
Golf Mk6
| Removing |
 Note
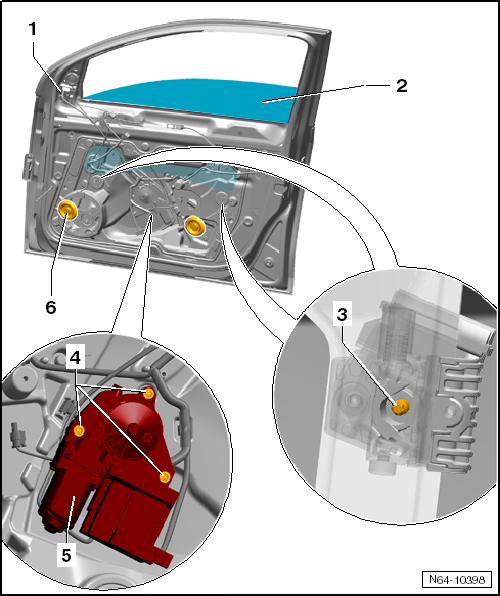
Note| The bolts -3- have left-handed threads. |
| – | Remove front door trim → General body repairs, interior; Rep. gr.70. |
| – | Lever out caps -6-. |
| – | Lower door window -2- until securing bolts -3- for door window are accessible. |
| – | Loosen bolts -3- (left-handed thread) but do not unbolt completely and spread clamping jaws apart. |
| – | Push door window -1- upwards and secure door window in position (e.g. with adhesive tape). |
Note| t | Up to 3 clips can be replaced by rivets on a series of vehicles. |
| t | During installation these rivets are replaced by the clips again. |
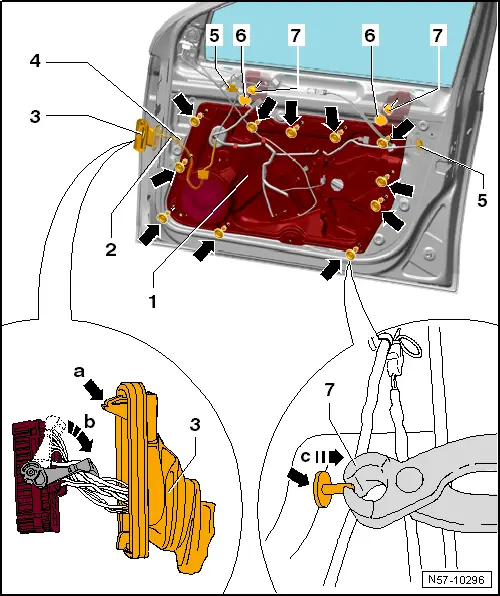
| – | Release protective sleeve fasteners -arrow a- and pull off protective sleeve -3-. |
| – | Open connector latch by swinging it downwards -arrow b- and disconnect connector. |
| – | Disconnect connectors to door lock and loudspeaker -5-. |
| – | Remove cover caps -6- and unbolt bolts -7-. |
| – | Pull out clips -arrows- with a pair of pliers -8--arrow c-. |
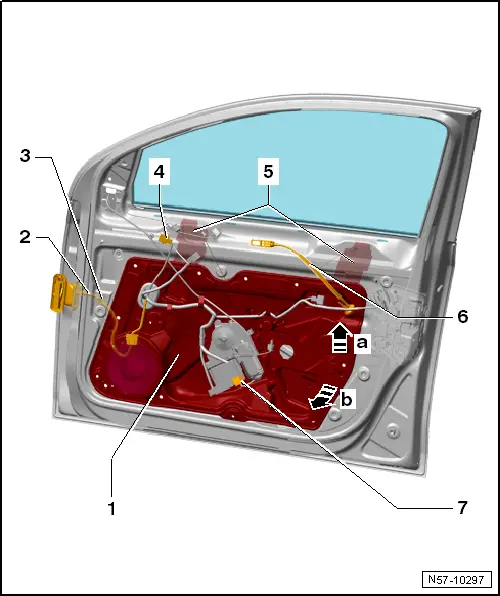
| – | Disconnect connector for exterior mirror on window regulator motor -7-. |
| – | Remove wiring harness to exterior mirror -4- from line holders. |
| – | Push assembly carrier -1- upwards slightly -arrow a-. |
| – | Pull assembly carrier -1- with window regulator -5- downwards at an angle -arrow b- out of door. |
| – | Release wiring harness -2- from wiring retainer -3-. |
| – | When pulling out assembly carrier -1-, guide wiring harness -2- out with it. |