volkswagen Workshop Repair Guides

Volkswagen Workshop Service and Repair Manuals

Renewing bonded rubber bush for wheel bearing housing > < Assembly overview: wheel bearing housing, trailing arm (front-wheel drive)
Removing and installing wheel bearing housing
Special tools and workshop equipment required
   
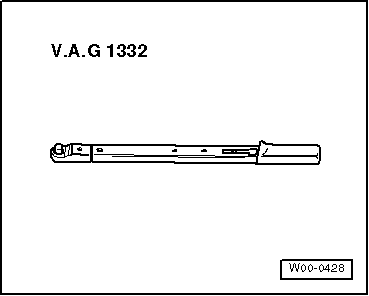
t  Torque wrench -V.A.G 1332-
Removing
–  Remove wheel.
–  Remove coil spring → Chapter.
–  Remove wheel bearing/wheel hub unit → Chapter.
–  Remove splash plate.
–  Remove ABS speed sensor out of wheel bearing housing.
  W00-0428
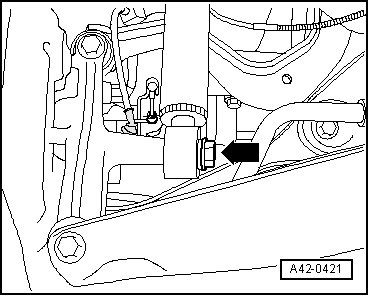
–  Remove bolt -arrow-.
  A42-0421
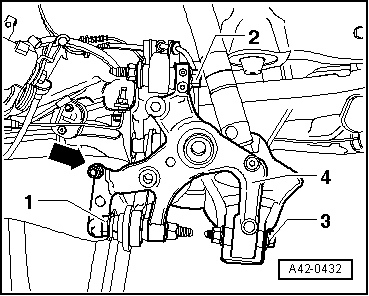
–  Remove bolt for track rod -1-, upper transverse link -2- and lower transverse link -3- from wheel housing -4-.
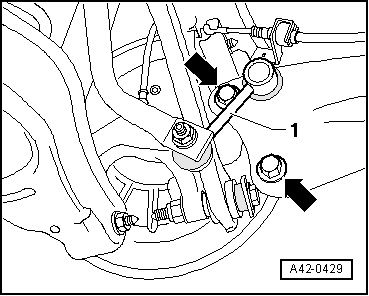
–  Remove coupling rod -arrow- from wheel bearing housing.
  A42-0432
–  Hold wheel bearing housing and unscrew bolts -arrows-.
–  Remove coupling rod -1- from trailing arm.
Installing
  A42-0429
–  Install bolts for track rod -1-, upper transverse link -2- and lower transverse link -3-.
–  Attach coupling rod -arrow- to wheel bearing housing hand tight.
  A42-0432
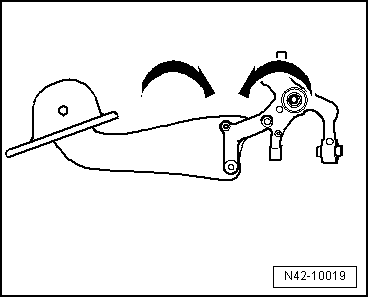
Threaded connection for trailing arm and wheel bearing housing may be tightened only after all other components (particularly the spring and shock absorber) of respective wheel suspension have been installed. To tighten, wheel suspension must be in extended position. Only then do trailing arm and wheel bearing housing move to the necessary position -arrows-.
It is important to keep to the specified sequence for the following operations.
  N42-10019
–  Position trailing arm and mounting bracket on wheel bearing housing using bolts -2- but do not tighten yet.
  A42-0432
–  Install bolts -arrows- and tighten to prescribed torque.
–  Install splash plate.
–  Install wheel bearing/wheel hub unit.
Bolt connections on wheel bearing housing may be tightened only when dimension „a“ has been obtained → Fig..
  A42-0429
–  Tighten bolt for track rod -1-.
–  Tighten bolt for lower transverse link -3-.
  A42-0432
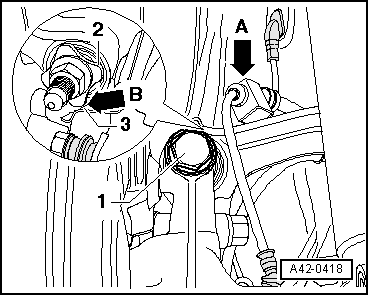
–  Tighten bolt -1- for upper transverse link.
  Note
Washer -2- must be installed so that there is a gap -arrow B- between washer and splash plate -3-.
  A42-0418
–  Tighten bolt -arrow-.
–  Install coil spring → .
–  Install ABS speed sensor in wheel bearing housing.
–  Install brake disc.
–  Attach brake carrier with brake caliper → Brake systems; Rep. gr.46.
–  Install wheel and tighten bolts or nuts → Chapter.
  A42-0421
Specified torques
ComponentSpecified torque
Upper transverse link to wheel bearing housing
t  Use new nuts and bolts
t  Tighten threaded connections only when vehicle is in the normal running position
130 Nm + 90°
Wheel bearing housing to lower suspension link
t  Use new nuts and bolts
t  Tighten threaded connections only when vehicle is in the normal running position
90 Nm + 90°
Wheel bearing housing to track rod
t  Use new nuts and bolts
t  Tighten threaded connections only when vehicle is in the normal running position
130 Nm + 90°
Trailing arm to wheel bearing housing
t  Use new bolts
90 Nm + 45°
Coupling rod to wheel bearing housing.
t  Use new nut
45 Nm
Splash plate to wheel bearing housing12 Nm
ABS speed sensor to wheel bearing housing8 Nm
Shock absorber to wheel bearing housing180 Nm
Brake disc to wheel bearing housing.4 Nm


Renewing bonded rubber bush for wheel bearing housing > < Assembly overview: wheel bearing housing, trailing arm (front-wheel drive)