
940 L4-2.3L SOHC VIN 88 B230F (1992)
E5. Clean caliper
It is essential to clean caliper thoroughly, for example when replacing pads.
Steel brush may be used. Leave anti-squeal shims in position to protect piston dust seals.
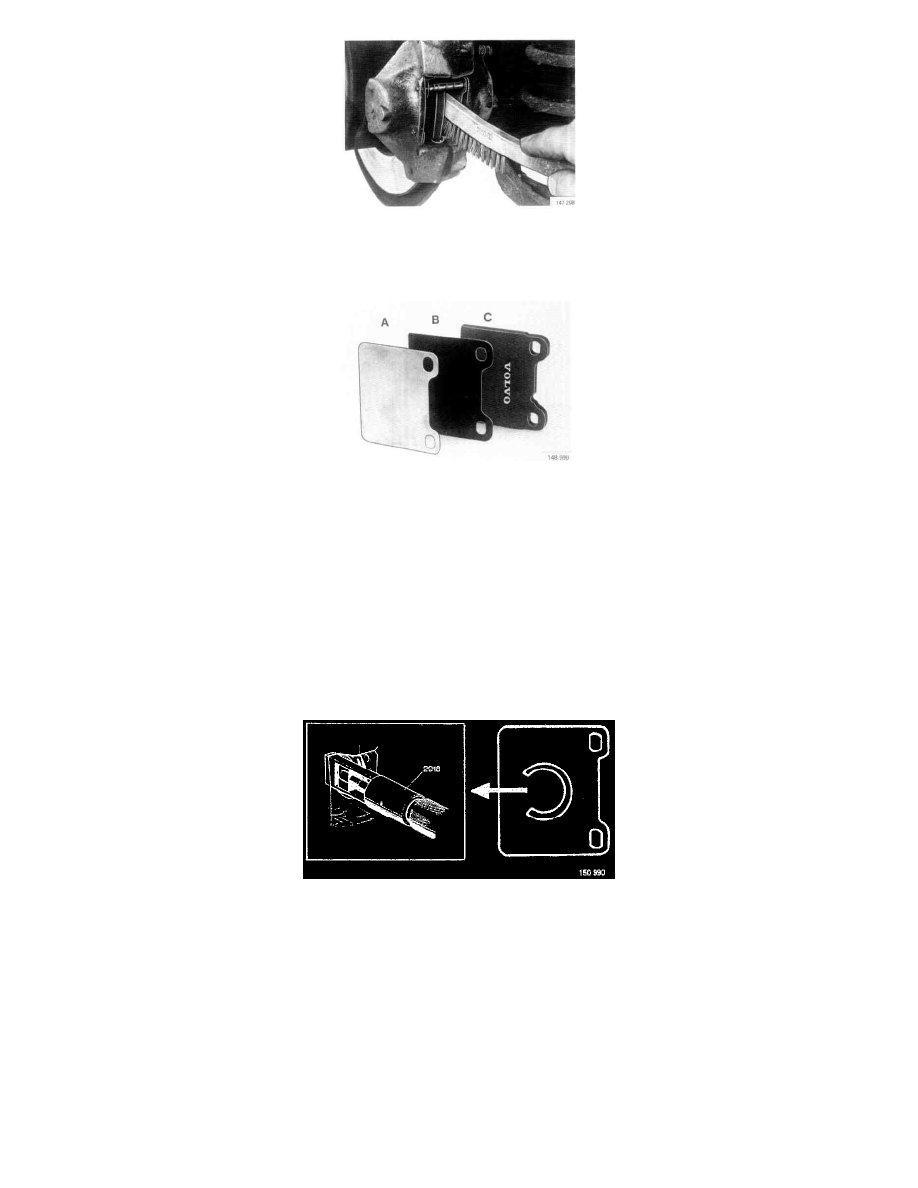
Minimizing rear brake noise
An anti-squeal shim should be installed as follows (see illustration) to minimize squealing or screeching.
A = stainless steel anti-squeal shim (P/N 13 59 772-9). Install nearest piston (two per caliper)
B = coated anti-squeal shim, P/N 12 28 590-4. Install nearest pad backing plate (two per caliper).
C = pad backing plate.
Note: Anti-squeal shim B:
Lubricate shim on both sides with thin coating (approx. 0.1-0.2 mm = 0.004-0.008 inch) of silicone grease, P/N 11 61 325-4.
Anti-squeal shim B is included temporarily in kit, P/N 12 28 590-4. The shim will eventually be discontinued and the pad backing plate provided with
an anti-squeal coating.
Thus, on cars with coated pad backing plates: Use antisqueal shim A lubricated with silicone grease, P/N 11 61 325-4.
E6. Check piston orientation if brake noise is present
Brake noise on earlier models in which the piston rim is provided with an opening may be minimized by installing the piston with the opening
facing forward.
Use tool 999 2918.
Note: The illustration shows a mirror image of the piston rim imposed on the shim.
E7. Inspect disc friction surface and measure disc thickness
Replace disc if component shows signs of severe wear, distortion, variation in thickness or other conditions.
Brake disc thickness mm (inch)