
940 L4-2.3L SOHC VIN 88 B230F (1992)
1. Remove the oil pan and strainer.
2. Collect the oil into a suitable container.
WARNING: The oil may be hot and may cause burn injuries unless sufficient time is allowed for the overdrive to cool.
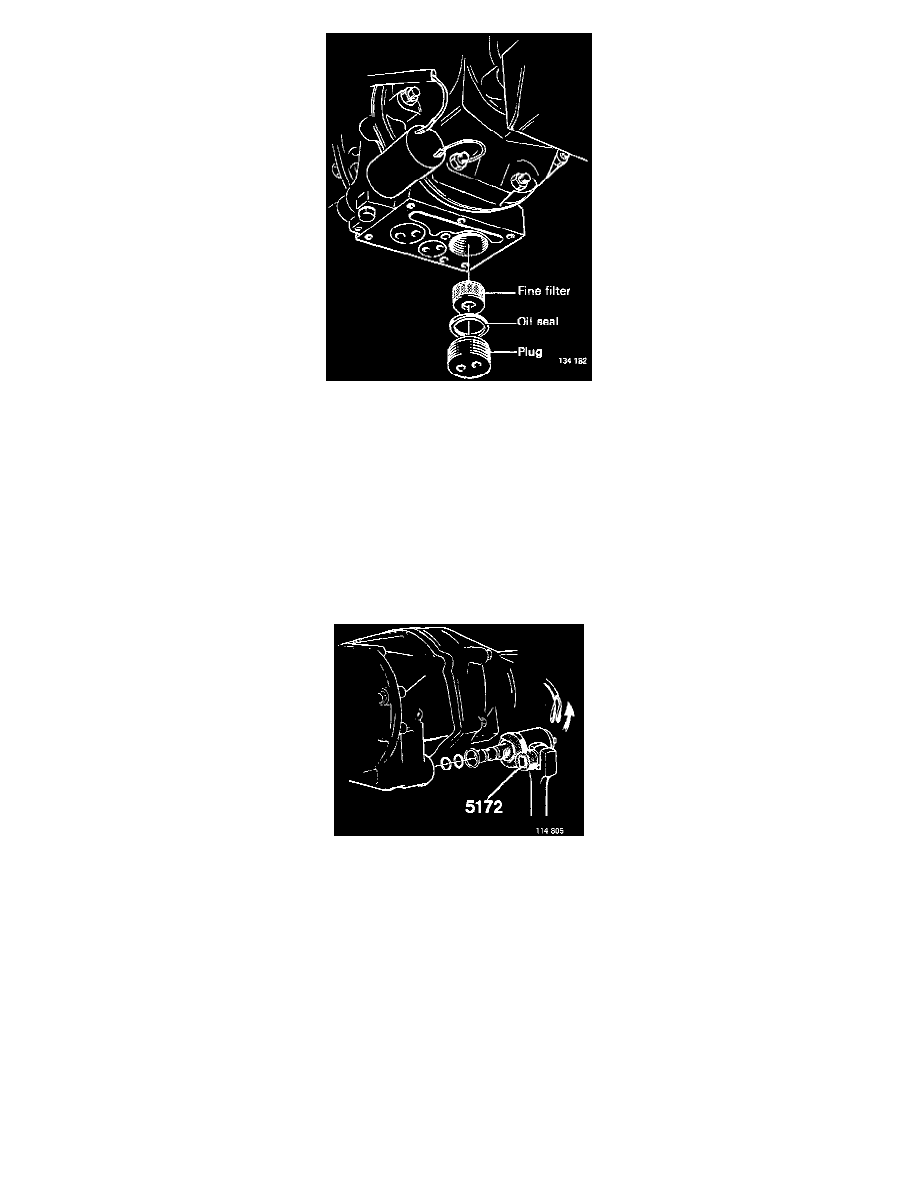
3. Use socket P/N 2836 to remove the plug. Remove the oil seal and the fine filter.
4. Wash all parts in white spirit and blow them dry with compressed air.
5. Fit a new filter, a new oil seal and the plug. Tightening torque: 20 Nm (14 ft lbs).
6. Fit the strainer and oil pan, using a new gasket. Make sure that the magnet is in position in the oil pan and that it is clean.
7. Fill with oil.
Solenoid Replacement
NOTE: The solenoid unit consists of a solenoid and a valve, integrated into one unit. If replacement is necessary, the complete unit must be replaced.
Use 25 mm (1 in) crowfoot wrench (Volvo tool P/N 5172) for removing and installing.
1. Disconnect wires at connectors. Attach crow-foot wrench. Use extension and wrench as appropriate. Remove solenoid.