
940 L4-2.3L SOHC VIN 88 B230F (1992)
3. Clean the relief valve. Wash all parts with white spirit and blow them dry with compressed air.
4. Check the relief valve. The following is particularly important if engagement of the overdrive is delayed or if the overdrive slips after engagement.
Check the valve seat. If wear marks are visible, replace the relief valve assembly.
5. Fit the relief valve:
-
Before fitting the components of the relief valve, it may be advisable to blow clean the orifice with compressed air. See "To Clean The
Throttling Orifice" bellow.
-
Fit new O-rings to the valve seat, the cylinder and the plug. Lubricate the components with oil. Fit the valve seat into the case and press it into
place by means of the cylinder.
NOTE: Fit the cylinder so that the end with the O-ring is nearest to the opening in the case.
-
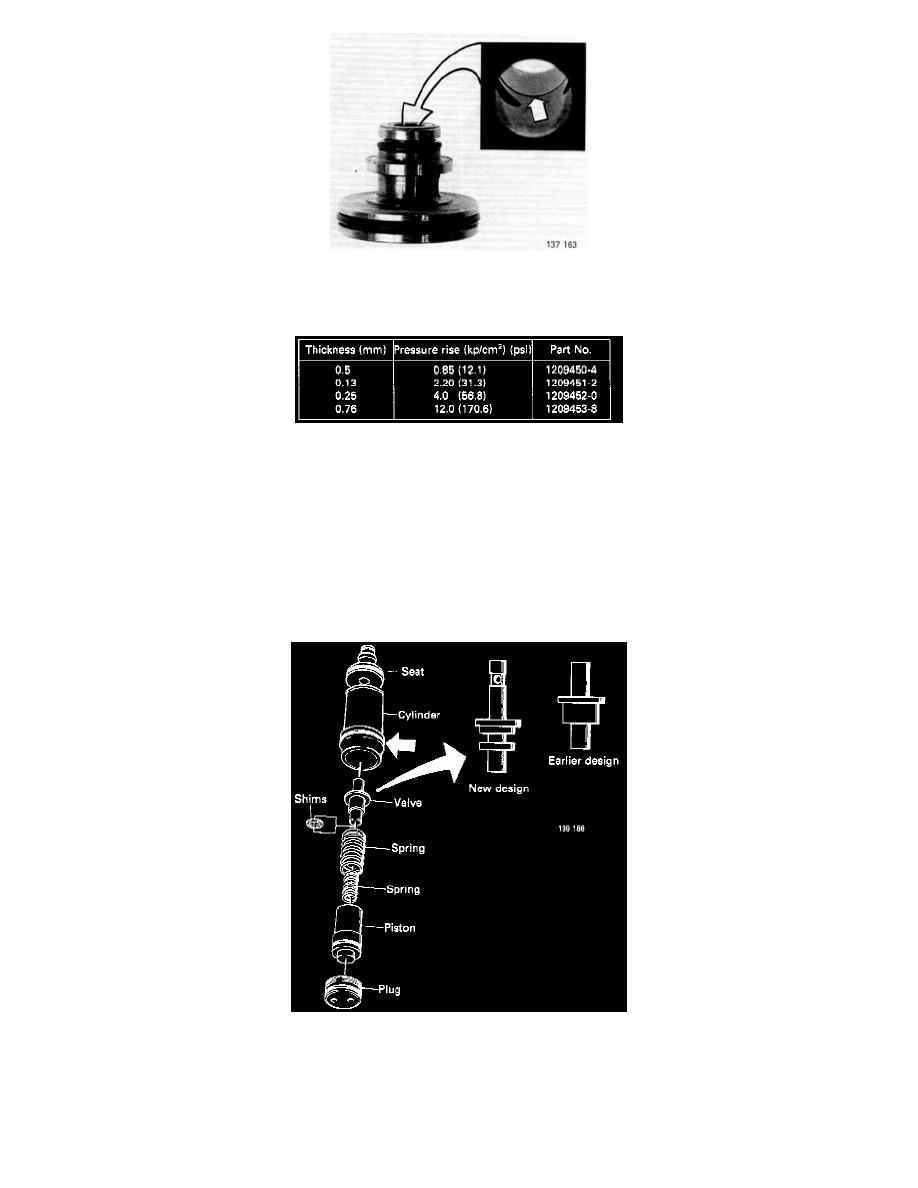
Fit the valve, together with any shims and the springs, into the piston and fit the whole assembly into the cylinder. Ensure that the valve seats
correctly in the valve seat.
-
Fit the plug and tighten to a torque of 20 Nm (14 ft lbs).
6. Fit the strainer and oil pan, using a new gasket. Carefully clean the magnet in the bottom of the pan.
7. Fill with oil.
8. Check the oil pressure. If necessary, adjust the pressure by means of the shims. Refer to "Checking Oil Pressure". See: Testing and Inspection