
Gearbox, fitting
- Make
- Volvo
- Model
- S40 Factory Service Manual
- Year
- 1996–2004
- Section
- 43 Transmission › Overhaul instructions › Gearbox, fitting
Gearbox, fitting
NOTE: Oil the components.
Guide bushing, new, fitting to clutch housing
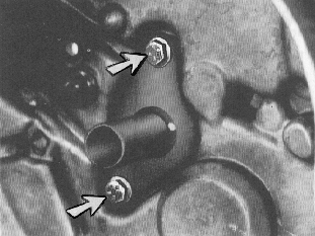
NOTE: Stuffing box packing is only supplied along with the guide bushing.
Grease the lip of the new stuffing box packing.
Fit the guide bushing into the opening along with the stuffing box packing.
Fit the guide bushing with two retaining bolts.
Tap in the guide bushing into the housing with a plastic mallet.
NOTE: Be careful not to damage any components.
Tighten the retaining bolts. Tightening torque 25 Nm .
Primary shaft, fitting
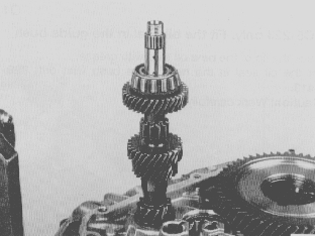
NOTE: Be careful not to damage the stuffing box packing when fitting the primary shaft.
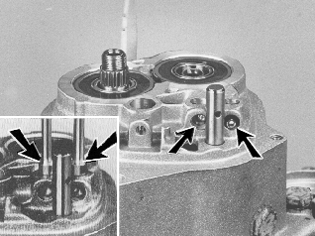
Reverse gear shaft, fitting the pin
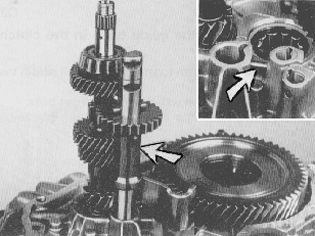
Fit the long pin into the clutch housing.
Reverse gear shaft, fitting.
Raise the primary shaft slightly.
Fit the gear selector shaft into the clutch housing.
Secondary shaft bearing, fitting
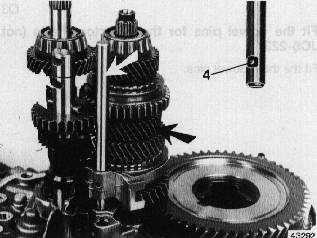
Fit the small pin (4) to the gear selector shaft.
Lift the reverse gear shaft slightly and press the long pin into the gear selector shaft recess.
Insert the secondary shaft, along with the gear selector shaft for 1st and 2nd gear, into the clutch housing.
Gear selector shaft, fitting pins
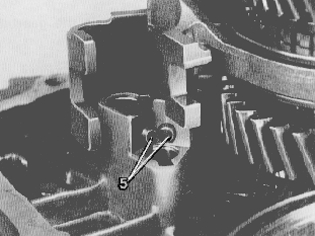
Fit the two short pins (5).
3rd and 4th gear selector shaft, fitting
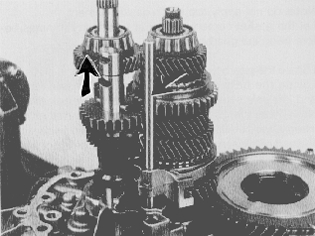
Raise the reverse gear shaft.
Fit the gear selector shaft along with the gear selector fork into the clutch sleeve.
Fit the gear selector shaft into the clutch housing.
Fit a new spring pin to the gear selector fork. It should be flush with the outside of the fork.
NOTE: The groove in the spring pin should be aligned with the gear selector shaft.
5th gear selector shaft (with reverse gear brake, if applicable), fitting
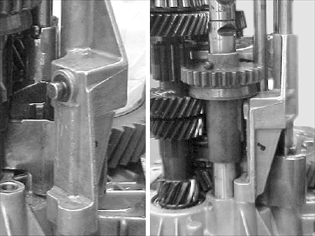
Fit the 5th gear selector shaft with brake in the appropriate place.
Raise the reverse shaft and turn the reverse shaft brake gradually until the spring pin end up in the housing and reverse shaft.
Check the fitting.
5th gear selector shaft in gear box (without reverse gear brake on reverse gear), fitting
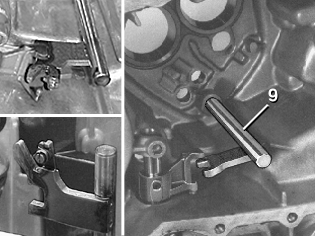
Fit the gear selector shaft (9).
Fit the locking spring and ball.
Press in the ball and raise the gear selector shaft until the ball locks in the recess.
Set the shafts in neutral so that the pins are exposed.
NOTE: Move the 5th gear selector shaft over the gear selector fork (same level).
NOTE: Check that the lock mechanism and pressure spring work.
Differential housing, fitting the magnet
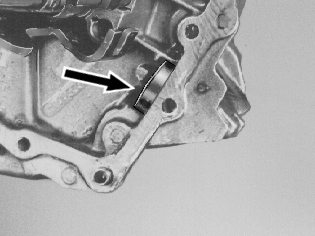
Position the gear selector openings at the same level.
Gearcase (without reverse gear brake on reverse gear), fitting
Apply sealant, Loctite 518, to the contact surface.
NOTE: Do not apply excessively.
Allow the sealant to cure for at least 30 minutes before filling the gearbox with oil.
Fit:
- gearcase over the shafts
- balls and locking springs for 1st, 2nd and 3rd gear selector shafts. Use two hex sockets wrenches.
Hold the gearcase pressed against the contact surface.
Thread a couple of retaining bolts and finger tighten.
NOTE: If necessary, move the gear selector shaft for 5th gear up slightly.
Gearcase (with reverse gear on reverse shaft), fitting
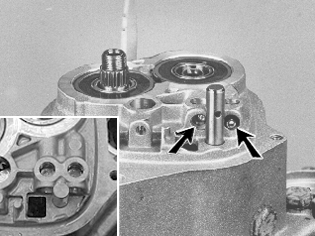
Apply sealant, Loctite 518, to the contact surface.
NOTE: Do not apply excessively.
Allow the sealant to cure for at least 30 minutes before filling the gearbox with oil.
Position the gearcase over the shaft.
Fit the locking spring and ball for the 5th gear selector shaft.
Fit the balls and locking springs for 1st, 2nd and 3rd gear selector shafts. Use two hex sockets wrenches.
Hold the link arm extended fully outwards during fitting. Turn it slightly clockwise.
Hold the gearcase pressed against the contact surface.
Insert the link arm and turn it back to its original position.
Temporarily fit the locking pin for 5th gear.
Thread a couple of retaining bolts and finger tighten.
NOTE: If necessary, move the gear selector shaft for 5th gear up slightly.
Reverse gear to neutral position
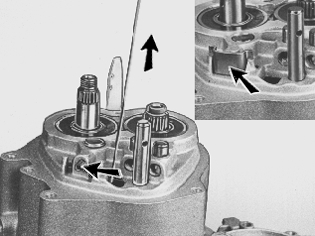
Pull the gear selector shaft upward with a lifting hook.
Fit the ball, locking spring, and mounting plate (with the raised section on the underside).
Gear selector fork, functional check
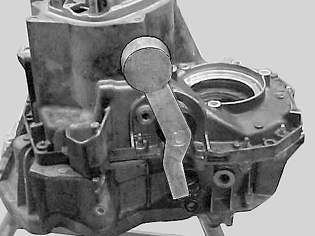
Rotate the primary shaft and check that the link arm runs freely.
Check that all gears can be engaged and disengaged.
Gearbox retaining bolts, fitting
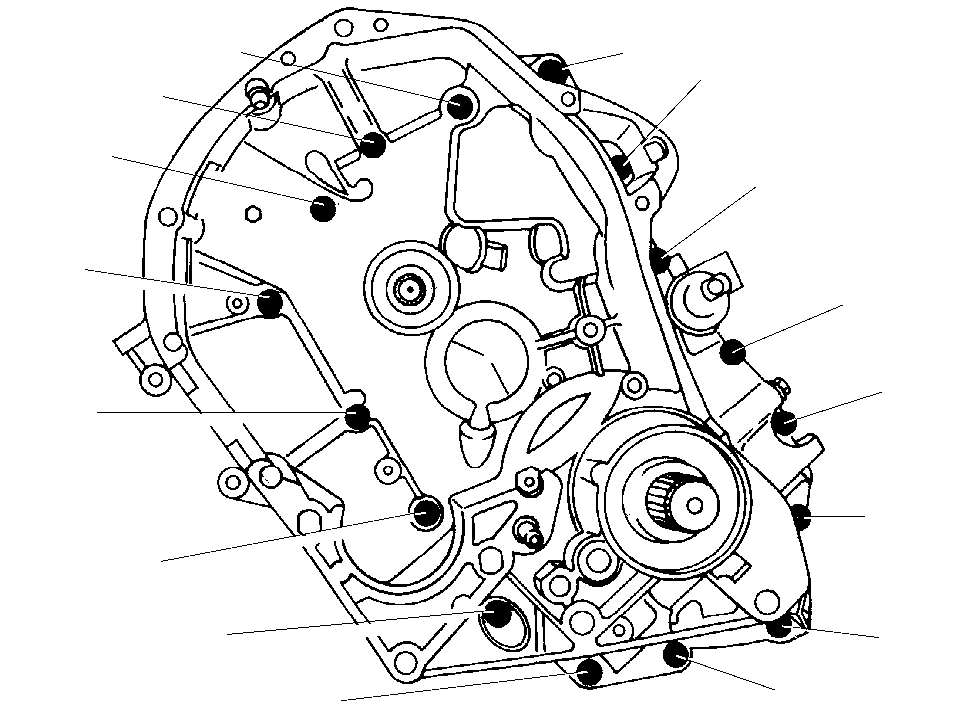
Fit the bolts as illustrated.
The bolts are of three different dimensions:
Tighten the bolts to 25 Nm.
5th gear, fitting the gearwheel
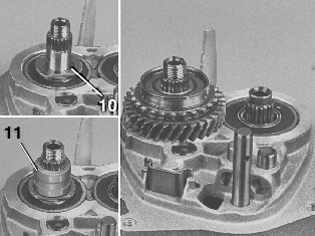
Fit:
- stuffing box packing (10) on the shaft with the nut facing the bearing
- sleeve (11) over the primary shaft
- gearwheel with synchromesh over the shaft.
Secondary shaft, fitting the gearwheel
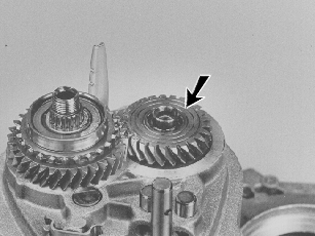
Apply a couple of drops of locking fluid, part number 116105x3-2, to the gear wheel.
Fit the gearwheel to the secondary shaft.
Press the secondary shaft gearwheel along with the bolt and stuffing box packing.
Remove the bolt and stuffing box packing.
Synchromesh hub and gear selector fork, fitting
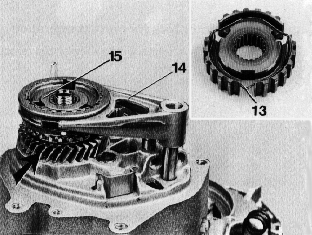
Fit the hub into the sleeve.
Fit:
- the ring-shaped spring (13) in the recess in the bottom.
- the gear selector fork (14) in the synchromesh hub (15) with the long side facing the gearcase.
Fit the hub over the primary shaft and at the same time push the gear selector fork over the gear selector shaft.
Press in the gear on the primary shaft with the old lock nut.
Remove the lock nut.
Bolt and lock nut, fitting
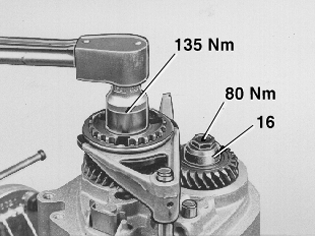
Press the synchromesh hub into 5th gear.
Press down the reverse gear shaft.
Version 1:
Fit a new lock nut and tighten to 160 Nm.
Fit the shims (16).
Apply a couple of drops of threadlock, part number 1161075-5, to the nut.
Fit the bolt and tighten to 80 Nm.
NOTE: Position the gears in neutral.
Version 2:
Fit a new ring and use a new nut. Tighten to 160 Nm.
Clean and apply a couple of drops of threadlock, part number 1161075-5, to the nut.
Fit the bolt and tighten to 80 Nm.
NOTE: Position the gears in neutral.
Gear selector fork, fitting of spring pin
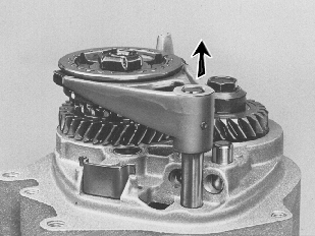
Lift the gear selector fork.
Fit a new spring pin to the gear selector fork.
NOTE: The groove in the spring pin should be aligned with the gear selector shaft.
Check the function
NOTE: Fit the spring pin. It should be flush with the outside.
Protective cover, fitting
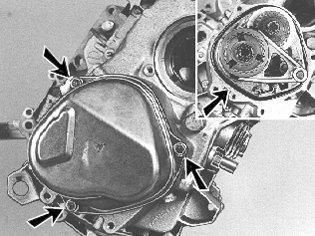
Fit a new O-ring to the gearcase.
Exercise care when fitting the protective cover to avoid damaging the oil channel.
Thread the bolts and tighten them to 25 Nm.
Calculate the shim thickness for the lock pin for the 5th gear guide pin
NOTE: Only follow these instructions if a new case or new link arm is fitted.
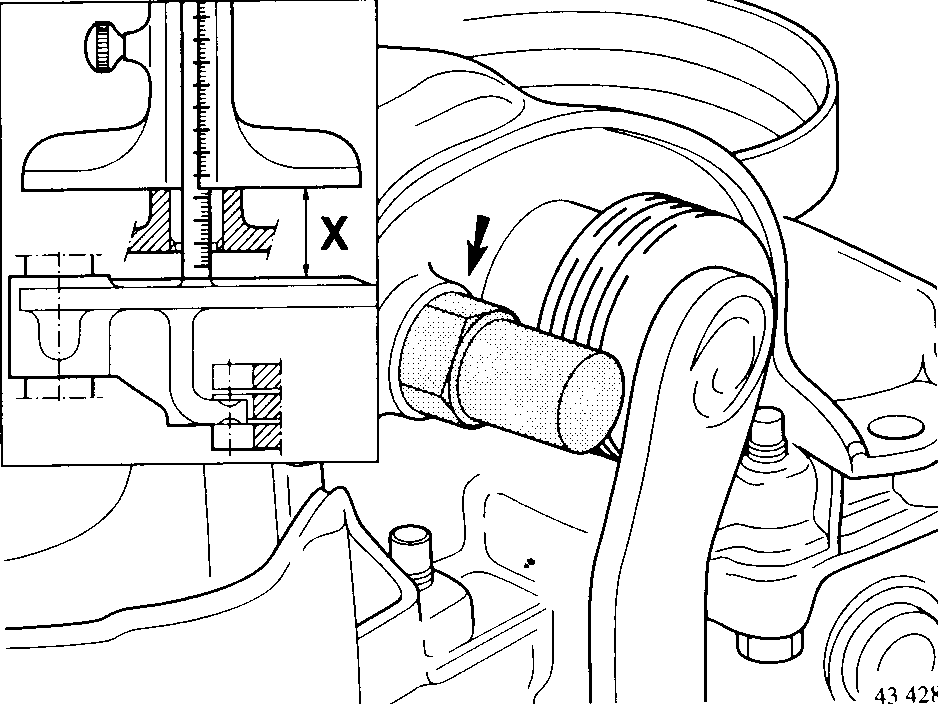
Engage 4th gear.
Press in the gear selector fork as far as possible through the guide pin hole.
Measure the distance from the contact surface of the gearcase to the gear selector fork (dimension X).
| Dimension X | Use the following shim thickness |
|---|---|
| 21.70-22.02 mm | 0.66 mm |
| 22.03-22.35 mm | 0.33 mm |
| 22.36 mm, or above | none |
5th gear, fitting the guide pin
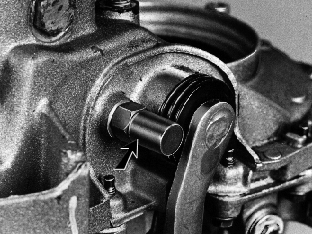
Apply a couple of drops of locking compound, part no. 1161053-2, to the guide pin.
Fit and tighten the guide pin.
Tightening torque 24 Nm.
Plastic cover for the clutch release fork ball and ball joint cup, fitting
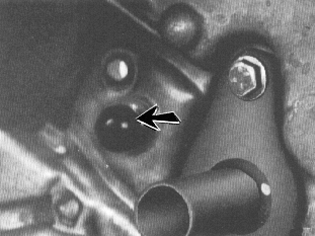
Clean the ball joint cup thoroughly.
Apply Loctite 415 to the ball joint.
Fit the plastic cover over the ball and ball joint cup (requires considerable force).
Other components, fitting
Fit:
- Oil drain plug, tightening torque 22 Nm
- Filler/level plug and finger tighten
- Seal plugs (if previously removed), tightening torque 25 Nm
- Reversing light switch (apply a couple of drops of locking compound, part number 1161099). Tightening torque 22 Nm
- Dust guard, clutch release fork, and clutch release bearing.
Always use new sealing rings.
Parts & tools for this job For 1996 Volvo S40
- TOOLTorque wrenchSearch: 3/8 inch torque wrench
- TOOLSocket setSearch: socket set metric
- BOOKHaynes manualSearch: Haynes manual Volvo S40
Links open Amazon search results in a new tab. As an Amazon Associate I earn from qualifying purchases.