
S60 L5-2.4L VIN 64 B5244S6 (2003)
Assemble the connecting rod. Check that the cover is facing the correct direction. Tighten to 20 Nm.
Secure the large end of the connecting rod in a vice with soft jaws (copper or aluminum).
Mark both halves with the cylinder number. Use a center punch or number punch.
Installing piston rings
Use piston ring pliers.
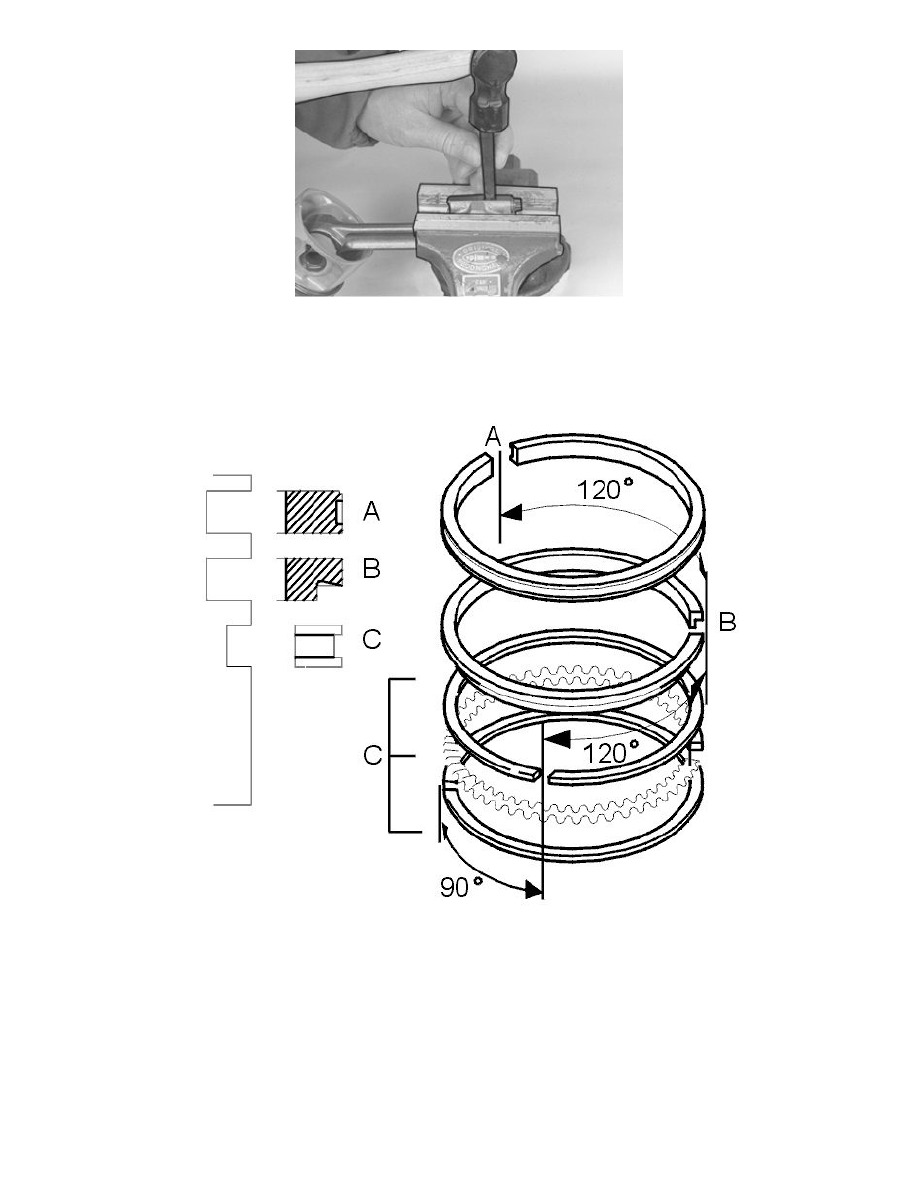
Turn the piston rings so that the openings are offset as illustrated.
A=Compression ring. The text on the piston ring shall face up.
B=Scraper ring. The bevel shall face down.
C=Oil ring. Three parts equilateral.
First install the expander ring (C), then the two upper rings over the expander ring.
Caution! Make sure that the piston rings are not stuck and that they turn easily.
Note! Incorrect positioning increases oil consumption.
Assembling pistons and connecting rods