
V70 2.4 L5-2.4L VIN 61 B5244S (2001)
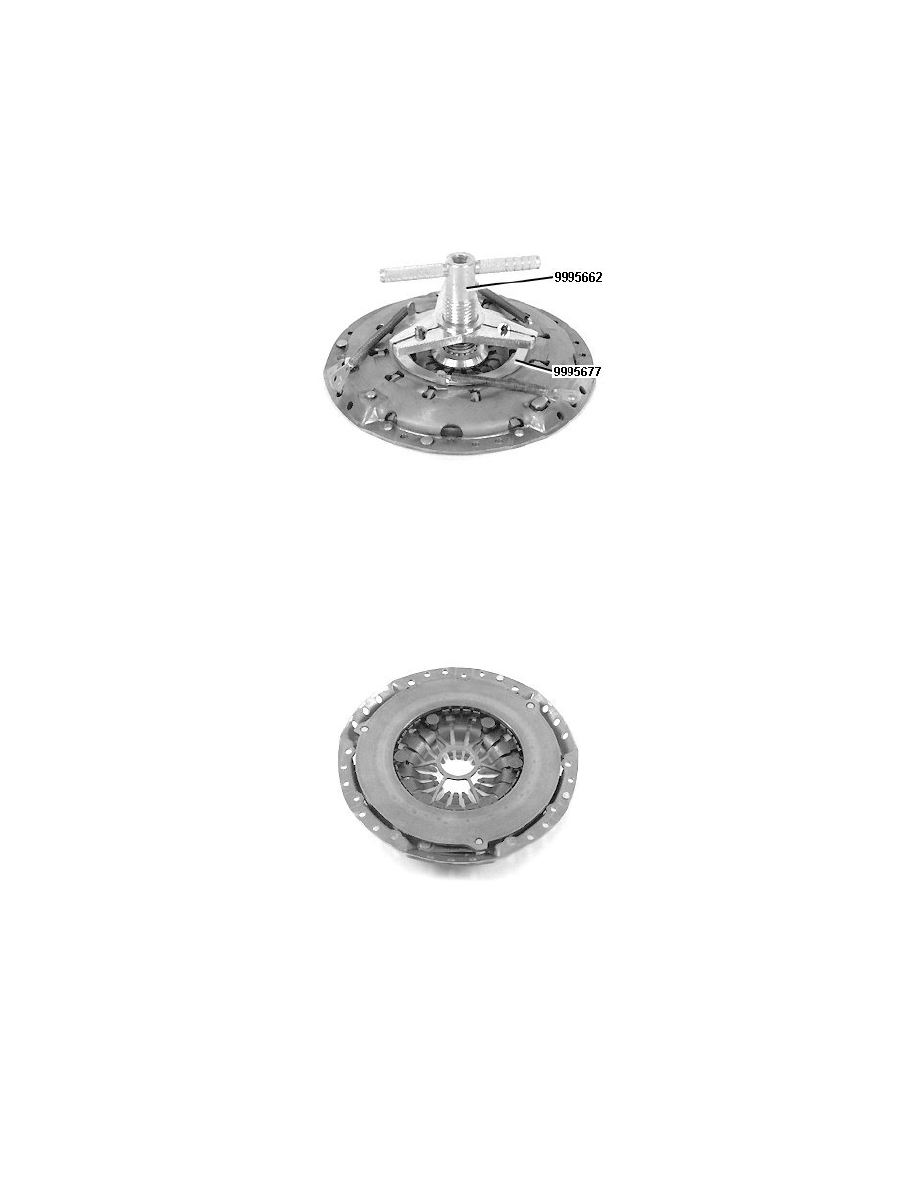
Applies only to certain engine versions with self adjusting clutches:
Compress the clutch so that the automatic adjuster is not under load.
If the clutch is worn, the counterhold turns the automatic adjustment to the original position marking.
The marking consists of two stamped arrows.
Then continue to screw in the compression tool until the diaphragm spring has pressed the pressure plate to a free position.
A click can be heard when the clutch pressure plate snaps out.
Remove the clutch and clutch driven plate.
Relieving the load from the clutch diaphragm spring
Note! Do not allow the diaphragm spring to be under load for a long period of time. Relieve the load as soon as possible. Leave the compression
tool in position.
Applies only to certain engine versions with self adjusting clutches:
Note! Keep fingers away from the three clutch rivets when relieving a load or removing the compression tool. There is a risk of clamping
injuries.
Checking the clutch
Wipe the clutch. Use a dry cloth.
Check carefully for over heating damage, cracking, scoring or other damage to the friction surface
Check that spring is not damaged or broken.
Checking the pressure plate for out-of-true