
XC90 L5-2.5L Turbo VIN 59 B5254T2 (2004)
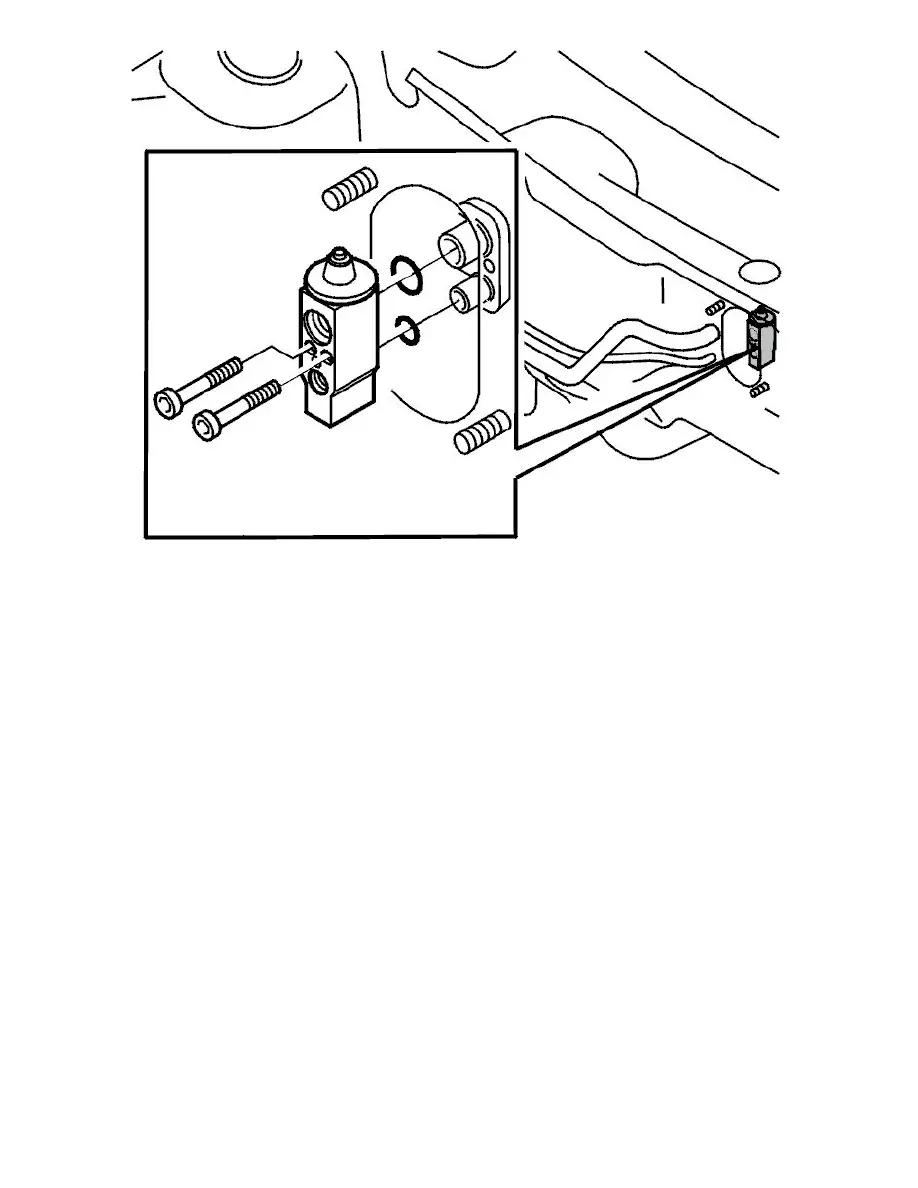
Slacken off the two screws holding the expansion valve.
Remove the expansion valve.
Installing the expansion valve
Note! Always use new O-rings lubricated with compressor oil.
Install:
-
the O-rings on the pipe from the evaporator
-
the expansion valve. Install and tighten the screws. See Tightening torque See: Body and Frame/Specifications
-
the O-rings on the pipes.
Position the pipes and the holder against the expansion valve. At the same time check that the pipes are correctly positioned on the holder at the member.
Install:
-
the screw. Tighten the holder and the pipes on the expansion valve. See Tightening torque See: Body and Frame/Specifications
-
the seal and the heat shield. Screw the heat shield into place using the nuts.
Press the clamp together on the member.
Install:
-
the mounting for the right-hand gutter
-
the gutter
-
the engine stabilizer brace in the engine compartment.
Vacuum pump the air conditioning (A/C) system. See Vacuum pumping See: Service and Repair/Vacuum Pumping.
Fill the air conditioning (A/C) system with refrigerant. See Refrigerant, filling See: Service and Repair/Refrigerant, Filling.
Leak trace the air conditioning (A/C) system. See Leak tracing, fluorescent tracing agent / UV lamp See: Testing and Inspection/Component Tests and
General Diagnostics/Leak Tracing, Fluorescent Tracing Agent/UV Lamp or Leak tracing, electronic leak tracer See: Testing and Inspection/Component
Tests and General Diagnostics/Leak Tracing, Electronic Leak Tracer.