
XC90 L5-2.5L Turbo VIN 59 B5254T2 (2004)
Expansion Valve: Service and Repair
Expansion Valve Rear, Replacing
Expansion valve rear, replacing
As the illustrations in this service information are used for different model years and / or models, some variation may occur. However, the essential
information in the illustrations is always correct.
Preparations
Note! Read the safety precautions for handling refrigerant. See Refrigerant, safety regulations See: Service Precautions/Technician Safety
Information.
Drain the refrigerant from the system. See Refrigerant, draining See: Service and Repair/Refrigerant, Draining.
Remove the rear left side panel. See Side panel cargo compartment, replacement See: Body and Frame/Interior Moulding / Trim/Trim Panel/Service and
Repair/Side Panel Cargo Compartment, Replacement.
Note! Always plug the pipes and connections when working on the climate control system.
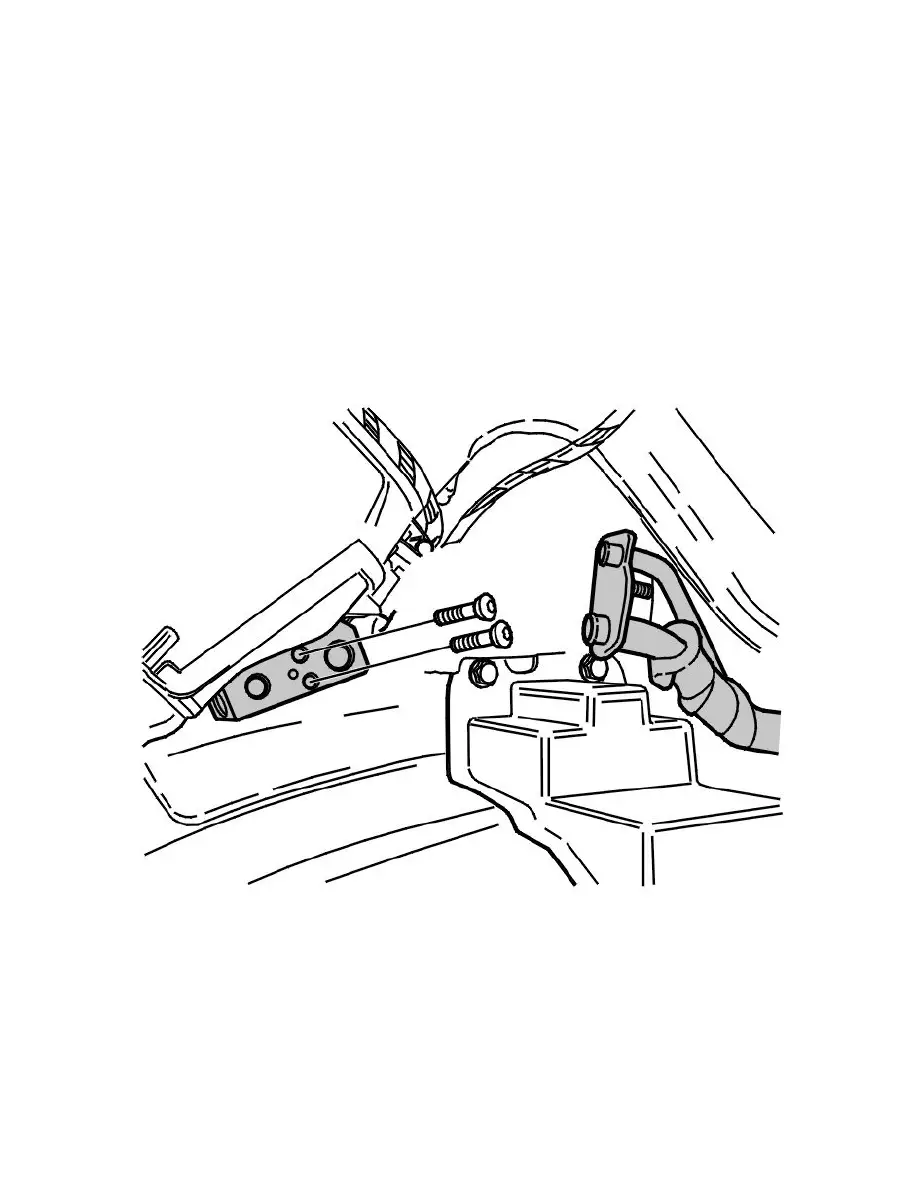
Removing the rear expansion valve
Remove:
-
the screw on the junction block for the air conditioning (A/C) pipes to the expansion valve
-
the 2 screws for the expansion valve.
Note! the original O-rings for the expansion valve and the connecting air conditioning (A/C) pipes are violet and must be replaced with new
yellow ones lubricated with compressor oil.
Installing the rear expansion valve
Note! For tightening torques, see Specifications See: Body and Frame/Specifications.
Install:
-
the expansion valve using the 2 screws. Tighten. See Tightening torque See: Body and Frame/Specifications
-
the junction block with the air conditioning (A/C) pipes using the 1 M5 screw. Tighten.