
XC90 L5-2.5L Turbo VIN 59 B5254T2 (2004)
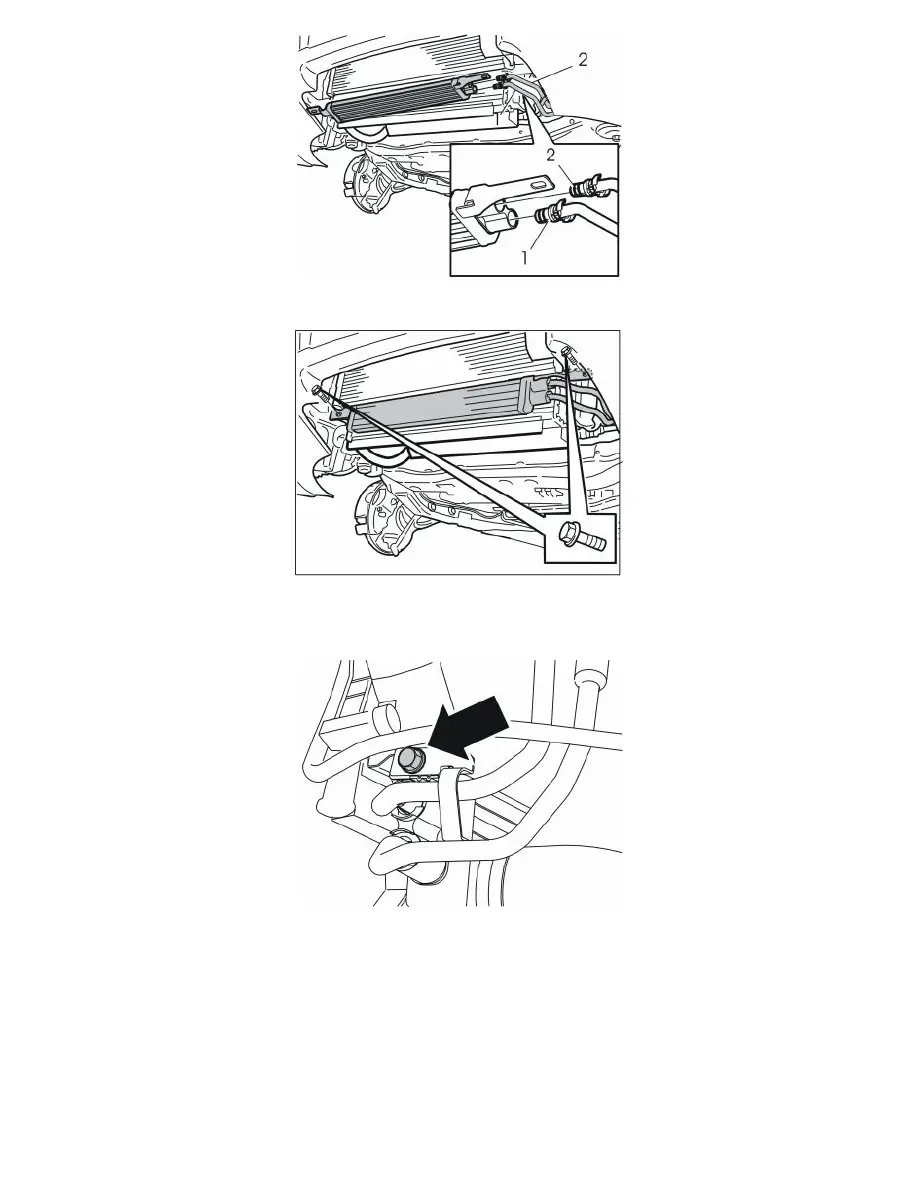
Illustration B shows how the oil cooler is secured
-
Take the oil cooler from the kit. Connect the hose from the gearbox (1) and the hose from the radiator (2) to the oil cooler
-
Ensure that the mounting lug for the lower hose is beneath the mounting lug for the upper hose
-
Take the two M6x16 screws from the kit. Secure the oil cooler to the existing mountings. Tighten the screws. Tighten to 10 Nm (7 lbf. ft).
-
Take the M6x14 screw from the kit. Tighten both the mounting lugs for the hoses to the mounting in the radiator. Tighten the screw. Tighten to 10
Nm (7 lbf. ft)
-
Tighten the connection nut on the hose to the gearbox. Tighten to 40 Nm ((29 lbf. ft.).
Finishing work
-
Reinstall the front skid plate. Tighten the screws. Tighten to 50 Nm (37 lbf. ft.)
-
Reinstall the air cleaner (ACL). Connect the removed components
-
Reinstall the intake manifold on the air cleaner (ACL). Tighten the screws. Tighten to 10 Nm (7 lbf. ft.).
-
Fill with 0.2 L of oil
-
Run the engine and top up the oil to the correct level.