
XC90 L5-2.5L Turbo VIN 59 B5254T2 (2004)
Note! Ensure that the mating surfaces on the crankshaft and carrier plate are completely clean.
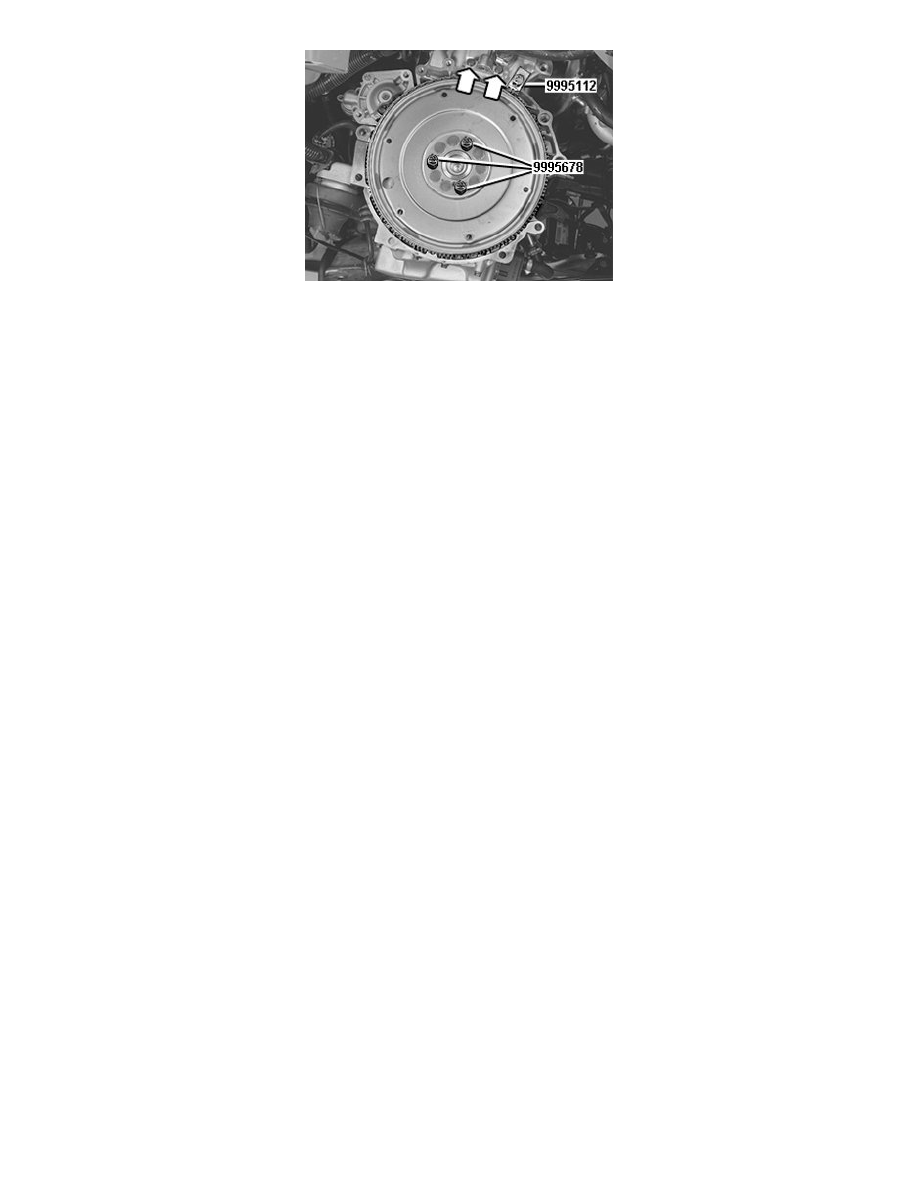
Use tool 999 5678 Special screw See: Tools and Equipment/999 5678 Special Screw , which consists of 3 studs with nuts.
Install:
-
The 3 studs belonging to tool 999 5678 Special screw See: Tools and Equipment/999 5678 Special Screw , distributed as illustrated
-
the carrier plate.
Note! Check that the locating pin on the crankshaft is positioned opposite the hole in the carrier plate.
Locate gear sector 999 5112 GEAR SECTOR See: Tools and Equipment/999 5112 Gear Sector against the carrier plate.
Pull the flywheel towards the crankshaft using the three nuts on special tool 999 5678 Special screw See: Tools and Equipment/999 5678 Special Screw.
Caution! The carrier plate must lie against the crankshaft flange before the screws are installed. There is a risk that excess locking fluid on the
screws will come between the mating surfaces.
Install 7 new screws. Tighten. See Tightening torque See: Engine, Cooling and Exhaust/Engine/Specifications/Mechanical Specifications/Tightening
Torque.
Remove the 3 nuts and studs.
Install the remaining 3 new screws. Tighten. See Tightening torque See: Engine, Cooling and Exhaust/Engine/Specifications/Mechanical
Specifications/Tightening Torque.
Install the engine speed (RPM) sensor with the bracket. Tighten.
Finishing
Install transmission AW55-50. See Transmission, installing See: Automatic Transmission/Transaxle/Service and Repair/Removal and Replacement.
Install transmission AW50AWD. See See: Automatic Transmission/Transaxle/Service and Repair/Removal and Replacement