Audi Workshop Service and Repair Manuals
HOME
FEATURES
MENU
INDEX
ABOUT US
Exploded view - hydraulics (LHD) >
< Removing and installing clutch position sender G476
A3 Mk2
Power transmission
6-speed manual gearbox 02Q, four-wheel drive
Clutch, control
Exploded view - pedal cluster, clutch master cylinder
Removing and installing clutch master cylinder
Removing and installing clutch master cylinder
Removing and installing clutch master cylinder
Special tools and workshop equipment required
t
Pliers -T10005-
Removing
Note
t
If you suspect a defective clutch master cylinder, perform function test prior to renewing
→ Chapter „Notes on removing and installing clutch master cylinder and slave cylinder“
.
t
When working in the footwell, put cloths on the floor covering to protect it from possible brake fluid spills.
–
Remove mounting bracket
→ Chapter
.
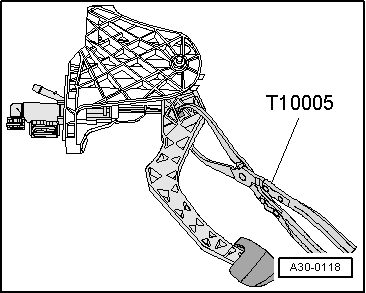
–
Release retaining clip for operating rod on master cylinder using pliers -T10005-.
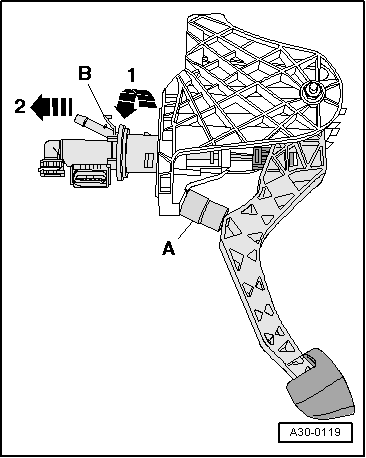
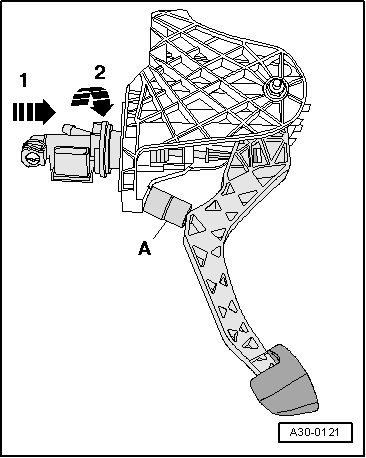
–
Insert a spacer
-A-
between clutch pedal and stop, and press clutch pedal forward.
t
Length of spacer = approx. 40 mm (e.g.
1
/
2
” socket)
–
Release retainer clip
-B-
and pull master cylinder out of mounting bracket
-arrow 1-
and
-arrow 2-
.
Installing
l
Clutch pedal in “released” position.
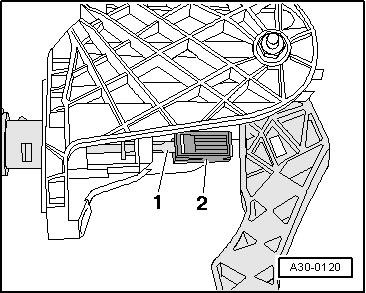
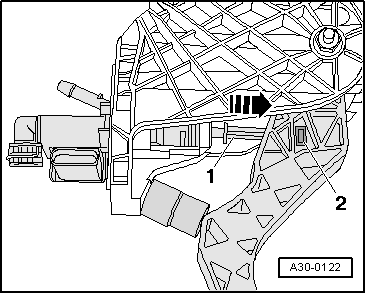
–
Install retaining clip
-2-
on operating rod
-1-
for clutch master cylinder.
–
Insert a spacer
-A-
between clutch pedal and stop, and press clutch pedal forward.
t
Length of spacer = approx. 40 mm (e.g.
1
/
2
” socket)
–
Secure master cylinder on mounting bracket
-arrow 1-
and
-arrow 2-
.
–
Press operating rod
-1-
for master cylinder in direction of
-arrow-
so that retaining clip
-2-
snaps into place in clutch pedal.
–
Install mounting bracket
→ Chapter
.
Power transmission
6-speed manual gearbox 02Q, four-wheel drive
Clutch, control
Exploded view - pedal cluster, clutch master cylinder
Removing and installing clutch master cylinder
Exploded view - hydraulics (LHD) >
< Removing and installing clutch position sender G476
 Note
Note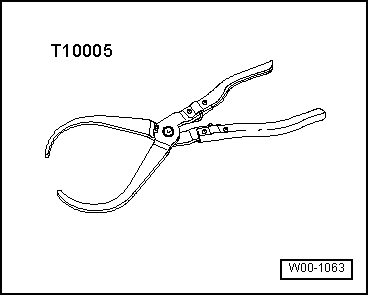
 Note
Note