
Pacifica V6-3.8L (2008)
Parking Brake Lever: Service and Repair
Removal
REMOVAL
1. Disconnect and isolate battery negative cable from battery post.
2. Lock out automatic adjuster in parking brake lever. See: Service and Repair
3. Raise and support vehicle. See: Maintenance
NOTE: It may be necessary to back off parking brake shoe adjustment to allow sufficient slack to disengage cable buttons from
connectors in following two steps.
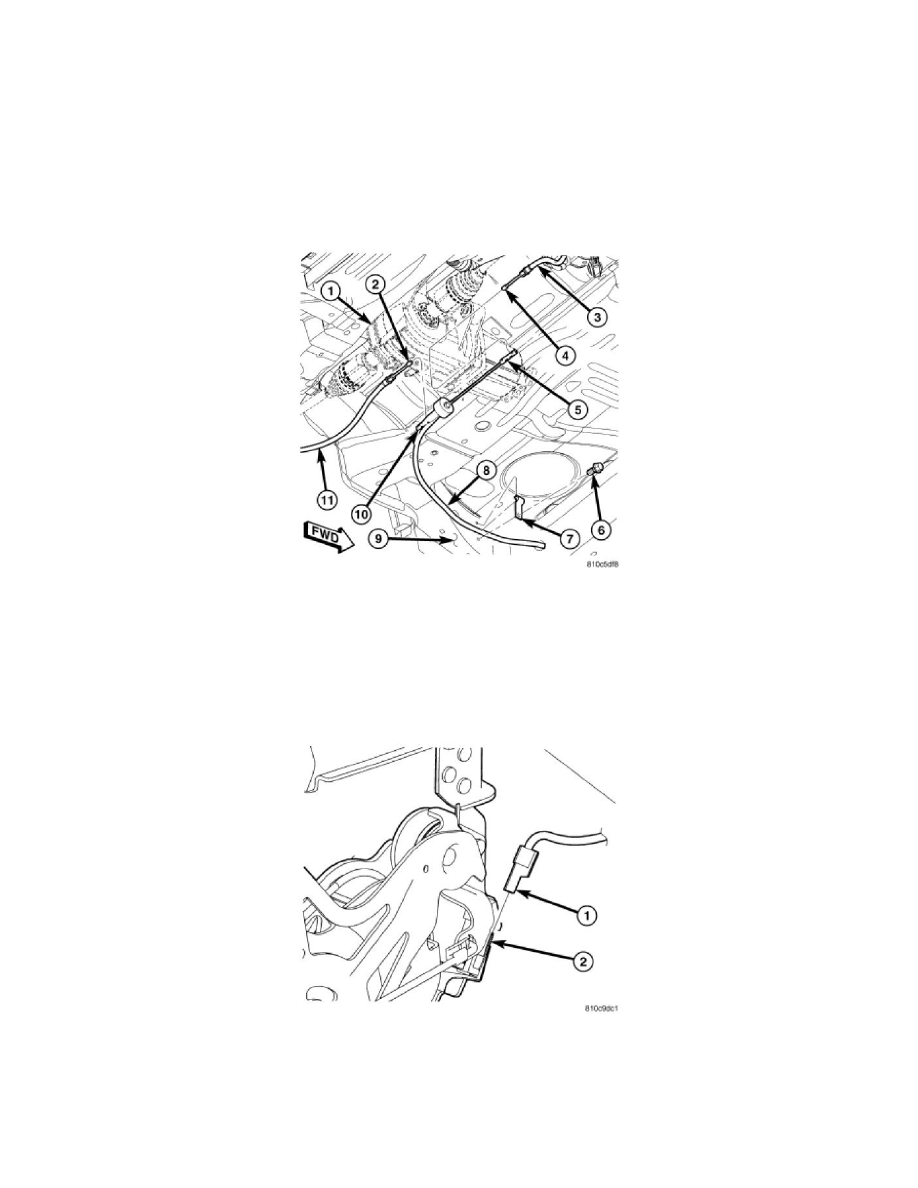
4. Slide left rear cable button (11) inboard and remove from equalizer (10).
5. While holding cable connector on end of front cable (5) secure with a pair of pliers at the front cable button, slide right rear cable button (4)
inboard and remove from cable connector.
6. Lower vehicle.
7. Roll vehicle off hoist as necessary to open left front door.
8. Remove left front door opening sill scuff plate.
9. Remove left front door weather strip.
10. Remove lower cowl trim.
11. Disconnect release rod at parking brake lever.
12. Disconnect wiring connector (1) at parking brake indicator lamp switch (2).
13. Remove body control module. See: Body and Frame/Body Control Systems/Body Control Module/Service and Repair/Body Control Module -
Removal
14. Remove three mounting nuts and two wiring routing clips, then remove body control module mounting bracket.