| PINPOINT TEST B : ONE PARKING, REAR OR LICENSE LAMP(S) IS INOPERATIVE |
| TEST CONDITIONS | DETAILS/RESULTS/ACTIONS |
| B1: DETERMINE CONDITIONS UNDER WHICH THE FAULT OCCURS |
| | 1 SWITCH ON the parking lamps. |
| | 2 CHECK parking lamps and license plate lamps. |
| | Are both parking lamps inoperative? Yes No - Both license plate lamps inoperative: GO to B2. - One license plate lamp inoperative: GO to B4. - Front left parking lamp inoperative: GO to B6. - Front right parking lamp inoperative: GO to B9. - Both rear lamps on the left-hand side inoperative: GO to B12. - Rear lamp (rear lamp assembly) on the left-hand side inoperative: GO to B14. - Rear lamp (tailgate) on the left-hand side inoperative: GO to B15. - Both rear lamps on the right-hand side inoperative: GO to B17. - Rear lamp (rear lamp assembly) on the right-hand side inoperative: GO to B18. - Rear lamp (tailgate) on the right-hand side inoperative: GO to B20. |
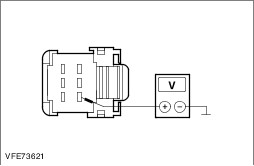
| B2: CHECK THE COMMON POWER SUPPLY OF THE LICENSE PLATE LAMPS FOR OPEN |
| | 1 Ignition switch in position 0. |
| | 2 Disconnect left-hand license plate lamp from connector C4LS04. |
| | 3 Ignition switch in position II. |
| | 4 SWITCH ON the parking lamps. |
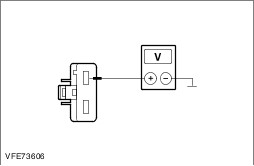
| | 5 Measure the voltage between the left-hand license plate lamp, connector C4LS04, pin 1, circuit CLS04C (YE/VT), wiring harness side and ground. |
| | Does the meter display battery voltage? Yes LOCATE and RECTIFY the break in the circuits between soldered connection SP534 and ground connection G4D149 with the aid of the Wiring Diagrams. CHECK system operates correctly No |
| B3: CHECK THE COMMON POWER SUPPLY OF THE LICENSE PLATE LAMPS FOR OPEN |
| | 1 Ignition switch in position 0. |
| | 2 Disconnect Smart Junction Box from connector C1BP02B. |
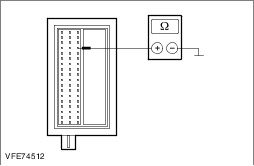
| | 3 Measure the resistance between the Smart Junction Box, connector C1BP02B, pin 52, circuit CLS04B (YE/VT), wiring harness side and the left-hand license plate lamp, connector C4LS04, pin 1, circuit CLS04C (YE/VT), wiring harness side. |
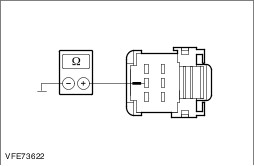
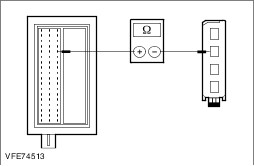
| | Is a resistance of less than 2 Ohm registered? Yes INSTALL A NEW Smart Junction Box. CHECK system operates correctly No LOCATE and RECTIFY the break in the circuits between the Smart Junction Box and soldered connection SP400 with the aid of the Wiring Diagrams. CHECK system operates correctly |
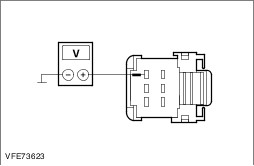
| B4: CHECK THE POWER SUPPLY TO THE LICENSE PLATE LAMP FOR OPEN CIRCUIT |
| | 1 Ignition switch in position 0. |
| | 2 Disconnect License plate lamp. - left: from connector C4LS04
- right: from connector C4LS05
|
| | 3 Ignition switch in position II. |
| | 4 SWITCH ON the parking lamps. |
| | 5 Measure the voltage between license plate lamp: - left: Connector C4LS04, pin 1, circuit CLS04C (YE/VT), wiring harness side and ground.
- right: Connector C4LS05, pin 1, circuit CLS04D (YE/VT), wiring harness side and ground.
|
| | Does the meter display battery voltage? Yes No LOCATE and RECTIFY the break in the circuit between soldered connection SP400 and the license plate lamp with the aid of the Wiring Diagrams. CHECK system operates correctly |
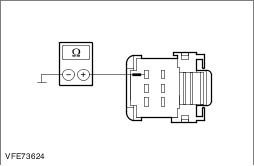
| B5: CHECK THE GROUND CONNECTION OF THE LICENSE PLATE LAMP FOR OPEN CIRCUIT |
| | 1 Ignition switch in position 0. |
| | 2 Measure the resistance between the license plate lamp: - left: connector C4LS04, pin 2, circuit GD150M (BK/WH), wiring harness side and ground.
- right: connector C4LS05, pin 2, circuit GD150U (BK/WH), wiring harness side and ground.
|
| | Is a resistance of less than 2 Ohm registered? Yes RENEW the license plate lamp. CHECK system operates correctly No LOCATE and RECTIFY the break in the circuits between the license plate lamp and soldered connection SP534 with the aid of the Wiring Diagrams. CHECK system operates correctly |
| B6: CHECK THE VOLTAGE SUPPLY TO THE FRONT LEFT-HAND PARKING LIGHT FOR OPEN CIRCUIT |
| | 1 Ignition switch in position 0. |
| | 2 Disconnect Left-hand front fog lamp unit from connector C1LS06. |
| | 3 Ignition switch in position II. |
| | 4 SWITCH ON the parking lamps. |
| | 5 Measure the voltage between the left-hand parking lamp, connector C1LS06, pin 1: - Vehicles with body code vehicle identification number (VIN) S: circuit CLS13B (YE/BU), wiring harness side and ground.
- All other vehicles: circuit CLS13C (YE/BU), wiring harness side and ground.
|
| | Does the meter display battery voltage? Yes No |
| B7: CHECK THE VOLTAGE SUPPLY TO THE FRONT LEFT-HAND PARKING LIGHT FOR OPEN CIRCUIT |
| | 1 Ignition switch in position 0. |
| | 2 Disconnect Smart Junction Box from connector C1BP02A. |
| | 3 Measure the resistance between the Smart Junction Box, connector C1BP02A, pin 39, circuit CLS13B (YE/BU), wiring harness side and the front fog lamp unit C1LS06, pin 1: - Vehicles with body code vehicle identification number (VIN) S: circuit CLS13B (YE/BU), wiring harness side and ground.
- All other vehicles: circuit CLS13C (YE/BU), wiring harness side and ground.
|
| | Is a resistance of less than 2 Ohm registered? Yes INSTALL A NEW Smart Junction Box. CHECK system operates correctly No LOCATE and RECTIFY the break in the circuits between the Smart Junction Box and the front fog lamp unit with the aid of the Wiring Diagrams. CHECK system operates correctly |
| B8: CHECK THE GROUND CONNECTION OF THE LEFT-HAND FRONT PARKING LAMP FOR OPEN CIRCUIT |
| | 1 Ignition switch in position 0. |
| | 2 Measure the resistance between the parking lamp, connector C1LS06, pin 2: - Vehicles with body code vehicle identification number (VIN) S: circuit GD130AR (BK/YE), wiring harness side and ground.
- All other vehicles: circuit GD130AT (BK/YE), wiring harness side and ground.
|
| | Is a resistance of less than 2 Ohm registered? Yes CHECK and RENEW the front fog lamp unit. CHECK system operates correctly No LOCATE and RECTIFY the break in the circuit between the front fog lamp unit and soldered connection SP371 with the aid of the Wiring Diagrams. CHECK system operates correctly |
| B9: CHECK THE VOLTAGE SUPPLY TO THE RIGHT-HAND FRONT PARKING LAMP FOR OPEN CIRCUIT |
| | 1 Ignition switch in position 0. |
| | 2 Disconnect Right-hand front fog lamp unit from connector C1LS07. |
| | 3 Ignition switch in position II. |
| | 4 SWITCH ON the parking lamps. |
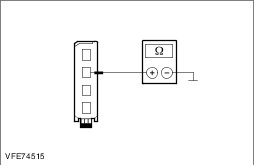
| | 5 Measure the voltage between the right-hand parking lamp, connector C1LS07, pin 1, circuit CLS07B (BN/YE), wiring harness side and ground. |
| | Does the meter display battery voltage? Yes No |
| B10: CHECK THE VOLTAGE SUPPLY TO THE RIGHT-HAND FRONT PARKING LAMP FOR OPEN CIRCUIT |
| | 1 Ignition switch in position 0. |
| | 2 Disconnect Smart Junction Box from connector C1BP02A. |
| | 3 Measure the resistance between the parking lamp, connector C1LS07, pin 1, circuit CLS07B (BN/YE), wiring harness side and the Smart Junction Box, connector C1BP02A, pin 40, circuit CLS07B (BN/YE), wiring harness side. |
| | Is a resistance of less than 2 Ohm registered? Yes INSTALL A NEW Smart Junction Box. CHECK system operates correctly No LOCATE and RECTIFY the break in the circuits between the Smart Junction Box and the front fog lamp unit with the aid of the Wiring Diagrams. CHECK system operates correctly |
| B11: CHECK THE GROUND CONNECTION OF THE RIGHT-HAND FRONT PARKING LIGHT FOR OPEN CIRCUIT |
| | 1 Ignition switch in position 0. |
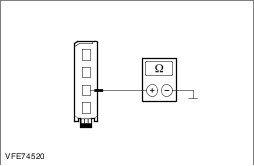
| | 2 Measure the resistance between the parking lamp, connector C1LS07, pin 2, circuit GD132S (BK/VT), wiring harness side and ground. |
| | Is a resistance of less than 2 Ohm registered? Yes CHECK and RENEW the front fog lamp unit. CHECK system operates correctly No LOCATE and RECTIFY the break in the circuit between the front fog lamp unit and soldered connection SP380 with the aid of the Wiring Diagrams. CHECK system operates correctly |
| B12: CHECK THE SHARED VOLTAGE SUPPLY OF THE LEFT-HAND REAR PARKING LAMPS FOR OPEN CIRCUIT |
| | 1 Ignition switch in position 0. |
| | 2 Disconnect Left-hand rear lamp assembly from connector C4LS18A. |
| | 3 Ignition switch in position II. |
| | 4 SWITCH ON the parking lamps. |
| | 5 Measure the voltage between the left-hand rear lamp assembly, connector C4LS18A, pin 2, circuit CLS08A (VT/GN)/CLS08C (VT/GN), wiring harness side and ground. |
| | Does the meter display battery voltage? Yes LOCATE and RECTIFY the break in the circuits between soldered connection SP549 and ground connection G4D149 with the aid of the Wiring Diagrams. CHECK system operates correctly No |
| B13: CHECK THE SHARED VOLTAGE SUPPLY OF THE LEFT-HAND REAR PARKING LAMPS FOR OPEN CIRCUIT |
| | 1 Ignition switch in position 0. |
| | 2 Disconnect Smart Junction Box from connector C1BP02B. |
| | 3 Measure the resistance between the left-hand rear lamp assembly, connector C4LS18A, pin 2, circuit CLS08A (VT/GN)/CLS08C (VT/GN), wiring harness side and the Smart Junction Box, connector C1BP02B, pin 50, circuit CLS08A (VT/GN), wiring harness side. |
| | Is a resistance of less than 2 Ohm registered? Yes INSTALL A NEW Smart Junction Box. CHECK system operates correctly No LOCATE and RECTIFY the break in the circuits between the Smart Junction Box and the rear lamp assembly with the aid of the Wiring Diagrams. CHECK system operates correctly |
| B14: CHECK THE GROUND CONNECTION OF THE LEFT-HAND REAR LAMP (LAMP ASSEMBLY) FOR OPEN CIRCUIT |
| | 1 Ignition switch in position 0. |
| | 2 Disconnect Rear lamp (lamp assembly) from connector C4LS18A. |
| | 3 Measure the resistance between the left-hand rear lamp (lamp assembly), connector C4LS18A, pin 3, circuit GD150C (BK/WH), wiring harness side and ground. |
| | Is a resistance of less than 2 Ohm registered? Yes INSTALL A NEW rear lamp (lamp assembly). CHECK system operates correctly No LOCATE and RECTIFY the break in the circuits between the rear lamp (lamp assembly) and soldered connection SP549 with the aid of the Wiring Diagrams. CHECK system operates correctly |
| B15: CHECK THE VOLTAGE SUPPLY OF THE LEFT-HAND REAR LAMP (TAILGATE) FOR OPEN CIRCUIT |
| | 1 Ignition switch in position 0. |
| | 2 Disconnect Rear lamp (tailgate) from connector C4LS35. |
| | 3 Ignition switch in position II. |
| | 4 SWITCH ON the parking lamps. |
| | 5 Measure the voltage between the left-hand rear lamp (tailgate), connector C4LS35, pin 3, circuit CLS08B (VT/GN), wiring harness side and ground. |
| | Does the meter display battery voltage? Yes No LOCATE and RECTIFY the break in the circuits between the rear lamp (lamp assembly) and the rear lamp (tailgate) with the aid of the Wiring Diagrams. CHECK system operates correctly |
| B16: CHECK THE GROUND CONNECTION OF THE LEFT-HAND REAR LAMP (TAILGATE) FOR OPEN CIRCUIT |
| | 1 Ignition switch in position 0. |
| | 2 Measure the resistance between the left-hand rear lamp (tailgate), connector C4LS35, pin 2, circuit GD150P (BK/WH), wiring harness side and ground. |
| | Is a resistance of less than 2 Ohm registered? Yes INSTALL A NEW rear lamp (tailgate). CHECK system operates correctly No LOCATE and RECTIFY the break in the circuits between the rear lamp (tailgate) and soldered connection SP534 with the aid of the Wiring Diagrams. CHECK system operates correctly |
| B17: CHECK THE SHARED VOLTAGE SUPPLY OF THE RIGHT-HAND REAR LAMPS FOR OPEN CIRCUIT |
| | 1 Ignition switch in position 0. |
| | 2 Disconnect Smart Junction Box from connector C1BP02B. |
| | 3 Measure the resistance between the Smart Junction Box, connector C1BP02B, pin 51, circuit CLS09A (WH/OG), wiring harness side and ground. |
| | Is a resistance of less than 10,000 Ohm registered? Yes INSTALL A NEW Smart Junction Box. CHECK system operates correctly No LOCATE and RECTIFY the break in the circuits between the Smart Junction Box and soldered connection SP568 with the aid of the Wiring Diagrams. CHECK system operates correctly |
| B18: CHECK THE VOLTAGE SUPPLY TO THE RIGHT-HAND REAR LAMP (LAMP ASSEMBLY) FOR OPEN CIRCUIT |
| | 1 Ignition switch in position 0. |
| | 2 Disconnect Rear lamp (lamp assembly) from connector C4LS19A. |
| | 3 Ignition switch in position II. |
| | 4 SWITCH ON the parking lamps. |
| | 5 Measure the voltage between the rear lamp unit (lamp assembly), connector C4LS19A, pin 2, circuit CLS09B (WH/OG), wiring harness side and ground. |
| | Does the meter display battery voltage? Yes No LOCATE and RECTIFY the break in the circuit between soldered connection SP568 and the rear lamp unit (lamp assembly) with the aid of the Wiring Diagrams. CHECK system operates correctly |
| B19: CHECK THE GROUND CONNECTION OF THE RIGHT-HAND REAR LAMP (LAMP ASSEMBLY) FOR OPEN CIRCUIT |
| | 1 Ignition switch in position 0. |
| | 2 Measure the resistance between the right-hand rear lamp unit (lamp assembly), connector C4LS19A, pin 3, circuit GD152A (BK/BU), wiring harness side and ground. |
| | Is a resistance of less than 2 Ohm registered? Yes INSTALL A NEW rear lamp unit (lamp assembly). CHECK system operates correctly No LOCATE and RECTIFY the break in the circuits between the rear lamp unit (lamp assembly) and soldered connection SP600 with the aid of the Wiring Diagrams. CHECK system operates correctly |
| B20: CHECK THE VOLTAGE SUPPLY TO THE RIGHT-HAND REAR LAMP (TAILGATE) FOR OPEN CIRCUIT |
| | 1 Ignition switch in position 0. |
| | 2 Disconnect Rear lamp unit (tailgate) from connector C4LS36. |
| | 3 Ignition switch in position II. |
| | 4 SWITCH ON the parking lamps. |
| | 5 Measure the voltage between the right-hand rear lamp unit (tailgate), connector C4LS36, pin 3, circuit CLS09F (WH/OG), wiring harness side and ground. |
| | Does the meter display battery voltage? Yes No LOCATE and RECTIFY the break in the circuits between soldered connection SP568 and the rear lamp unit (tailgate) with the aid of the Wiring Diagrams. CHECK system operates correctly |
| B21: CHECK THE GROUND CONNECTION AT THE RIGHT-HAND REAR LAMP (TAILGATE) FOR OPEN CIRCUIT |
| | 1 Ignition switch in position 0. |
| | 2 Measure the resistance between the right-hand rear lamp unit (tailgate), connector C4LS36, pin 2, circuit GD150W (BK/WH), wiring harness side and ground. |
| | Is a resistance of less than 2 Ohm registered? Yes INSTALL A NEW rear lamp unit (tailgate). CHECK system operates correctly No LOCATE and RECTIFY the break in the circuit between the rear lamp unit (tailgate) and soldered connection SP534 with the aid of the Wiring Diagrams. CHECK system operates correctly |