seat Workshop Repair Guides

SEAT Workshop Service and Repair Manuals

Brakes, hydraulics, regulator, servo > < Brake pedal: Removing and installing
Brake light switch: removing and adjusting
  Note!
To be adjusted, the brake light switch must be removed.
Removing
–  Remove the cover under the shelf on driver's side.
–  Unplug brake light multiple connector.
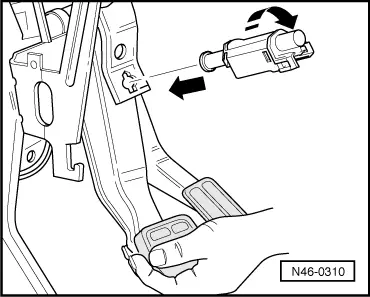
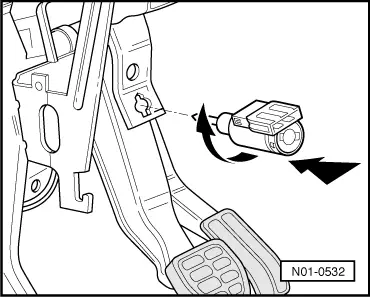
–  Remove brake light switch by turning 45° or 90° to the left (according to type of switch).
Assembly of the brake light switch used to date (angular)
–  Before fitting, remove the bolt completely.
–  Press the brake pedal down by hand to its limit.
   
–  Insert the switch through the mounting hole and locate by turning 90° to the right.
–  Release the brake pedal.
–  Connect the brake light multiple connector.
–  Check brake light operation.
–  Once the brake light switch has been adjusted, check that the brake pedal is at stop position (pedal free).
Assembly of the new brake light switch (rounded)
–  Before fitting, remove the bolt completely.
  N46-0310
–  Insert the switch through the mounting hole, press it against the pedal and locate by turning 45° to the right.
–  The brake pedal remains all the time in the same position (not pressed).
–  Connect the brake light multiple connector.
–  Check brake light operation.
–  Once the brake light switch has been adjusted, check that the brake pedal is at stop position (pedal not depressed).
  N01-0532

Brakes, hydraulics, regulator, servo > < Brake pedal: Removing and installing