skoda Workshop Repair Guides

Skoda Workshop Service and Repair Manuals

Removing and installing the control unit for temperature flap > < Removing and installing control motor for fresh/re-circulating air flap V154
Removing and installing the control motor for air distribution flaps
–  Remove storage compartment on driver and passenger side → Body Work; Rep. Gr.70.
–  Removing the dash panel centre part → Body work; Rep. Gr.70.
–  Removing the dash panel → Body Work; Rep. Gr.70.
–  Remove right footwell vent (Tightening torque: 1.5 Nm).
–  Remove the intermediate piece for defrost dust and intermediate piece for dash panel vents (3 retaining clips).
Removing
   
–  Release screw -1-.
–  Release catches -2- and swivel out the control unit from the housing in the direction of the arrow.
Install
  S87-0263
–  Arrest the gear wheels of the control unit.
   To this end turn the gear wheels sufficiently in order to engage the markings -arrows-.
–  In this position insert screw M6 -2- in the opening of the bottom gear wheel and into the housing.
  S87-0122
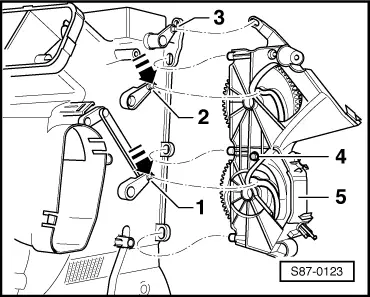
–  Position the flap lever of the footwell vent -1- down -arrow- (flap closed).
–  Position the flap lever of the dash panel vent -2- down -arrow- (flap closed).
–  Position the defrost flap lever -3- in such a way that the defrost flap is fully opened.
–  Insert arrested control unit -5- into the 3 openings of the housing.
–  Position the control unit on the housing in such a way that the lever bolts -1- and -2- engage in the relevant slides of the control unit -5-.
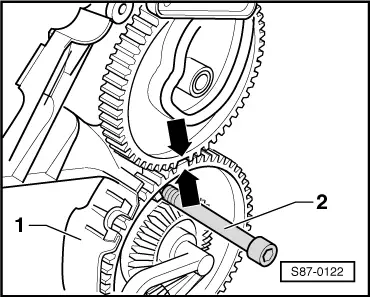
–  Guide the lever bolt -3- in the corresponding opening of the control unit -5-.
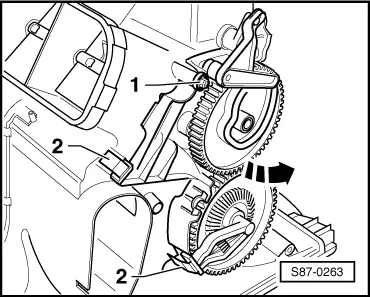
  Note
When installing it is possible to view the lever bolt -1- through an inspection hole in the bottom gear wheel.
–  Lock control unit -5- into position.
–  Remove screws -4-.
–  Check operation of the control unit.
It must be possible to adjust all flaps to their end position in a smooth and easy manner.
If the flap adjustment is not O.K.:
–  Remove control unit and install again - as described above.
If the flap adjustment is O.K.:
–  Screw control unit (1 Nm).
Further installation occurs in reverse order.
  S87-0123

Removing and installing the control unit for temperature flap > < Removing and installing control motor for fresh/re-circulating air flap V154