|
Replace window actuation on rear door (electric
actuation)
 Remove Remove
| 2. |
Detach rear door inner panelling 
|
|
| 3. |
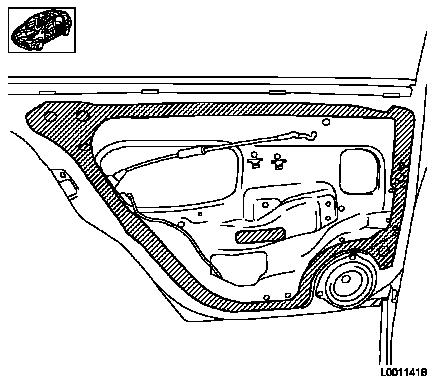
Detach water vapour barrier
|
|
| 4. |
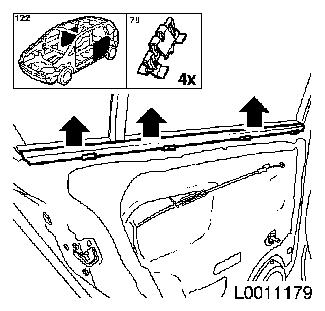
Detach inner channel strip
| • |
Pull channel strip carefully from behind beginning at the
top
|
|
|
|
| 5. |
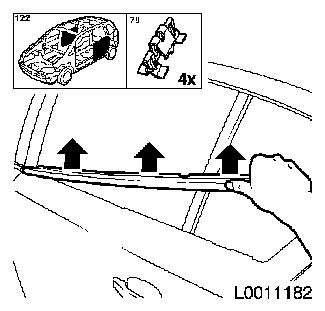
Detach outer channel strip
| • |
Pull channel strip carefully from behind beginning at the
top
|
|
|
|
|
| 6. |
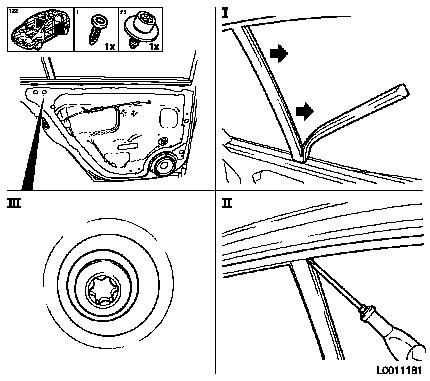
Loosen lower guide rail (3)
|
| 7. |
Detach rear guide rail seal (1)
|
| 8. |
Remove rear guide rail (2)
|
|
| 9. |
Remove rear door sash window
|
|

|
| 10. |
Drill off the rivets of the electric window winder
|
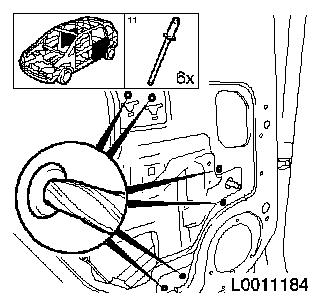
| 11. |
Remove electric window winder
| • |
Disconnect wiring harness plug.
|
| • |
Extract window winders through assembly aperture of the door
frame
|
|
| 12. |
Dispose of remains of rivets
|
|
|
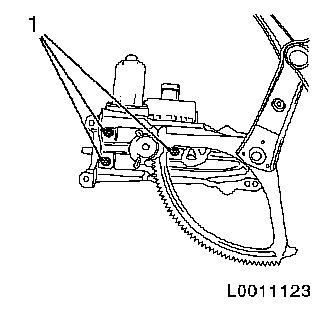
| 13. |
Detach motor from linkage
|
|
|
 Install
| 14. |
Attach motor to linkage
|
| 15. |
Insert electric windows with motor
| • |
Install window winders through assembly aperture of the door
frame
|
| • |
Connect wiring harness plug
|
|
| 16. |
Fasten electric window winder
|
| 17. |
Fit sash window
| • |
Wind sash window half way up
|
| • |
Slide the glass pane in the lower guide
|
|
| 18. |
Install front door rear guide rail
|
| 19. |
Tighten rear lower guide rail
|
| 20. |
Attach outer shaft strip
|
| 21. |
Attach inner channel strip
|
| 22. |
Install water vapour barrier
Note: Damaged water
vapour barrier must be replaced.
| • |
Apply adhesive tape to door frame according to the shaded areas
shown.
|
| • |
Cut foil to size
Note: Use removed foil
and door contours as a template
|
| • |
Affix water vapour barrier without creases
|
|
| 23. |
Attach rear door inner panelling
|
|
