|
Remove and install gearshift module (M20 +
MTA)
 Remove Remove
Important: Follow Easytronic
safety notes .
|
| 1. |
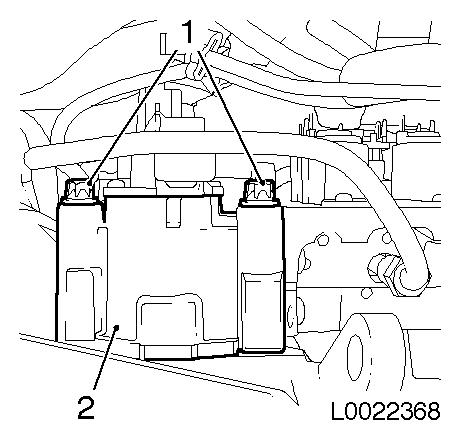
Remove clutch module
|
Important: The electronic control
unit may only be removed and reinstalled once. If the electronic
control unit is removed again, it must be replaced.
|
| 3. |
Remove electronic control unit 
|
| 4. |
Release 2 wiring harness plugs and disconnect.
| • |
From shift position sensor (2)
|
| • |
From selection position sensor (1)
|
|
|

|
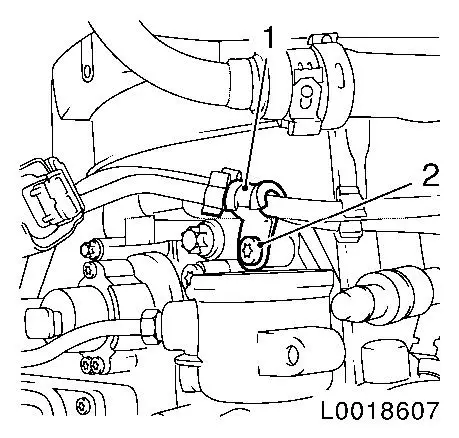
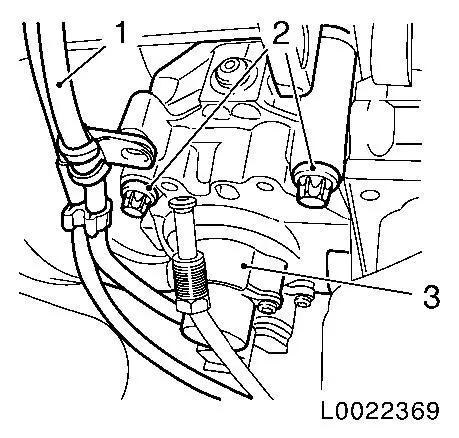
| 5. |
Detach holder for high pressure line MTA system (1)
|
|
|
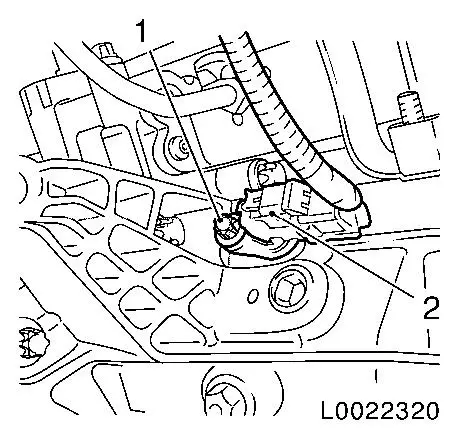
| 6. |
Unlock and separate the wiring harness plug (2) for gearbox
output speed (1)
|
|
|
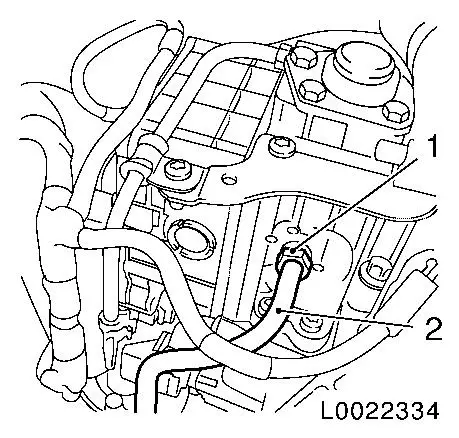
| 7. |
Detach high pressure line (2) from the shift module
|
|
|
| 8. |
Detach shift module bracket from transmission
| • |
Unclip wiring harness (1)
|
|
|
|
| 9. |
Detach shift module (2) base
|
|
|
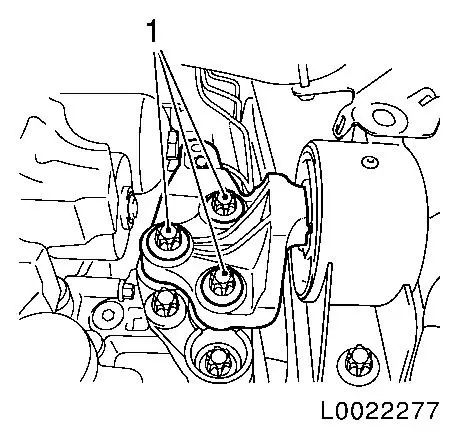
| 11. |
Detach transmission from left engine damping block
|
| 12. |
Lower engine with transmission on EN-47650
Note: Lower engine with
transmission until transmission lies on front axle body
Do not damage wiring harnesses and attaching parts
Be careful of vacuum line on throttle valve module
|
|
|
Important: Carefully remove shift
module to avoid damaging the pins of the solenoid valves
|
| 13. |
Remove shift module (3)
| • |
Remove MTA wiring harness and high pressure line (1)
|
| • |
Remove shift module gasket
|
| • |
Clean sealing surfaces.
|
|
|
|
 Install
|
Important: Before installing the
shift module, the gearbox and shift module must be checked for
correct installation position. The gearbox and shift module must
stand in the idle position "N".
|
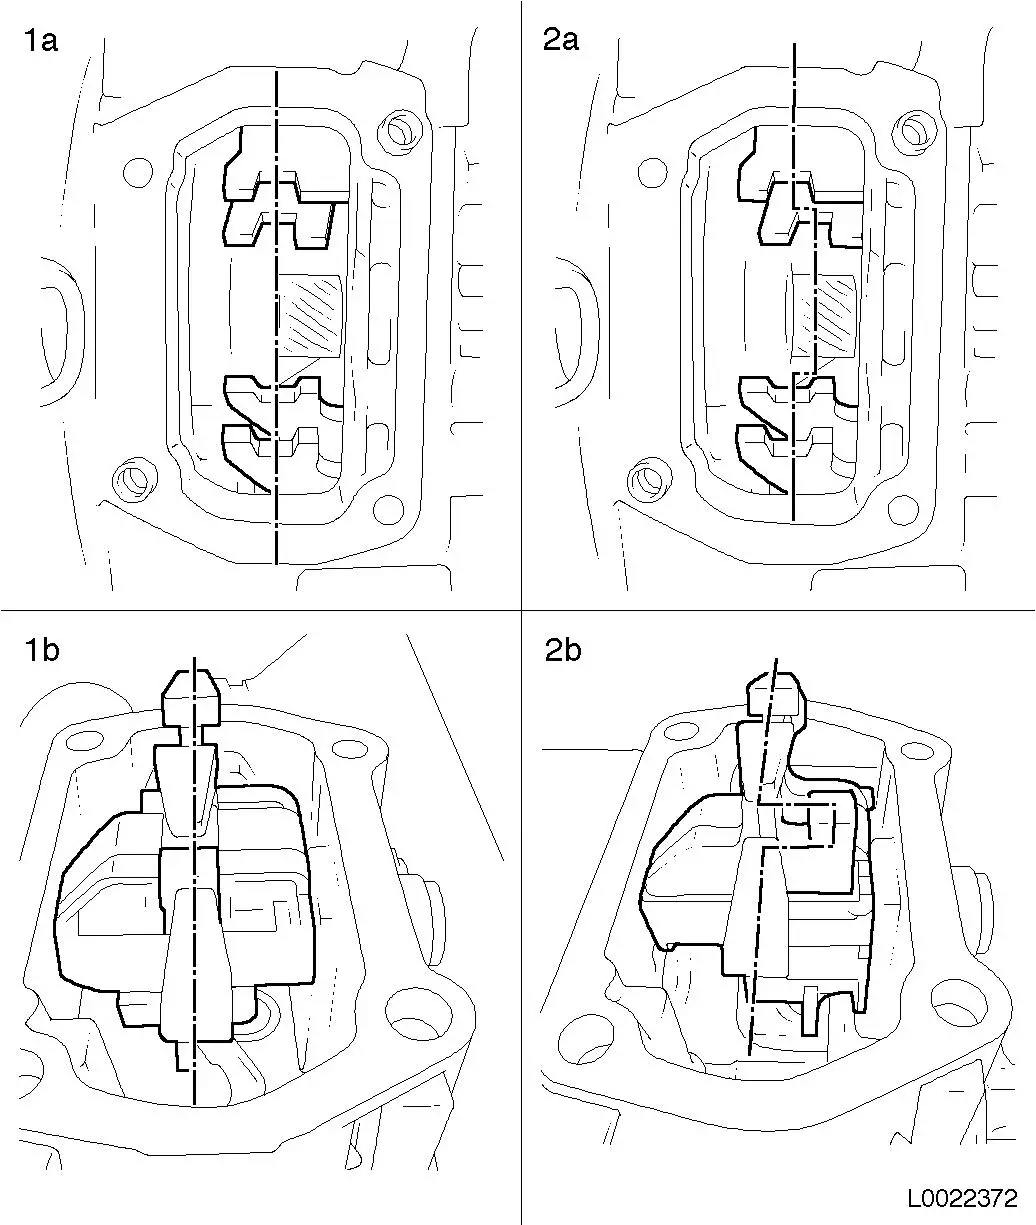
| 14. |
Check gears for idle position, if necessary adjust by moving
the shift finger.
|
| 15. |
Check shift module for idle position, if necessary adjust by
twisting
|
|
| 16. |
Check angle of shift finger for idle position, if necessary
adjust by twisting
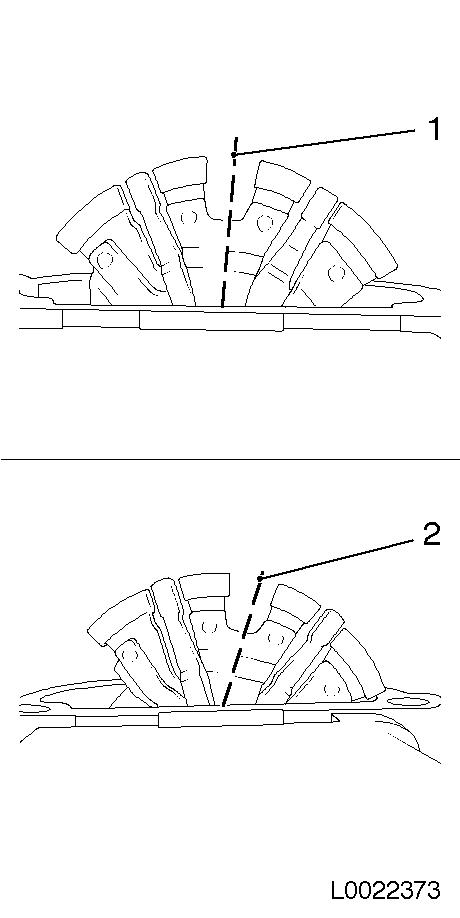
Note: In this test, 4
positions are possible. The two centre positions are both
correct.
|
|
|
Important: Carefully insert shift
module to avoid damaging the pins of the solenoid valves
|
| 17. |
Install shift module (3)
| • |
Insert new gasket for shift module
|
| • |
Insert MTA wiring harness and high pressure line (1)
|
| • |
Tighten 2x bolts (2) 28 Nm
|
| • |
Clean sealing surfaces.
|
|
|
|
Important: Do not damage wiring
harnesses and attaching parts
Be careful of vacuum line on throttle valve module
|
| 18. |
Raise engine and transmission on the left hand side
|
| 19. |
Attach transmission to left hand engine damping block
| • |
Tighten 3x bolts (1) 55 Nm
|
|
|
|
| 21. |
Attach shift module (2) base
| • |
Tighten 2x bolts (1) 28 Nm
|
|
|
|
| 22. |
Attach shift module bracket to transmission
| • |
Tighten stud bolts (2) 28 Nm
|
| • |
Clip in wiring harness (1)
|
|
|
|
| 23. |
Connect and lock wiring harness plug (2) for gearbox output
speed sensor (1)
|
|
|
| 24. |
Connect and lock 2 wiring harness plugs
| • |
to shift position sensor (2)
|
| • |
to selection position sensor (1)
|
|
|
|
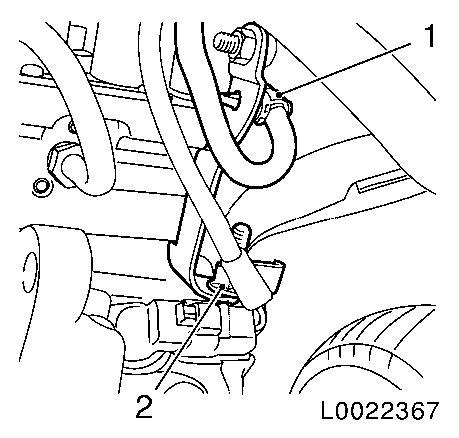
| 25. |
Attach holder for high pressure line MTA system (1)
|
|
|
| 27. |
Install clutch module
|
| 28. |
Install remove electronic control unit
|
|
