RDX L4-2.3L Turbo (2008)

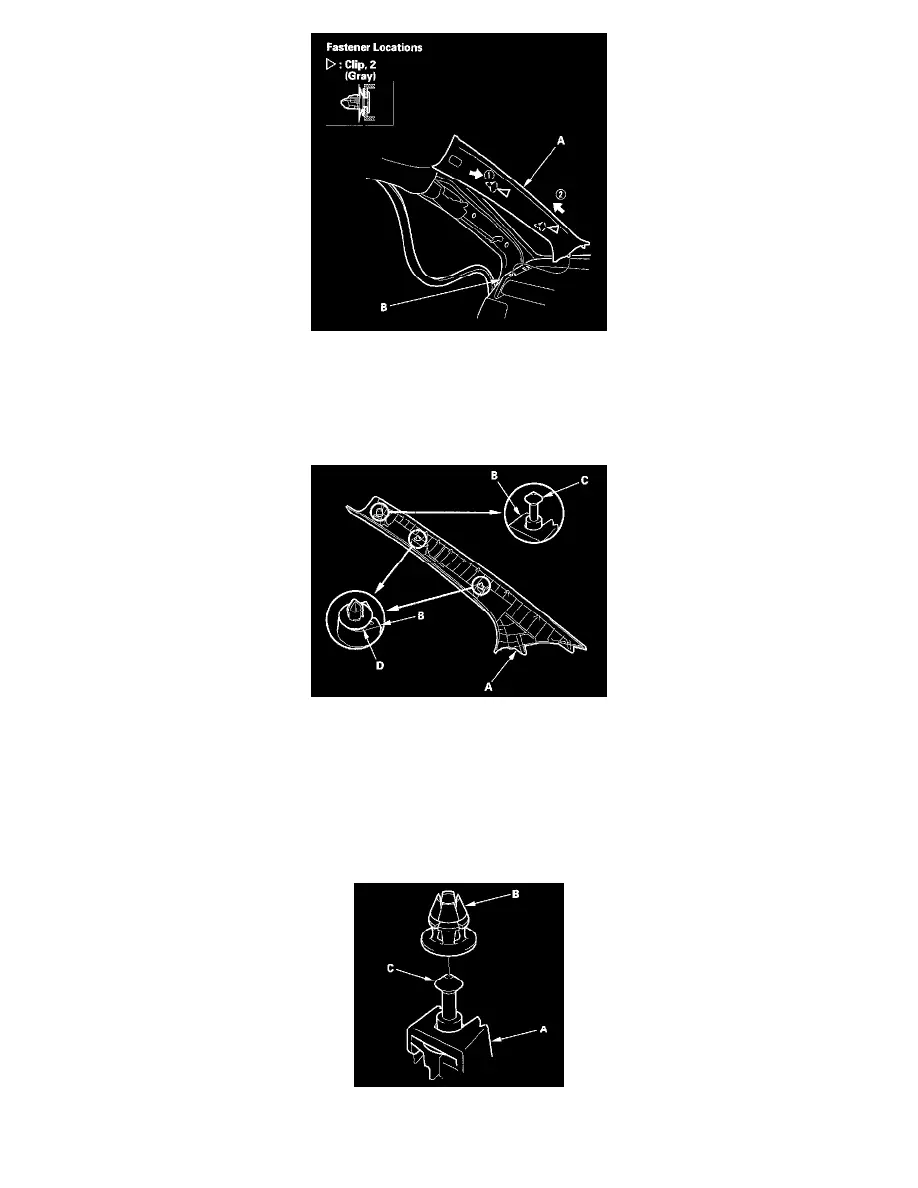
4. Remove the A-pillar trim (A) by hand to detach the remaining clips, then pull the trim up from the dashboard (B).
5. Remove the grommet from the body.
NOTE: The upper clip must be replaced with a new one because the grommet is damaged during removal.
6. If the side curtain airbag has been deployed, replace the A-pillar trim with a new one.
7. If the side curtain airbag has not been deployed, check the A-pillar trim (A):
-
To prevent the side curtain airbags from deploying improperly and possibly causing injury, inspect the A-pillar trim and replace it if it has any
of these types of damage:
-
Any cracks, deformations, or stress-whitenings
-
Any cracks or stress-whitened in the clip and pin seating surfaces (B)
-
Damaged top of the upper clip pin (C)
-
Replace the upper clip with a new one because it was damaged during removal.
-
Check for damaged or stress-whitened clips (D), and replace them with new ones.
8. Before installing the A-pillar trim (A), carefully remove the grommet (B) from the pin (C) on the new upper clip.
9. Check the overlap between the headliner and A-pillar trim, and if necessary, adjust it.
