
TL L5-2451cc 2.5L SOHC MFI (1997)
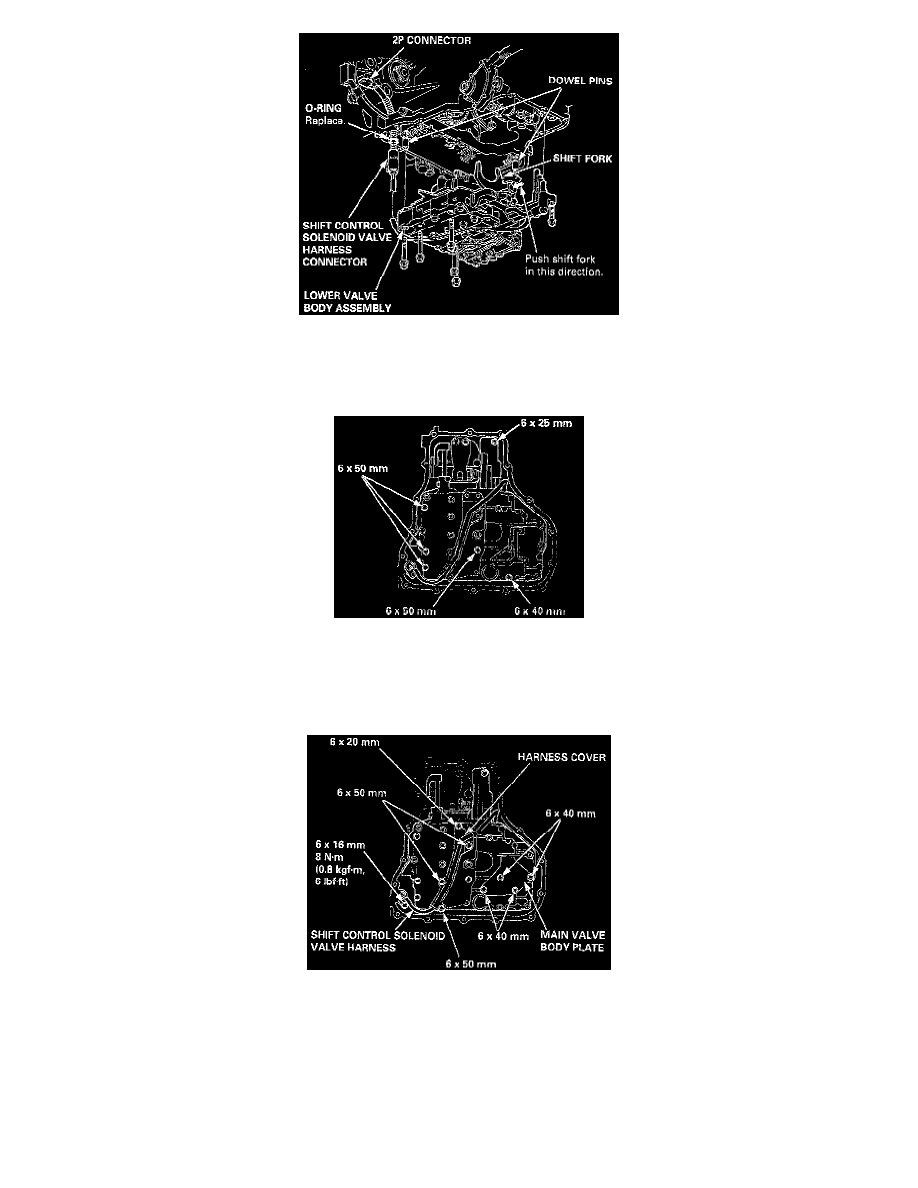
3. Install the two dowel pins on the lower valve body assembly.
4. Push the shift fork in the D range position.
5. Install the lower valve body putting the manual valve and the detent lever together, the reverse selector and the shift fork together, and joining the
ATF feed pipes with the ATF feed pipe holes on the transmission housing.
6. Install the six bolts and torque as shown.
7. Install the main valve body plate (four bolts)
8. Pass the shift control solenoid valve harness through the transmission housing, and install the shift control solenoid valve harness connector (one
bolt).
9. Install the harness cover (four bolts).
10. Lightly pull the shift control solenoid valve harness from the harness cover, then bring the shift control solenoid valve harness back. Make sure
that the shift control solenoid valve harness is not pinched. If the shift control solenoid valve harness is pinched, loosen the four bolts securing the
harness cover then retighten the bolts.
TORQUE: 12 Nm (8.7 ft. lbs.).