ZDX V6-3.7L (2010)

8. Remove the flange nuts (B) from the top of the damper.
9. Remove the damper/spring (C).
NOTE:
-
The left and right damper springs are different. Mark the springs L and R before you continue.
-
Be careful not to damage the body.
Installation
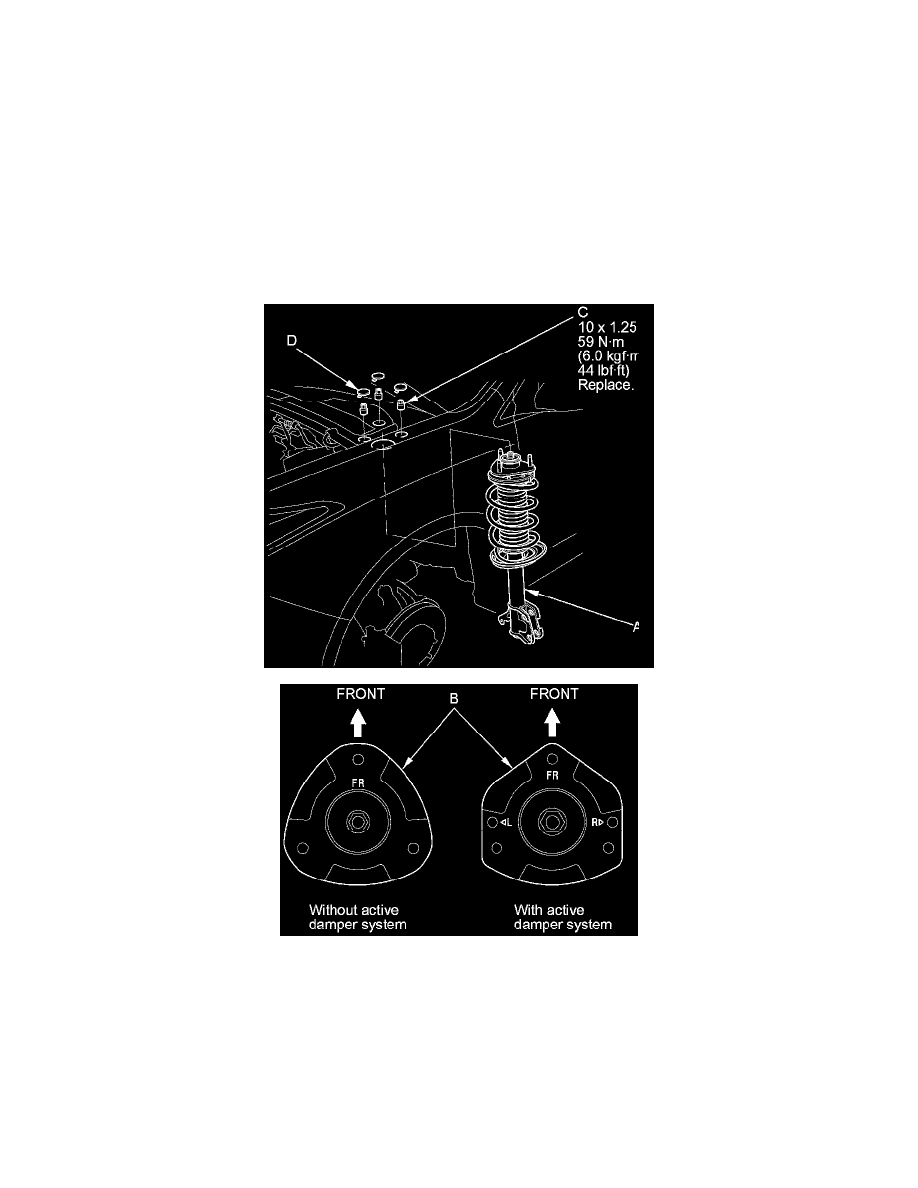
1. Install the damper/spring (A) on to the frame. Note the direction of the damper mounting base (B) as shown.
NOTE: Be careful not to damage the body.
2. Loosely install the new flange nuts (C) to the top of the damper.
NOTE: Install the service caps (D) after tightening the flange nuts to the specified torque.
3. Loosely install new damper pinch bolts (A) and new flange nuts (B) to the damper (C).
