
ZDX V6-3.7L (2010)
Axle Shaft Assembly: Overhaul
Rear Driveshaft Disassembly
Rear Driveshaft Disassembly
Special Tools Required
-
Threaded Adapter, 24 x 1.5 mm 07XAC-001020A
-
Slide Hammer 5/8''-18 UNF, commercially available
-
Bearing Puller, commercially available
Inboard Joint Side
1. Remove the boot bands. Be careful not to damage the boot.
-
For the ear clamp type See: Front Driveshaft Disassembly.
-
For the double loop type See: Front Driveshaft Disassembly.
-
For the low profile type See: Front Driveshaft Disassembly.
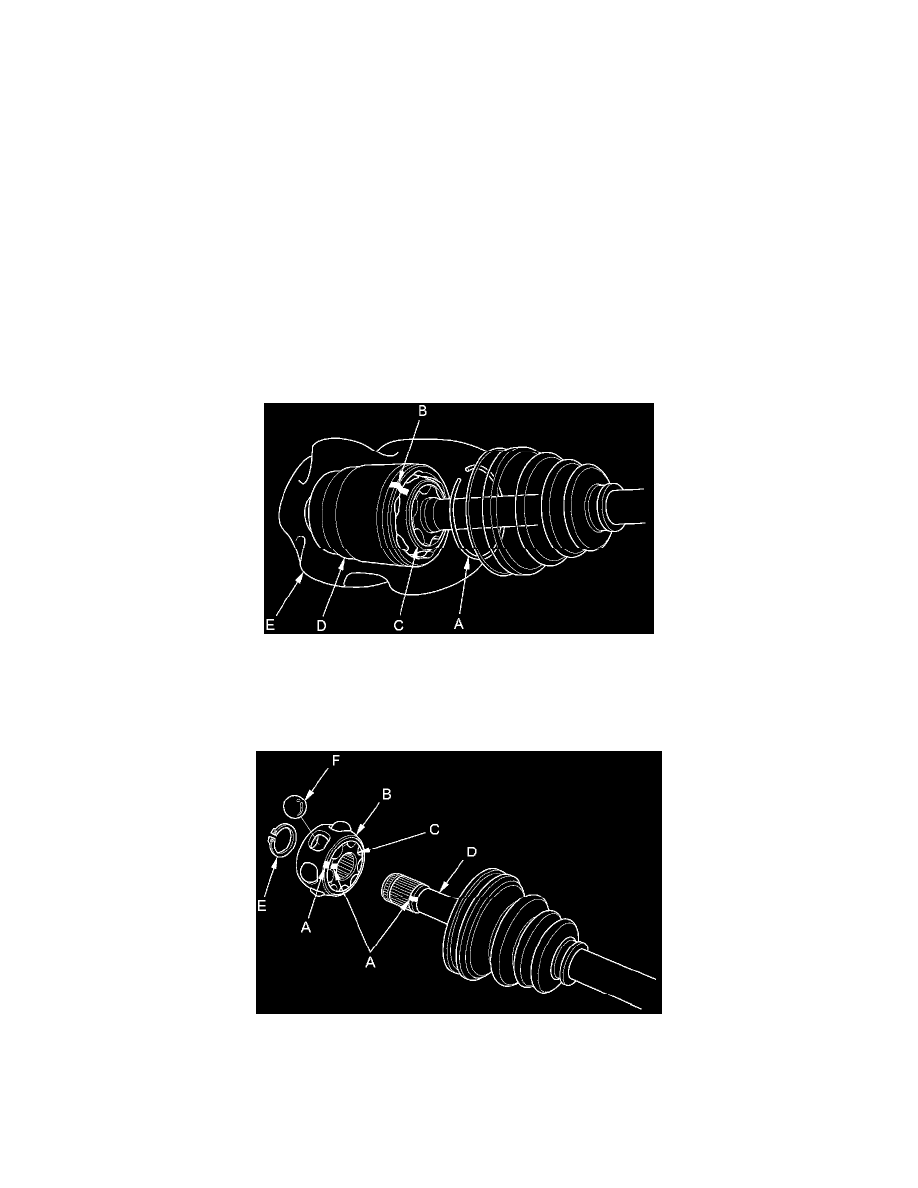
2. Remove the circlip (A).
3. Make marks (B) on the bearing retainer (C) and the inboard joint (D) to identify the locations of the bearing retainer to the grooves in the inboard
joint. Then remove the inboard joint on a clean shop towel (E). Be careful not to drop the steel balls when separating them from the inboard joint.
4. Make marks (A) on the bearing retainer (B), the bearing race (C), and the driveshaft (D) to identify the position of the bearing retainer and the
bearing race on the shaft.
5. Remove the snap ring (E).
6. Remove the bearing race and the steel balls (F).
NOTE: If necessary, use a commercially available bearing puller.
7. Wrap the splines on the driveshaft with vinyl tape (A) to prevent damaging the inboard boot.