
Data (page 2 of 2)
- Make
- Aston Martin
- Model
- DB7 Factory Workshop Manual Volume 2: Electrics, Body and Air Conditioning
- Year
- 1994–1998
- Section
- Repair procedures
Air conditioningData · page 2 of 2
- Depressurise the air conditioning system.
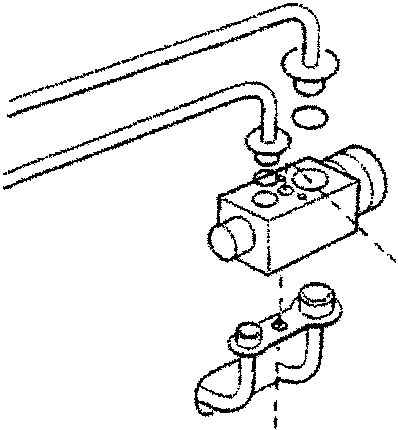
- Undo the pipe to expansion valve clamp bolt and retaining plate and disconnect the pipes (Fig. 1)
- Fit blanking plugs to the expansion valve and to the pipes.
- Reposition the pipes to one side.
- Unscrew the two torx head retaining screws and remove the expansion valve from the air conditioning unit (Fig. 1-1).
- Remove and discard the 'O' rings.
- Fitting a new valve is the reversal of the removal procedure.
- Ensure new 'O' rings to all union connections are fitted.
- Evacuate the system.
- Recharge the system.
- Fit new 'O' rings to the outlet port blanking plate, position the plate on the compressor and fit and tighten the securing bolt.
- Check compressor oil and top up in necessary.
- Refit the compressor.
- Remove the wing mat and close the bonnet.
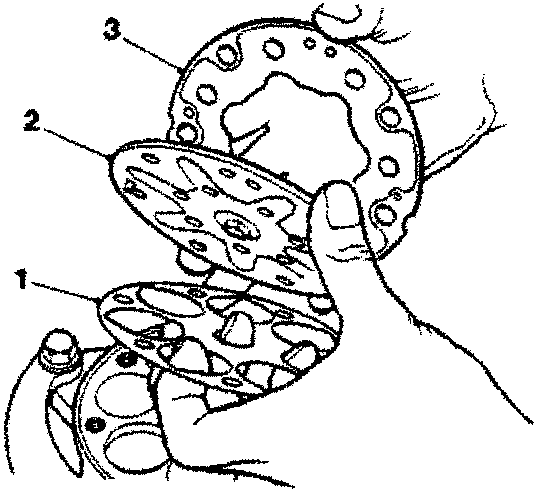
- Position valve plate and gaskets (Fig. 2-1 and 2) on the compressor and fit the cylinder head.
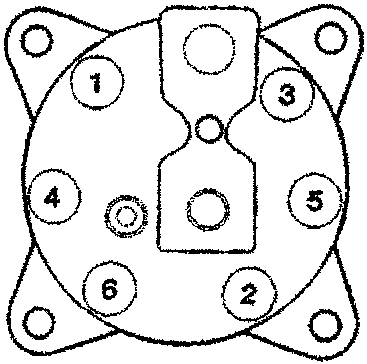
- Tighten the cylinder head securing bolts in the order shown in Fig. 3.
Parts & tools for this job For 1994 Aston Martin DB7
- TOOLA/C manifold gauge setSearch: AC manifold gauge set
- TOOLUV leak detection kitSearch: AC UV leak detection kit
- PARTCabin filterSearch: Aston Martin DB7 1994 cabin filter
Links open Amazon search results in a new tab. As an Amazon Associate I earn from qualifying purchases.