
Sill Trim
- Make
- Aston Martin
- Model
- DB9 Factory Workshop Manual
- Year
- Issue 2, 2005
- Section
- Exterior Trim › Sill Trim
01 Body systemSill Trim · page 1 of 3
Sill Trim
Remove
- Remove the front and rear road wheel arch liners sufficiently to gain access.
- Remove (x3) screws and (x2) scrivnuts.
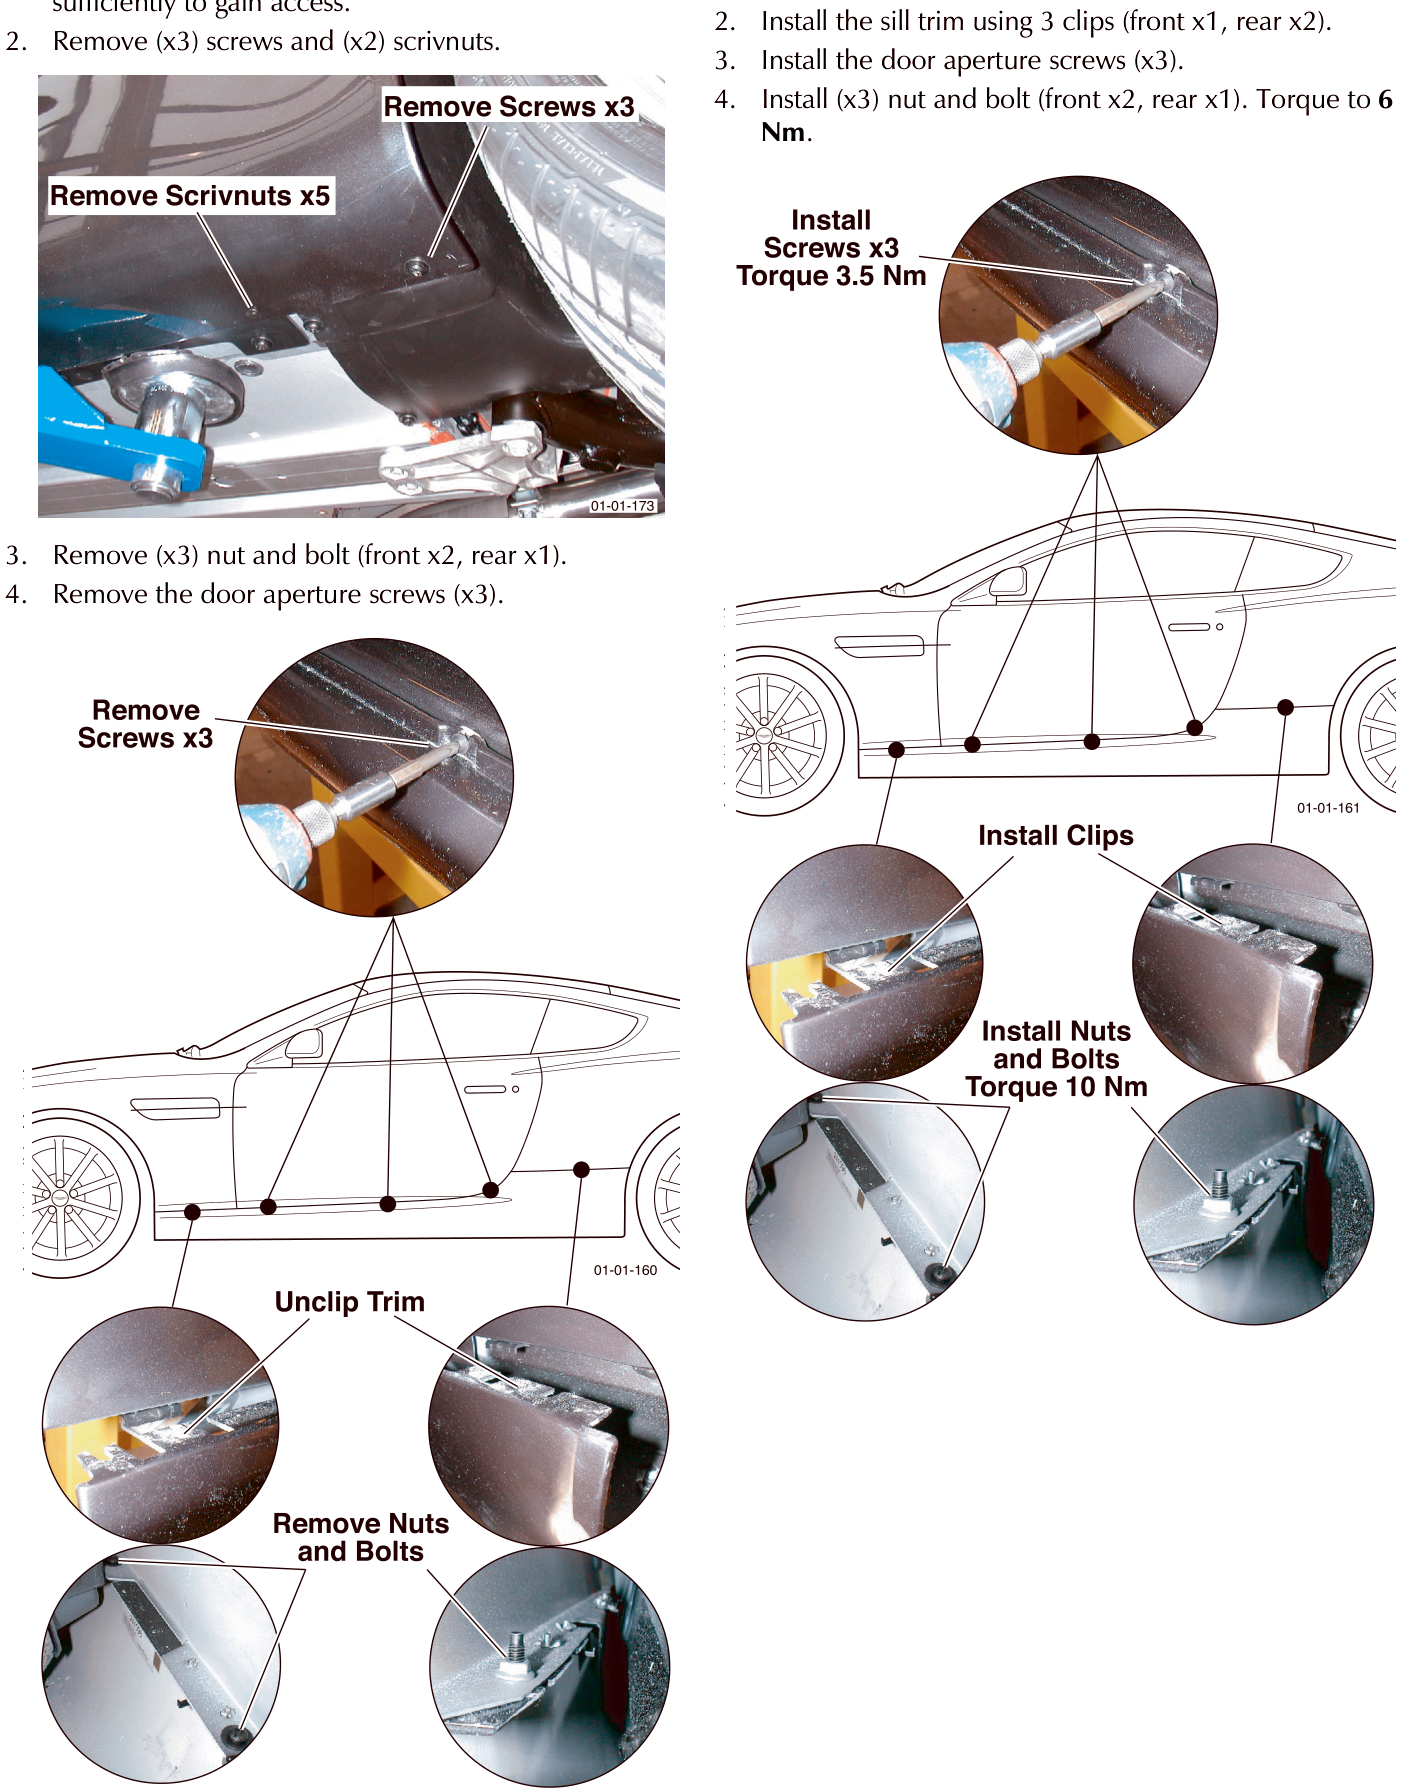
- Remove (x3) nut and bolt (front x2, rear x1).
- Remove the door aperture screws (x3).
5. Unclip the sill trim from the vehicle body. Withdraw the sill trim.
Installation
- Offer the sill trim to the vehicle.
- Install the sill trim using 3 clips (front x1, rear x2).
- Install the door aperture screws (x3).
- Install (x3) nut and bolt (front x2, rear x1). Torque to 6 Nm.
Parts & tools for this job For 2005 Aston Martin DB9
- TOOLTrim removal tool kitSearch: trim removal tool kit
- PARTTouch-up paintSearch: Aston Martin touch up paint
- PARTPanel clip assortmentSearch: Aston Martin panel clips assortment
Links open Amazon search results in a new tab. As an Amazon Associate I earn from qualifying purchases.