
Installation
- Make
- Aston Martin
- Model
- DB9 Factory Workshop Manual
- Year
- Issue 2, 2005
- Section
- Engine Cranking System › Installation
03 EngineInstallation
- Remove bolts (x2) that secure the starter motor.
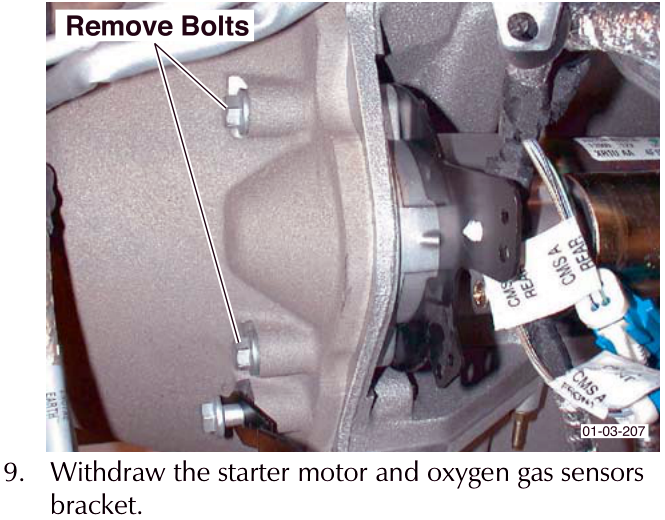
- Withdraw the starter motor and oxygen gas sensors bracket.
Installation
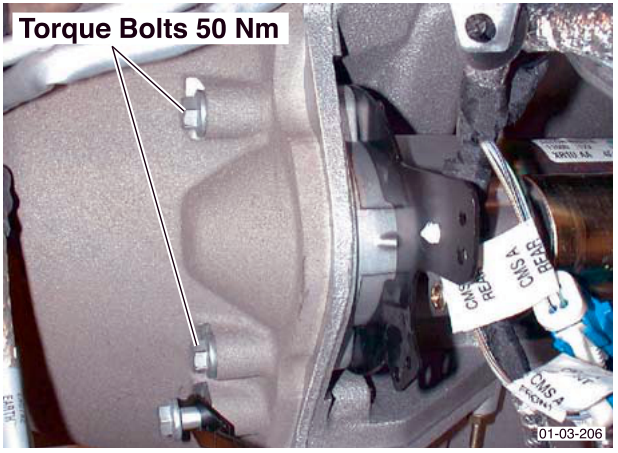
- Place the starter motor and the oxygen gas sensors bracket to the bell housing. Torque bolts to 50 Nm.
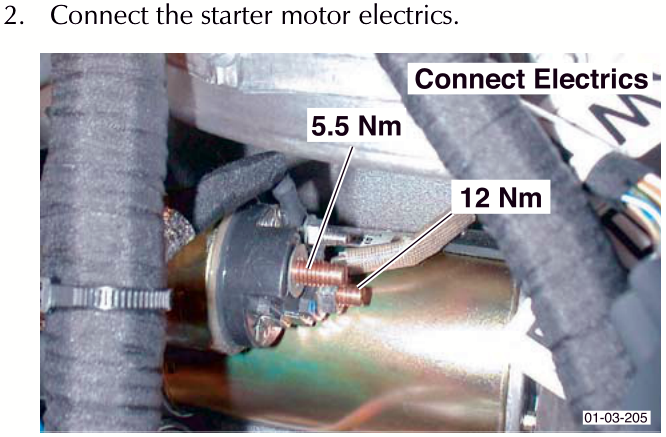
- Install the heat shield.
- Install the oxygen gas sensors (if removed).
- Install the front under tray and road wheel arch liner.
- Install the road wheels and ‘nip-up’ road wheel nuts.
- Lower the vehicle. Tighten the road wheel nuts (Refer to ‘Road Wheel Nut Torque Tightening’, page 4-5-7).
Parts & tools for this job For 2005 Aston Martin DB9
- PARTEngine gasket setSearch: Aston Martin DB9 2005 engine gasket set
- TOOLTorque wrenchSearch: 3/8 inch torque wrench
- TOOLFeeler gauge setSearch: feeler gauge set
Links open Amazon search results in a new tab. As an Amazon Associate I earn from qualifying purchases.