
Depressurising
- Make
- Aston Martin
- Model
- DB9 Factory Workshop Manual
- Year
- Issue 2, 2005
- Section
- Fuel Charging System › Depressurising
Depressurising
| Item | Code |
|---|---|
| Fuel System Depressurising | 10.01.EK |
- Read and observe fuel system safety precautions (Refer to ‘Safety Precautions’, page 3-5-1).
- Remove the fuel pump relay from the CEM.
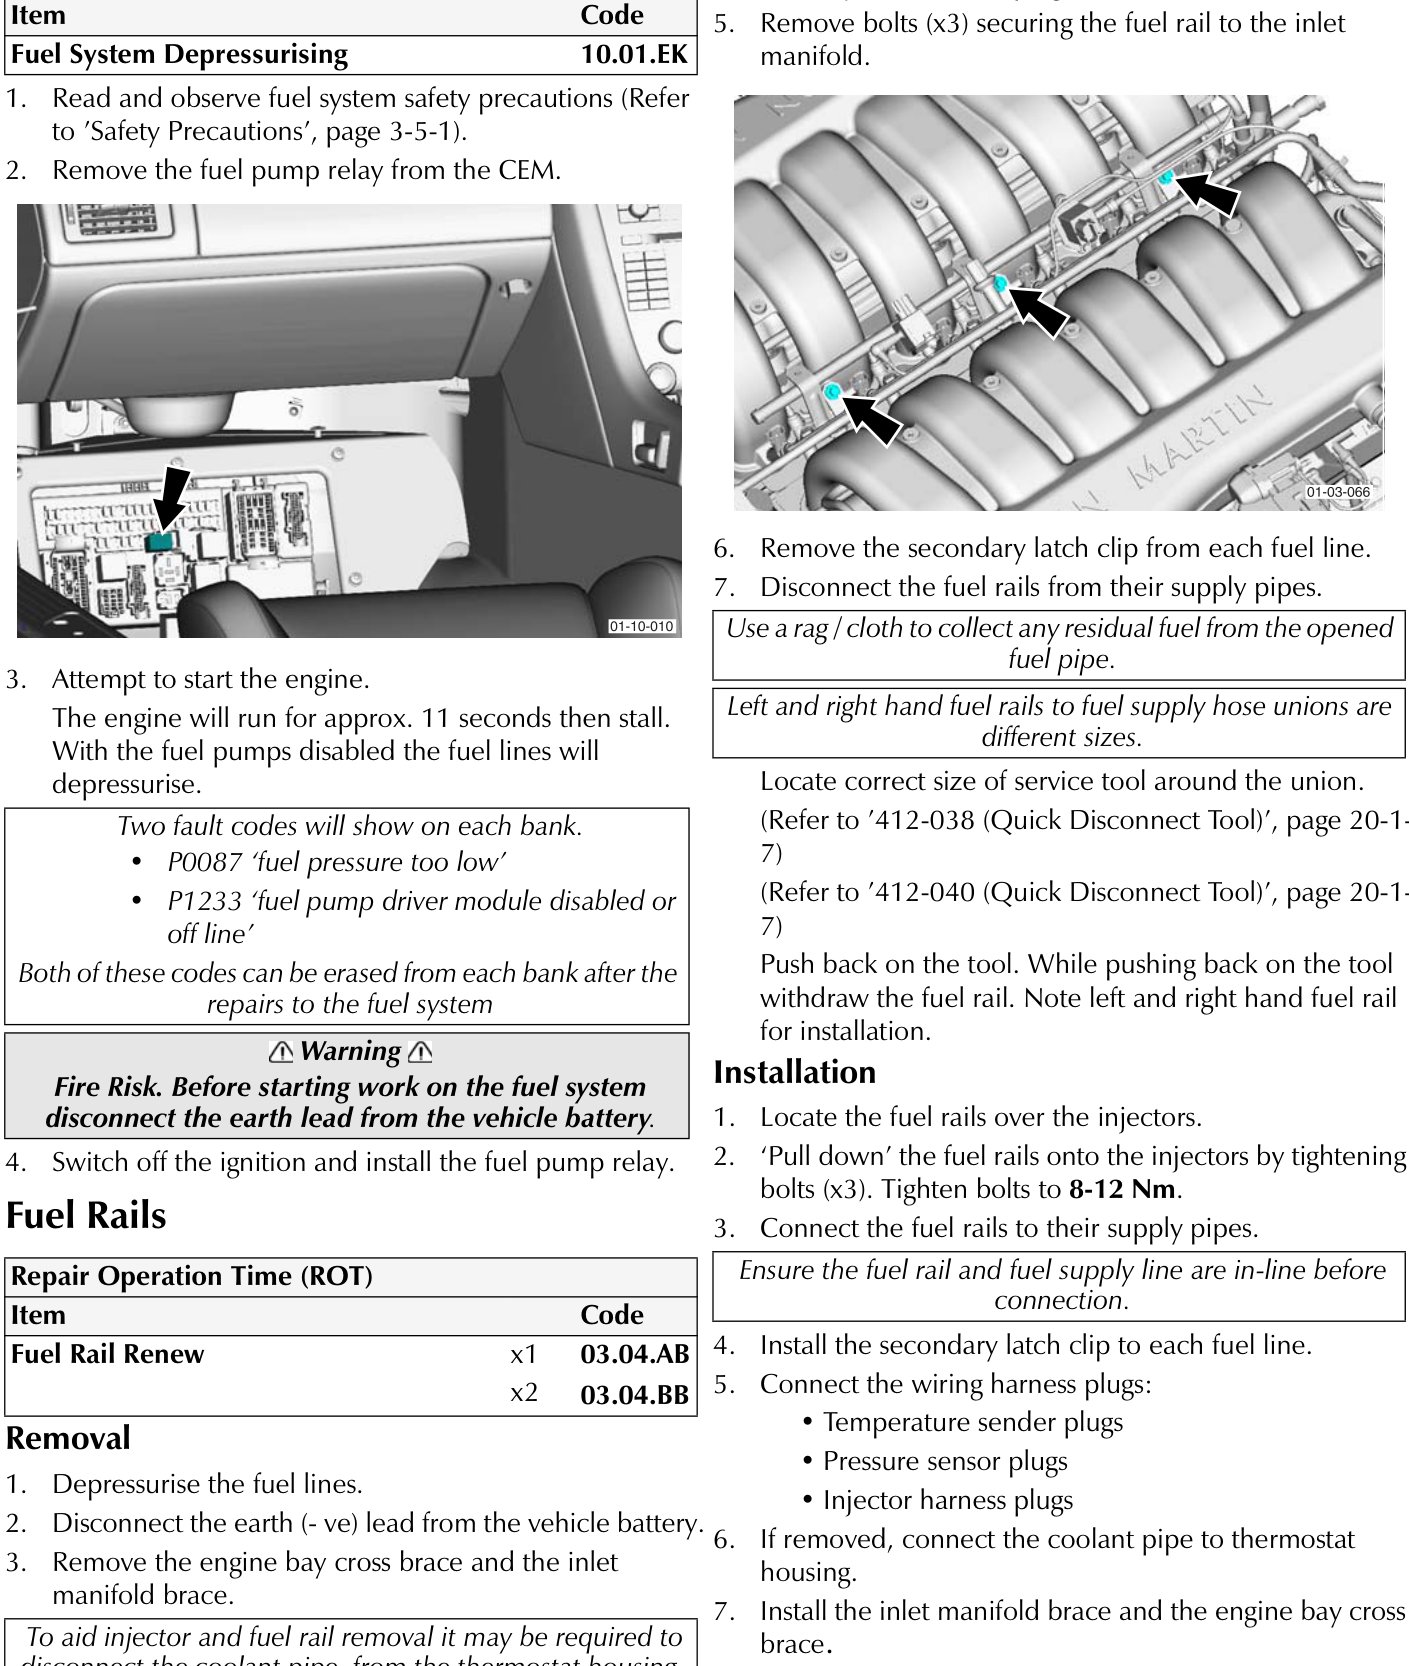
- Attempt to start the engine.
The engine will run for approx. 11 seconds then stall. With the fuel pumps disabled the fuel lines will depressurise.
Two fault codes will show on each bank.
- P0087 ‘fuel pressure too low’
- P1233 ‘fuel pump driver module disabled or off line’
Both of these codes can be erased from each bank after the repairs to the fuel system
⚠ Warning
Fire Risk. Before starting work on the fuel system disconnect the earth lead from the vehicle battery.
- Switch off the ignition and install the fuel pump relay.
Fuel Rails
| Item | Code | |
|---|---|---|
| Fuel Rail Renew | x1 | 03.04.AB |
| x2 | 03.04.BB | |
Removal
- Depressurise the fuel lines.
- Disconnect the earth (- ve) lead from the vehicle battery.
- Remove the engine bay cross brace and the inlet manifold brace.
To aid injector and fuel rail removal it may be required to disconnect the coolant pipe, from the thermostat housing, running between the two inlet manifolds.
- Remove the following wiring harness plugs:
- Temperature sender plugs
- Pressure sensor plugs
- Injector harness plugs
- Remove bolts (x3) securing the fuel rail to the inlet manifold.
- Remove the secondary latch clip from each fuel line.
- Disconnect the fuel rails from their supply pipes.
Use a rag / cloth to collect any residual fuel from the opened fuel pipe.
Left and right hand fuel rails to fuel supply hose unions are different sizes.
Locate correct size of service tool around the union.
(Refer to ‘412-038 (Quick Disconnect Tool)’, page 20-1-7)
(Refer to ‘412-040 (Quick Disconnect Tool)’, page 20-1-7)
Push back on the tool. While pushing back on the tool withdraw the fuel rail. Note left and right hand fuel rail for installation.
Installation
- Locate the fuel rails over the injectors.
- ‘Pull down’ the fuel rails onto the injectors by tightening bolts (x3). Tighten bolts to 8-12 Nm.
- Connect the fuel rails to their supply pipes.
Ensure the fuel rail and fuel supply line are in-line before connection.
- Install the secondary latch clip to each fuel line.
- Connect the wiring harness plugs:
- Temperature sender plugs
- Pressure sensor plugs
- Injector harness plugs
- If removed, connect the coolant pipe to thermostat housing.
- Install the inlet manifold brace and the engine bay cross brace.
Parts & tools for this job For 2005 Aston Martin DB9
- PARTEngine gasket setSearch: Aston Martin DB9 2005 engine gasket set
- TOOLTorque wrenchSearch: 3/8 inch torque wrench
- TOOLFeeler gauge setSearch: feeler gauge set
Links open Amazon search results in a new tab. As an Amazon Associate I earn from qualifying purchases.