
Clutch Assembly (08.01)
- Make
- Aston Martin
- Model
- DB9 Factory Workshop Manual
- Year
- Issue 2, 2005
- Section
- Clutch Assembly › Clutch Assembly (08.01)
Clutch Assembly (08.01)
Description
The clutch assembly is a balanced unit consisting of a flywheel, clutch friction plates and clutch cover.
The clutch is a twin plate, diaphragm spring type assembly. A concentric clutch slave cylinder is mounted around the first motion shaft in the torque tube bell housing.
The clutch master cylinder is mounted on the engine bulkhead and is operated directly by the clutch pedal.
A hydraulic connection from the master cylinder feeds pressurised fluid to the slave cylinder. The slave cylinder has an extension tube and bleed nipple extending from the left side of the bell housing for bleeding the system after any major work.
Specifications
Clutch Fluid
Castrol/Girling Universal Brake and Clutch fluid.
Clutch Assembly
Balanced assembly with alignment marks
Clutch Plate
Twin friction plates
Torque Figures
| Description | Nm | lb / ft. |
|---|---|---|
| Flywheel Bolts | 75-81 | 55.5-60 |
| Tighten the bolts in sequence. Loosen the bolts and then torque, in even stages, in the same sequence. | ||
| Clutch Bolts | 29-35 | 21.5-26 |
| Tighten x3 equally-spaced bolts, in-turn, to pull-down the clutch evenly. Then torque all bolts in sequence. | ||
| Starter Motor Bolts. | 30-35 | 22.5-26 |
Maintenance
Clutch Assembly
| Repair Operation Time (ROT) | |
|---|---|
| Item | Code |
| Clutch Renew | TBA |
Remove
Note alignment marks on clutch cover.
- Disconnect the vehicle battery.
Warning
If rasing vehicle on a ‘two post’ ramp (vehicle supported by underbody), ensurethat the rear end of the vehicle is securly strapped to the ramp. Faliure to strap the rear of vehicle down may lead to the vehicle falling off the ramp.
- Raise the vehicle and make safe.
- Remove the rear road wheel(s) and road wheel arch liners.
- Remove the front and rear undertrays and the shear plate.
Lower the front undertray to reveal the air intake for the alternator. Release the spring clip and part the flex pipe from the undertray.
- Remove the transaxle and the torque tube.
- (Refer to ‘Manual Transmission (07.03)’, page 7-3-1)
- (Refer to ‘Torque Tube’, page 5-1-2).
Warning
The clutch assembly is heavy. Ensure the clutch assembly is supported before removing final bolts.
- Install the crankshaft holding tool (Refer to ’303-1047 (Crankshaft Holding)’, page 20-1-6) to prevent crankshaft turning.
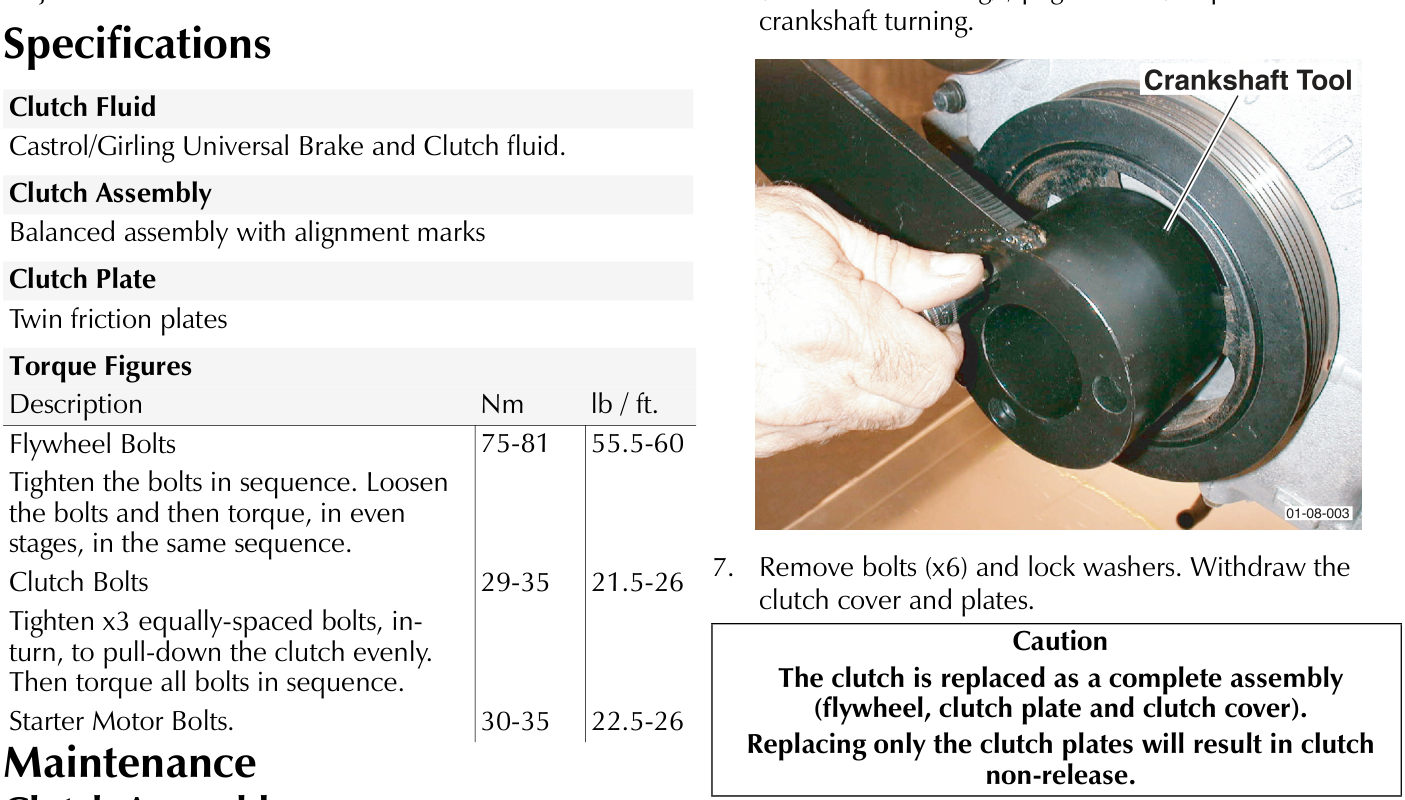
- Remove bolts (x6) and lock washers. Withdraw the clutch cover and plates.
Caution
The clutch is replaced as a complete assembly (flywheel, clutch plate and clutch cover). Replacing only the clutch plates will result in clutch non-release.
Image to Follow
Parts & tools for this job For 2005 Aston Martin DB9
- PARTClutch kitSearch: Aston Martin DB9 2005 clutch kit
- TOOLClutch alignment toolSearch: clutch alignment tool
- FLUIDGear oilSearch: Aston Martin DB9 manual gearbox oil
Links open Amazon search results in a new tab. As an Amazon Associate I earn from qualifying purchases.