
11. Automatic Vehicles Only.
- Make
- Aston Martin
- Model
- DB9 Factory Workshop Manual
- Year
- Issue 2, 2005
- Section
- Steering Column › 11. Automatic Vehicles Only.
11 Steering11. Automatic Vehicles Only.
- Ensure that the vehicle battery is disconnected at the negative terminal and that the ignition key is removed.
Warning
Allow a two minute power down period before proceeding. This will ensure that there is no power to the airbag system.
- Disarm and remove the air bag module (Refer to 'Driver Airbag', page 1-14-4).
- Remove the steering wheel (Refer to 'Steering Wheel', page 11-5-1).
- Retain the clockspring rotor in position, i.e. masking tape.
11. Automatic Vehicles Only.
Remove the paddle shift assembly.
- Disconnect the wiring harness plugs (x5).
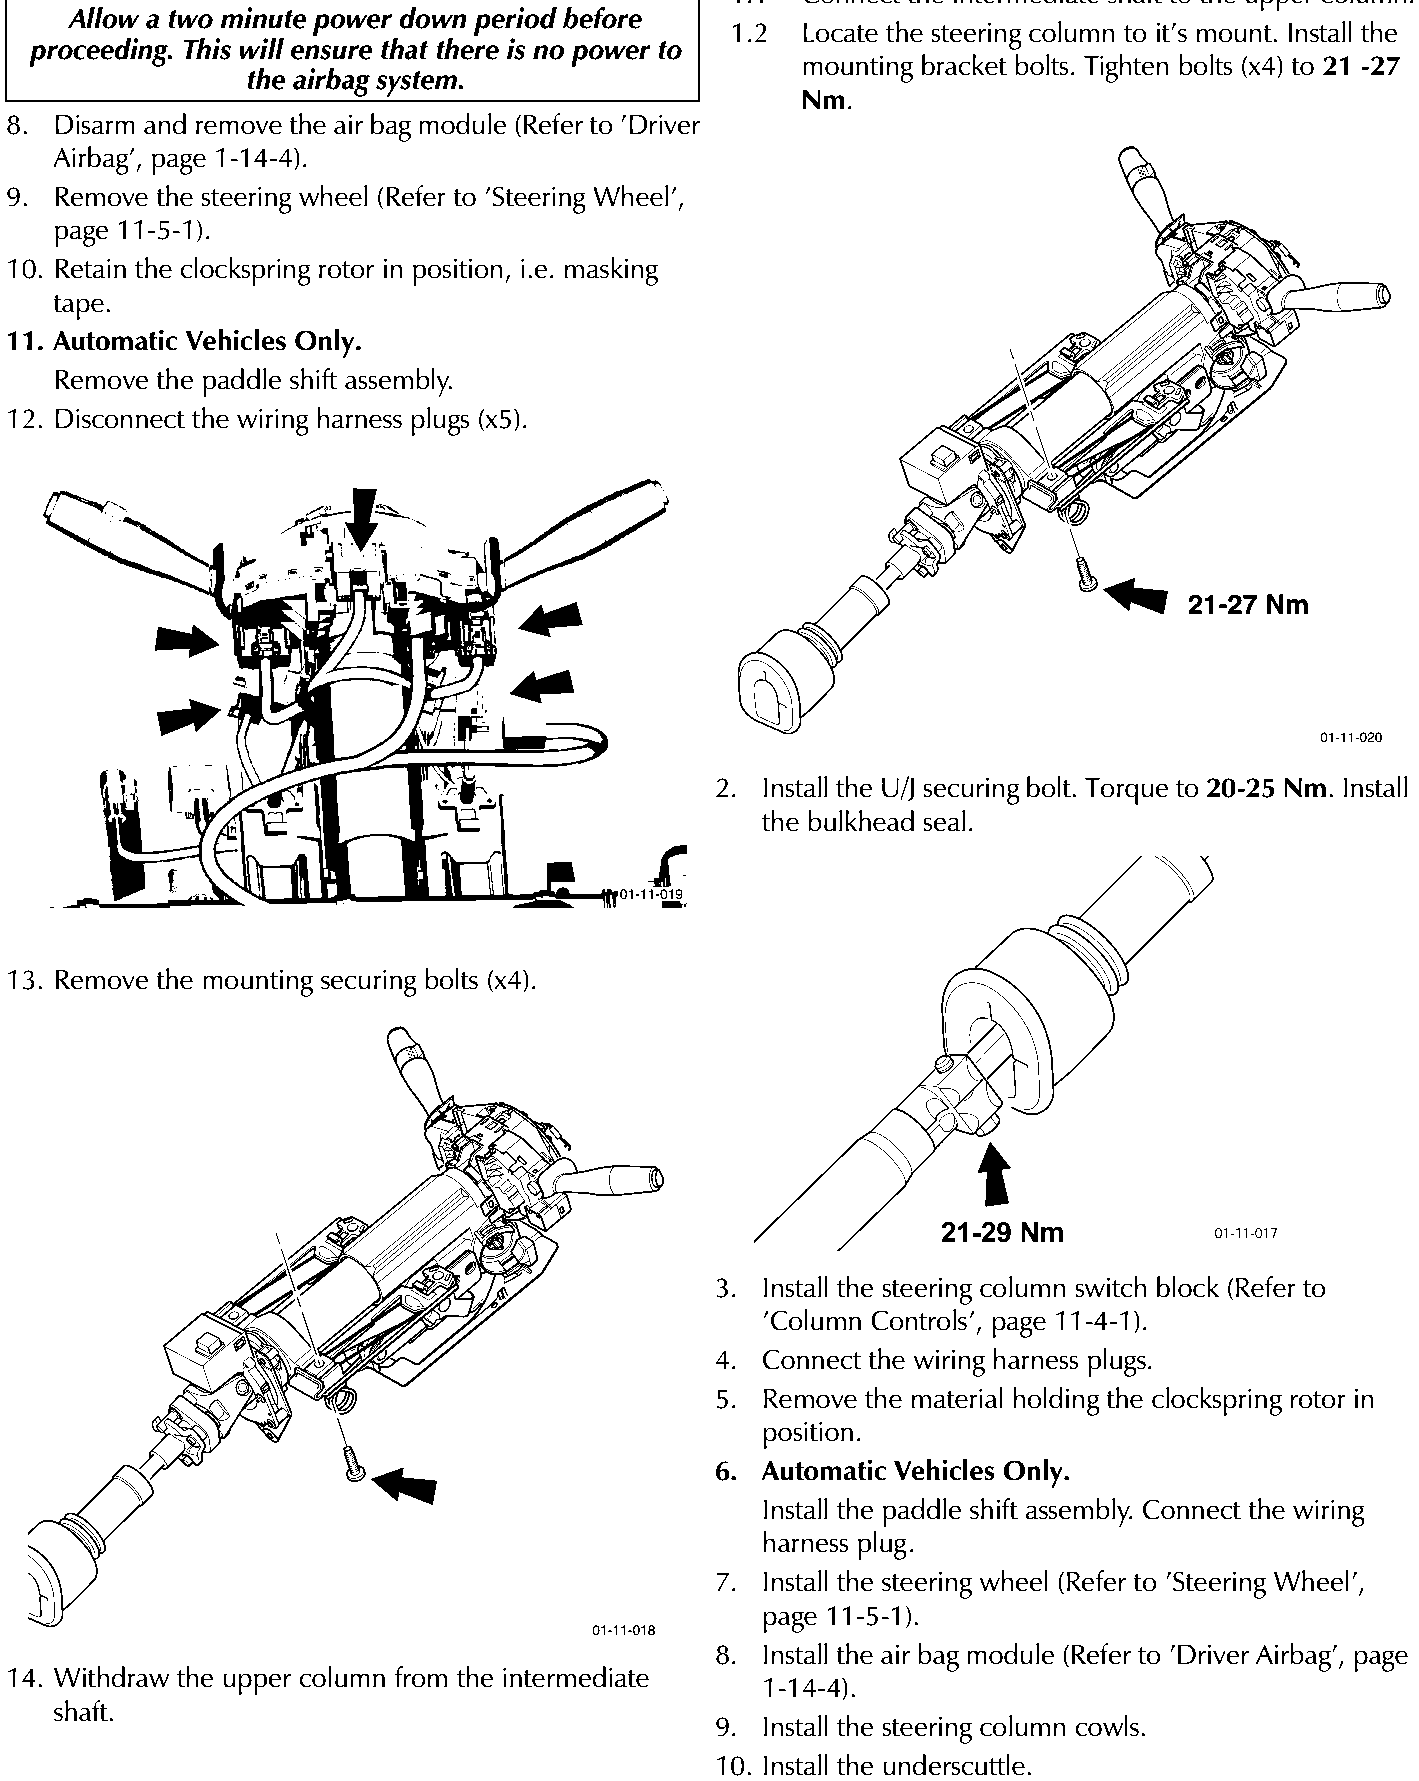
- Remove the mounting securing bolts (x4).
- Withdraw the upper column from the intermediate shaft.
Installation
- Install the upper column.
- Connect the intermediate shaft to the upper column.
- Locate the steering column to it's mount. Install the mounting bracket bolts. Tighten bolts (x4) to 21 -27 Nm.
- Install the U/J securing bolt. Torque to 20-25 Nm. Install the bulkhead seal.
- Install the steering column switch block (Refer to 'Column Controls', page 11-4-1).
- Connect the wiring harness plugs.
- Remove the material holding the clockspring rotor in position.
6. Automatic Vehicles Only.
Install the paddle shift assembly. Connect the wiring harness plug.
- Install the steering wheel (Refer to 'Steering Wheel', page 11-5-1).
- Install the air bag module (Refer to 'Driver Airbag', page 1-14-4).
- Install the steering column cowls.
- Install the underscuttle.
- Connect the vehicle battery.
Parts & tools for this job For 2005 Aston Martin DB9
- TOOLTie rod end toolSearch: tie rod end puller
- TOOLBall joint separatorSearch: ball joint separator
- FLUIDPower steering fluidSearch: Aston Martin power steering fluid
Links open Amazon search results in a new tab. As an Amazon Associate I earn from qualifying purchases.