
Caution
- Make
- Aston Martin
- Model
- DB9 Factory Workshop Manual
- Year
- Issue 2, 2005
- Section
- Specialist Tool Operation › Caution
20 Appendix and glossaryCaution · page 1 of 2
- Insert three screws (supplied with the new oil seal kit) into the three holes provided in the oil seal removal tool.
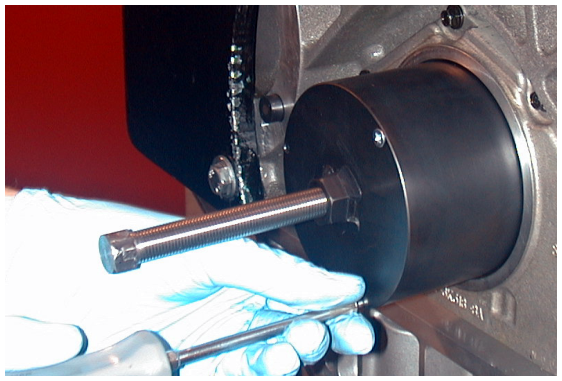
Screw the three screws in enough to attach to the oil seal slinger. Insert the oil seal removal tool bolt.
- Turn the bolt of the oil seal removal tool clockwise to withdraw the oil seal slinger.
- Remove the oil seal slinger, the three screws and the bolt from the oil seal removal tool.
Caution
Ensure that the oil seal removal tool is clean, free of dirt, grease and debris.
- Using the oil seal removal tool, carefully knock the crankshaft oil seal through the oil seal housing.
The oil seal will stop against the crankshaft / engine block web.
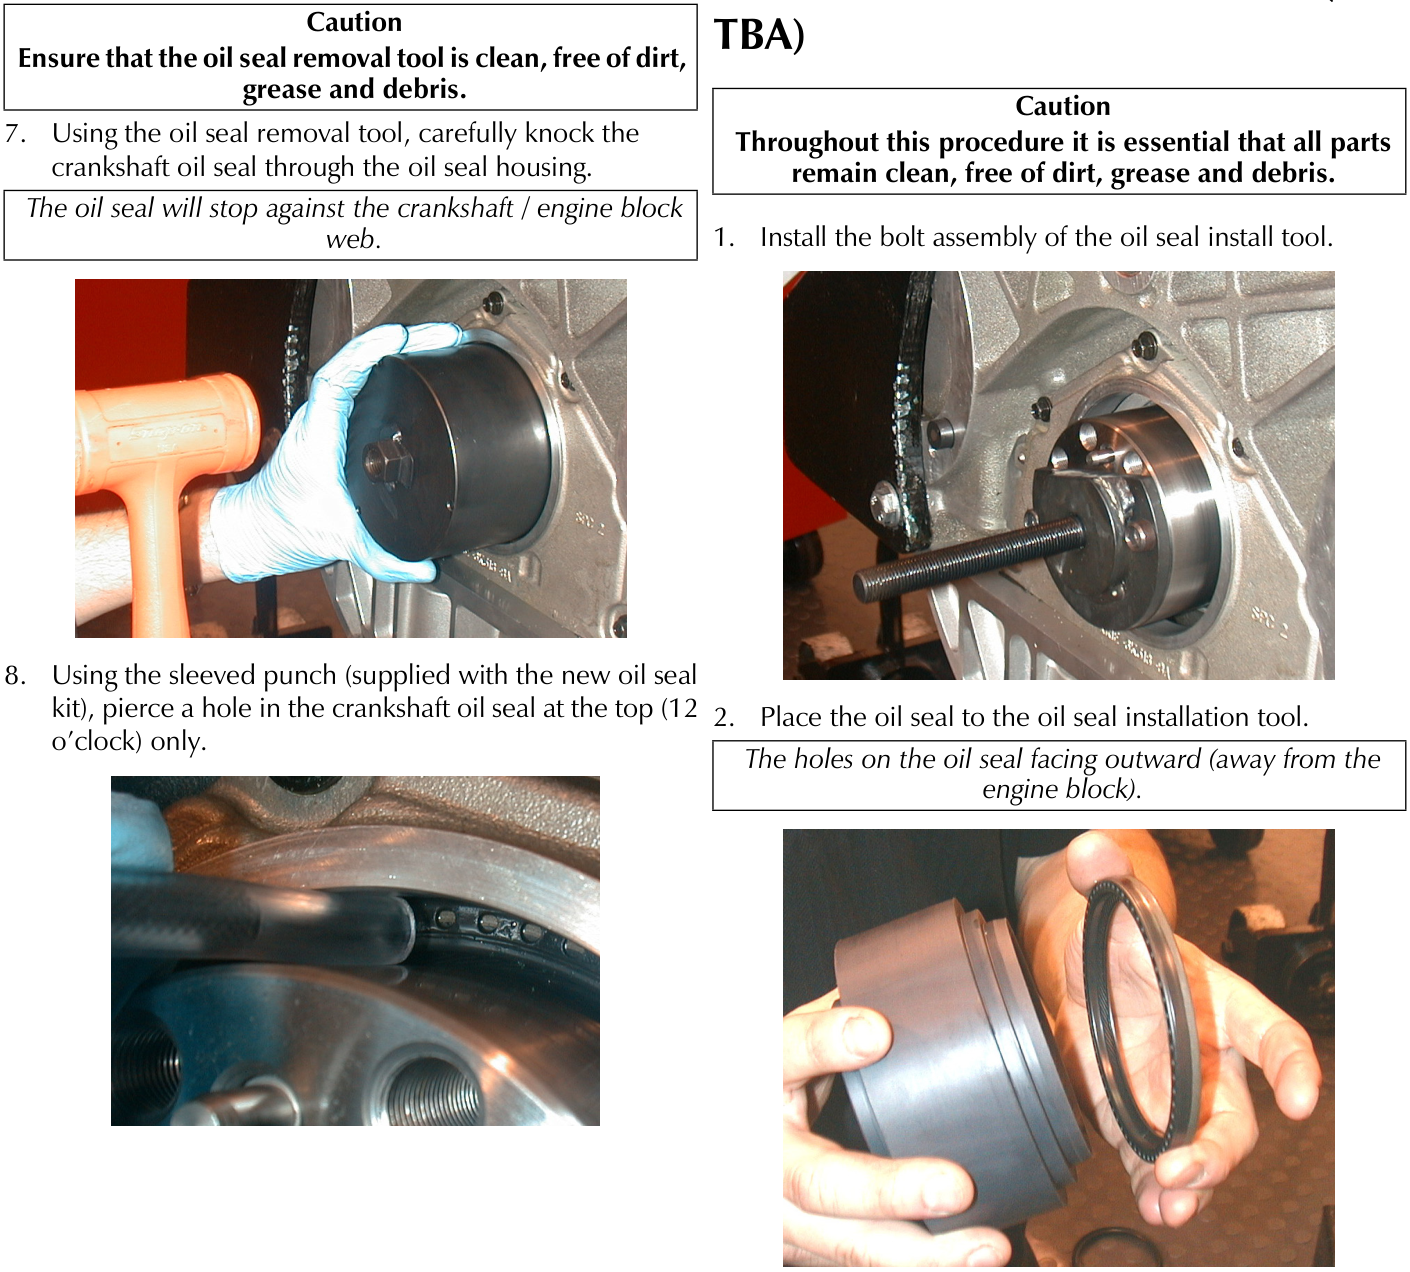
- Using the sleeved punch (supplied with the new oil seal kit), pierce a hole in the crankshaft oil seal at the top (12 o’clock) only.
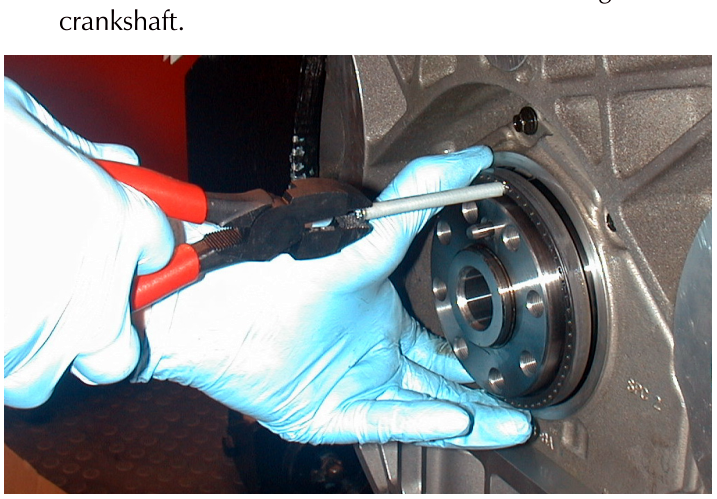
- Screw the sleeved screw (supplied with the new oil seal kit) into the pierced hole enough to attach to the crankshaft oil seal.
- Pull the crankshaft oil seal from the seal housing and the crankshaft.
Crankshaft Rear Oil Seal Install (No. TBA)
Caution
Throughout this procedure it is essential that all parts remain clean, free of dirt, grease and debris.
- Install the bolt assembly of the oil seal install tool.
- Place the oil seal to the oil seal installation tool.
The holes on the oil seal facing outward (away from the engine block).
Parts & tools for this job For 2005 Aston Martin DB9
- TOOLTorque wrenchSearch: 3/8 inch torque wrench
- TOOLSocket setSearch: socket set metric
- BOOKHaynes manualSearch: Haynes manual Aston Martin DB9
Links open Amazon search results in a new tab. As an Amazon Associate I earn from qualifying purchases.