audi Workshop Repair Guides

Audi Workshop Service and Repair Manuals

Dismantling and assembling 5th gear locking collar and synchronising hub > < Exploded view - 5th gear
Removing and installing 5th gear
  Note
The gearbox housing cover and 5th gear can also be removed without removing the gearbox from the vehicle. The gearbox oil must be drained off for this operation. The following instructions describe removal and installation with the gearbox removed from the vehicle.
   
Removing
l  Gearbox removed
–  Mount gearbox on assembly stand → Chapter.
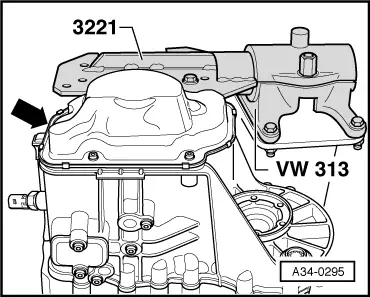
–  Unbolt gearbox housing cover -arrow-.
  A34-0295
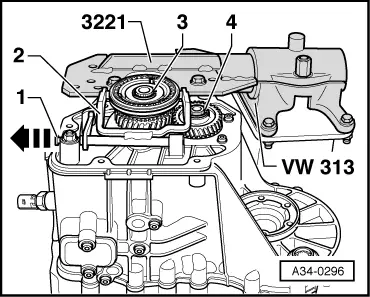
–  Pull out pivot pin -1- for 5th gear selector fork -2- and remove selector fork.
–  Remove circlip -3- for 5th gear synchronising hub.
–  Remove circlip -4- for 5th gear wheel.
–  Take off selector gear, locking collar with synchronising hub, and gear wheel.
  A34-0296
Installing
–  Check synchro-ring for wear → Fig..
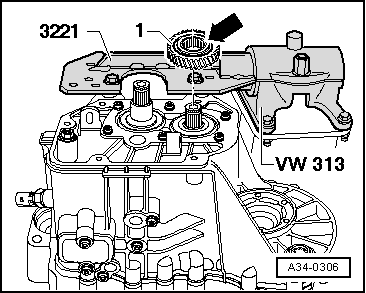
–  Fit 5th gear wheel -1-.
l  Installation position of 5th gear wheel: the large collar -arrow- points to the gearbox housing cover.
  A34-0306
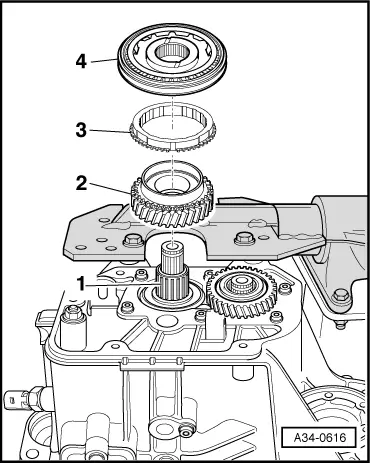
–  Install the following components in the sequence indicated:
1 - Needle bearing for 5th speed selector gear
2 - 5th speed selector gear
3 - 5th gear synchro-ring
4 - 5th gear synchronising hub with locking collar and check ring
  A34-0616
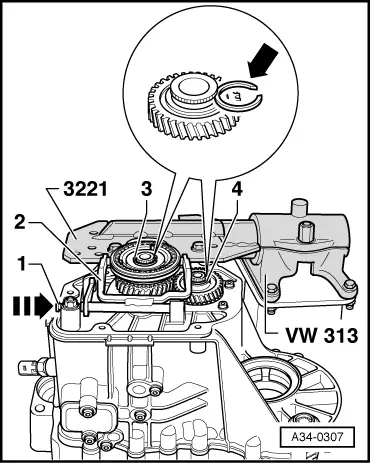
–  Fit 5th gear selector fork -2- and slide pivot pin -1- in onto stop in direction of -arrow-.
–  Determine thickness of new circlips -arrow- for input shaft -3- and output shaft -4-.
–  Determine the thickest circlip that will just fit and install it. For part number, refer to → Electronic parts catalogue.
The following circlips are available:
  A34-0307
Circlip thickness (mm)
2.002.102.20

–  Install gearbox housing cover.
  Note
If the gearbox cover is installed with the gearbox in the vehicle, fill up with gear oil and check oil level → Chapter.
Tightening torques → Chapter
   

Dismantling and assembling 5th gear locking collar and synchronising hub > < Exploded view - 5th gear