-
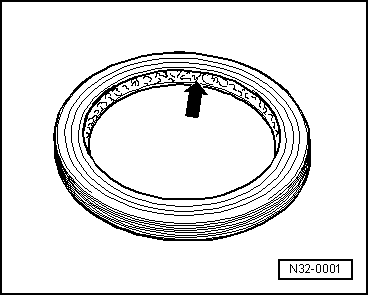
◆ → Before installing oil seals (radial shaft seals), pack space between sealing lips -arrow- with grease.
-
◆ The open side of the oil seals faces toward the side with fluid filling.
-
◆ Before installing, lightly lubricate outer circumference of seal and sealing lips with ATF or gear oil, depending on fitting location.
-
◆ Lightly lubricate O-rings with ATF before inserting to prevent them being trapped and damaged when assembling.
-
◆ Use only ATF in the parts of the gearbox where ATF is the specified lubricant. Other types of lubricant can cause problems with the hydraulic actuation of the gearbox.
-
◆ When replacing oil seals, always vary the point at which the sealing lips make contact (use insertion depth tolerances).
-
◆ After installation, check and if necessary correct the following levels in the area affected: ATF in planetary gearbox => Page 00-30 onwards.
Nuts, bolts
-
◆ Slacken the bolts in reverse sequence to the specified tightening sequence.
-
◆ Nuts and bolts which secure covers and housings should be slackened and tightened crosswise in stages if no tightening sequence is specified.
-
◆ Parts which are particularly sensitive to distortion (e.g. valve body) must be kept straight when removing and installing; loosen or tighten diagonally in stages.
-
◆ The tightening torques stated apply to non-oiled nuts and bolts.
-
◆ Replace self-locking bolts and nuts.
-
◆ The threads of bolts which are secured by a locking fluid should be cleaned with a wire brush. Then apply AMV 185 101 A1 when inserting.
-
◆ Threaded holes into which self-locking bolts or bolts coated with locking fluid are screwed, must be cleaned (e.g. with a tap). Otherwise there is a danger of bolts shearing when subsequently being removed.
Locking elements
-
◆ Do not over-stretch circlips.
-
◆ Always renew circlips which have been damaged or over-tensioned.
-
◆ Circlips must be properly seated in the base of the groove.
Mounting
-
◆ Attach the needle bearing with the written side (greater plate thickness) to the installing tool.
-
◆ Lubricate bearings with gear oil or ATF, depending on fitting location.
-
◆ The taper roller bearings for the output shaft and the differential in rear final drive are low-friction bearings. Do not additionally oil new taper roller bearings when measuring friction torque. The bearings are pre-treated at the factory with a special type of oil for this purpose.
-
◆ Do not interchange inner or outer races of bearings of the same size.
-
◆ Always replace the taper roller bearings on one shaft together and use new bearings from a single manufacturer.
-
◆ Heat inner races of taper roller bearings to approx. 100 °C before installing. Press in up to stop when installing so there is no axial clearance.
Adjustment shims
-
◆ Use a micrometer to measure the shims at several points. Different tolerances make it possible to obtain exact shim thickness required.
-
◆ Check for burrs and damage. Install only adjustment shims which are in perfect condition.
-
◆ Only install perfect, undamaged shims.
Valve body
-
◆ Renew the valve body if any of the selector elements are scorched.
Self-diagnosis
-
◆ Before performing repairs to the automatic gearbox, determine the cause of the fault as precisely as possible using the self-diagnosis.
The self-diagnosis is described in the Booklet Audi A4 1995 ä, Automatic Gearbox 01V, Self-diagnosis.
=> Automatic Gearbox 01V, Self-diagnosis; Repair group 01; Performing self-diagnosis
|