
SRX AWD V6-3.6L (2008)
Replacement) .
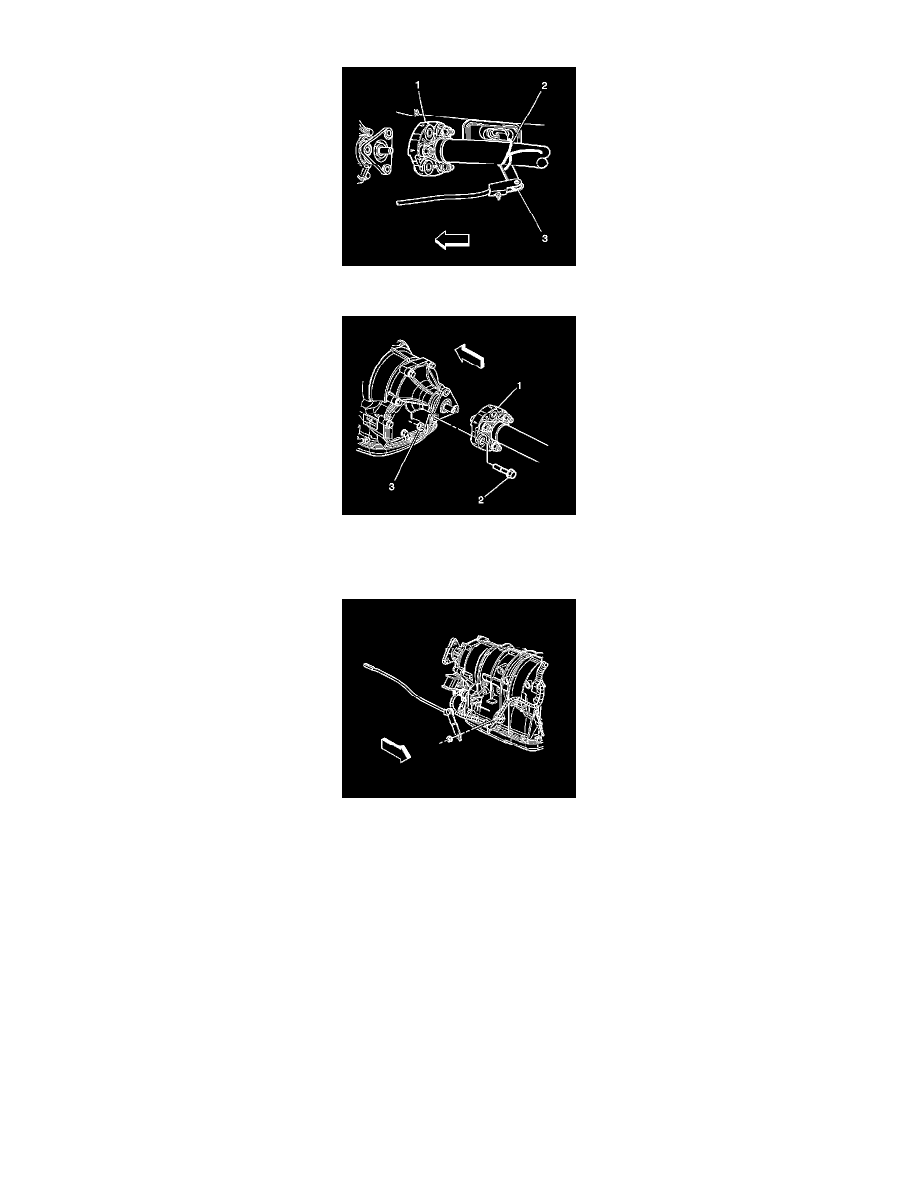
8. Remove the mechanics wire (2) securing the front propeller shaft (1) to the shift control lever (3).
9. Install the propeller shaft coupler (1) to the transmission flange. Refer to Rear Propeller Shaft Replacement (RWD) (See: Drive/Propeller Shafts,
Bearings and Joints/Drive/Propeller Shaft/Service and Repair/Rear Propeller Shaft Replacement (RWD)) .
10. Install the exhaust system. Refer to Exhaust System Replacement (See: Engine, Cooling and Exhaust/Exhaust System/Service and Repair) .
11. Place the transmission in the park position by rotating the shift shaft fully counterclockwise.
12. Connect the shift linkage to the transmission.
Notice: Refer to Fastener Notice (See: Service Precautions/Vehicle Damage Warnings/Fastener Notice) .
13. Install the transmission manual shift shaft nut.
Tighten the nut to 9 N.m (80 lb in).
14. Fill the transmission to the proper level. Refer to Transmission Fluid Check (See: Testing and Inspection/Component Tests and General
Diagnostics/5L40-E/5L50-E - Automatic Transmission/Transmission Fluid Check) .
15. Lower the vehicle.