
Planned maintenance
- Make
- Fiat
- Model
- Bravo /Brava (182) Factory Service Manual
- Year
- 1995–2001
- Section
- Planned maintenance (98 range) › Planned maintenance
00 Introduction and technical dataPlanned maintenance
Planned maintenance
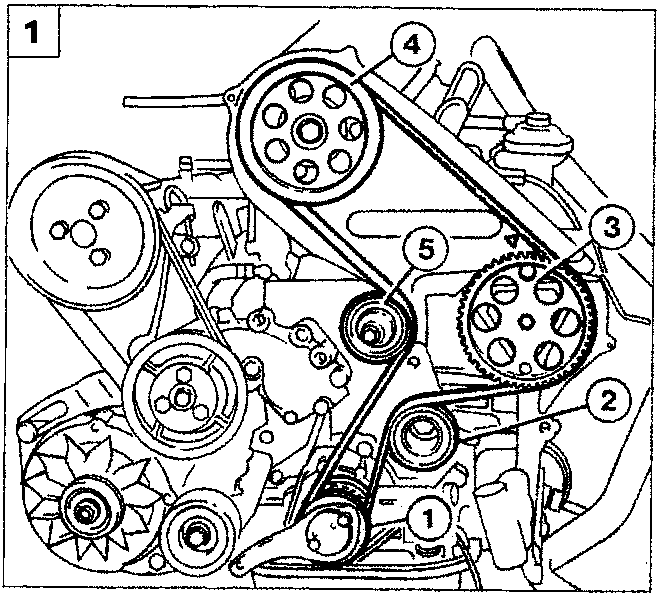
Fitting and tensioning the timing drive belt
- Complete the fitting of the timing belt observing the following order:
- Crankshaft gear;
- fixed pulley;
- injection pump pulley;
- timing pulley;
- belt tensioner.
Check that the reference on the injection pump corresponds with the fixed reference on the rear cover.
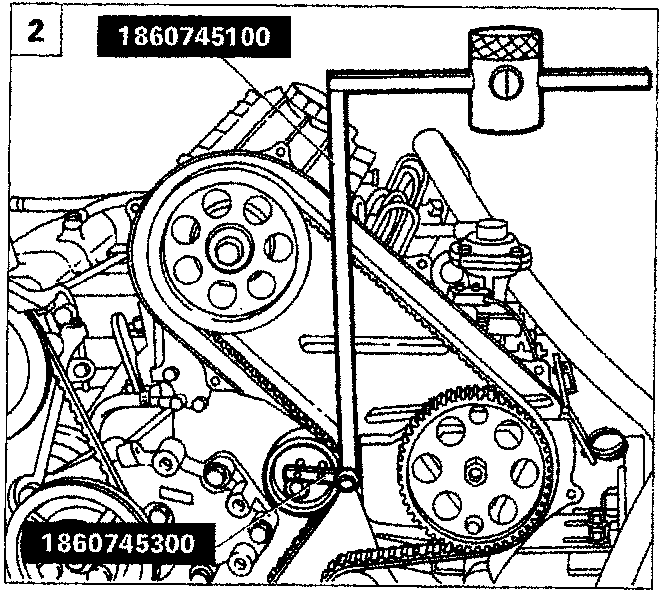
- Fit part 1860745300 on tool 1860745100, the position the weight with the knurled part 120 mm away on the millimetric rod and lock it in place. Fit the tool produced in this way on the belt tensioner as illustrated in the diagram and, acting on the joint, position the millimetric rod on the horizontal plane and lock the joint fixing bolt.
- Tighten the bolt fixing the camshaft drive pulley to the recommended torque. Remove the tools positioned previously for determining the timing and T.D.C. and the flywheel lock.
Let the belt bed in by rotating the crankshaft through two revolutions in its direction of rotation and tighten the nut fixing the belt tensioner to torque, then remove the tools used for the tensioning.
NOTE During this last phase the millimetric rod may move away from the horizontal plane; if this is the case, the joint must be adjusted again and the operation repeated.
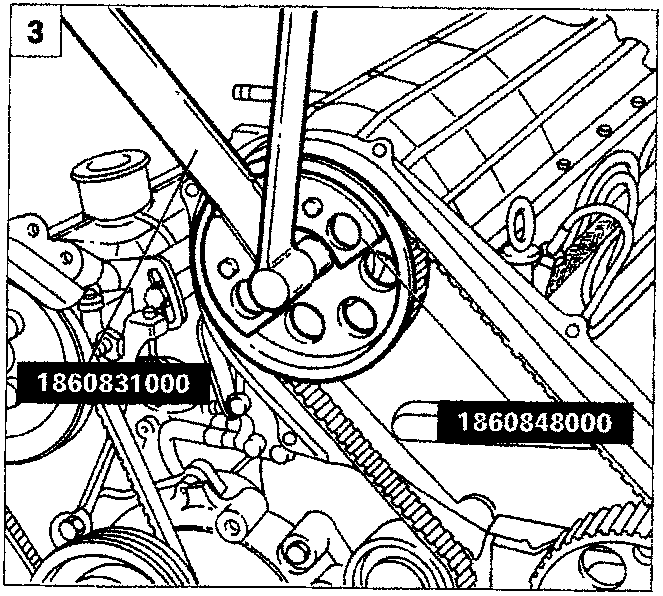
Refit the previously removed components reversing the procedure described for the removal.
Parts & tools for this job For 1995 Fiat Bravo
- PARTOil filterSearch: Fiat Bravo 1995 oil filter
- TOOLOil filter wrenchSearch: oil filter wrench
- FLUIDEngine oilSearch: Fiat Bravo engine oil
Links open Amazon search results in a new tab. As an Amazon Associate I earn from qualifying purchases.