
Checking the diodes
- Make
- Fiat
- Model
- Punto (176) Factory Service Manual
- Year
- 1993–1999
- Section
- Recharging system › Checking the diodes
CHECKING THE DIODES
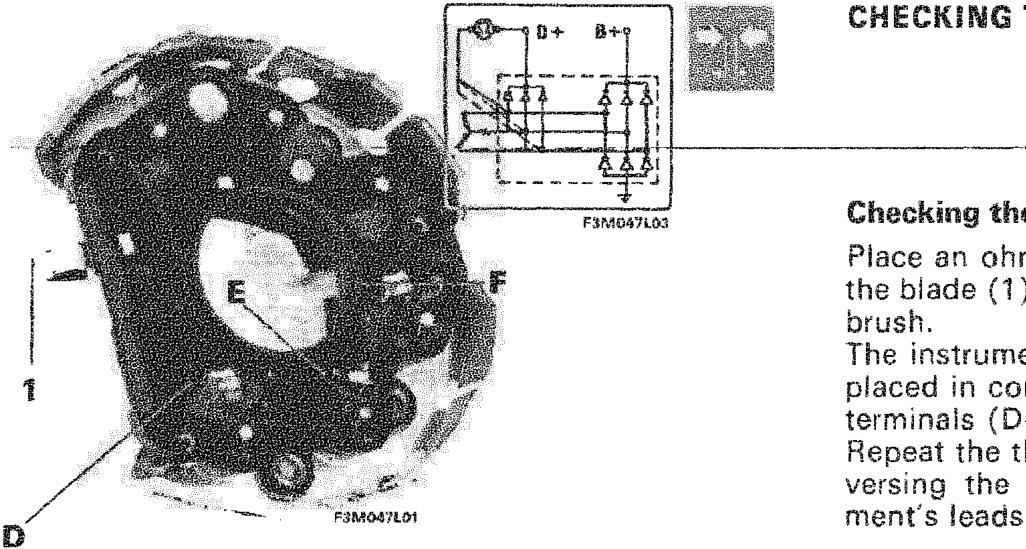
Checking the excitation diodes
Place an ohmmeter lead in contact with the blade (1) which touches the positive brush.
The instrument’s second lead should be placed in contact with each of the three terminals (D–E–F) in turn.
Repeat the three measurements after reversing the connections of the instrument’s leads.
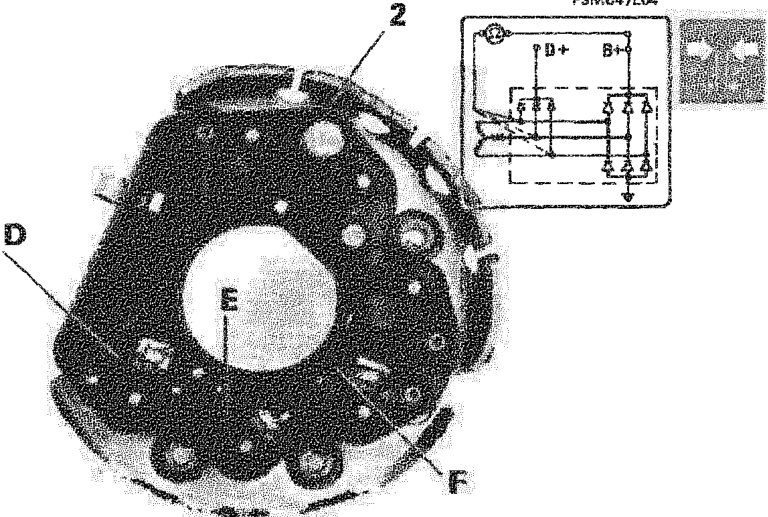
Checking positive power diodes
Place an ohmmeter lead in contact with the positive diode pack (2).
The instrument’s second lead should be placed in contact with each of the three terminals (D–E–F) in turn.
Repeat the three measurements after reversing the connections on the instrument’s leads.
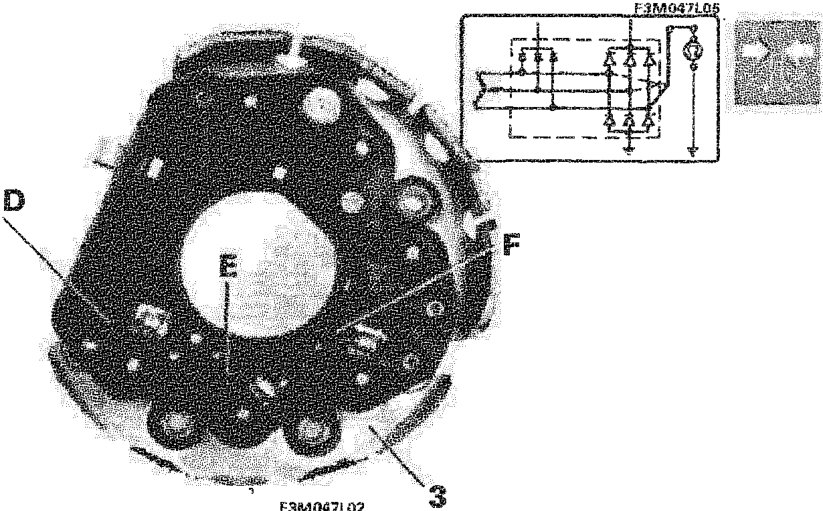
Checking negative power diodes
Place an ohmmeter lead in contact with the negative diode pack (3).
The instrument’s second lead should be placed in contact with each of the three terminals (D–E–F) in turn.
Repeat the three measurements after reversing the connections of the instrument’s leads.
Parts & tools for this job For 1993 Fiat Punto
- TOOLDigital multimeterSearch: automotive digital multimeter
- PARTAssorted fuse kitSearch: car fuse assortment kit
- TOOLWire crimper and connector kitSearch: wire crimper connector kit
Links open Amazon search results in a new tab. As an Amazon Associate I earn from qualifying purchases.