ford Workshop Repair Guides

Ford Workshop Service and Repair Manuals

Heating and Ventilation > < Heater Core and Evaporator Core Housing - Vehicles With: Manual Temperature Control
Heating and Ventilation - Heater Core and Evaporator Core Housing—Vehicles With: Automatic Temperature Control C-MAX 2003.75 (06/2003-)
Disassembly and Assembly

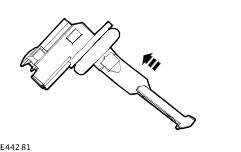
1. Disassemble the components in the order indicated in the following illustration(s) and table(s).

NOTE:
NOTE:Pull out the evaporator and heat exchanger at the same time.

 
Item
Part Number
Description
1
-
Heater housing water drain pipe
2
-
Air distribution flap actuator bolts
3
-
Air distribution flap actuator
4
-
Defroster jet actuator bolts/air vent distribution flap
5
-
Defroster jet actuator/air vent distribution flap
6
-
Passenger-side temperature control flap actuator bolts
7
-
Passenger-side temperature control flap actuator
8
-
Heater core/evaporator housing gasket
9
-
Bulkhead aperture cover section bolts
10
-
Bulkhead aperture cover section
11
-
Bulkhead aperture spacer
12
-
Evaporator housing cover bolts
13
-
Evaporator housing cover
14
-
Evaporator
15
-
Heater core

 
Item
Part Number
Description
17
-
Air distribution flap housing bolts
18
-
Air distribution flap housing
20
-
Air distribution flap actuator bolts
21
-
Air distribution flap actuator
22
-
Air distribution flap actuator bolts
23
-
Air distribution flap actuator
24
-
Driver-side temperature control flap actuator bolts
25
-
Driver-side temperature control flap actuator
26
-
Pollen filter housing cover bolts
27
-
Pollen filter housing cover
See Disassembly Detail
28
-
Pollen filter
29
-
Heater core / evaporator lower housing bolts
30
-
Heater core / evaporator lower housing

2. To assemble, reverse the disassembly procedure.

Disassembly Details

Item 16 : Air outlet temperature sensor

  1. Turn the air outlet temperature sensor clockwise through 90 degrees and remove.

Item 19 : Blower motor

  1. NOTE:
    NOTE:On RHD vehicles, turn the blower motor clockwise to release.
    Release the blower motor.
    1. Press the release button.
    1. Turn the blower motor counter-clockwise as far as possible.

  1. Remove the blower motor using the special tool.

Item 27 : Pollen filter housing cover

  1. NOTE:
    NOTE:In the event of damage to a pollen filter housing cover threaded hole, the pollen filter housing cover can be attached by means of the additional hole next to the original hole.
    Remove the pollen filter housing cover.
    1. Lift the pollen filter housing cover sideways.
    1. Pull out the pollen filter housing cover.

Assembly Details

Item 19 : Blower motor

  1. NOTE:
    NOTE:On RHD vehicles, turn the blower motor clockwise to lock.
    NOTE:
    NOTE:Note top position on blower motor.
    Move the blower motor into the installation position using the special tool.
    • Turn the blower motor into the installation position, insert and turn clockwise as far as possible.

Heating and Ventilation > < Heater Core and Evaporator Core Housing - Vehicles With: Manual Temperature Control