| In-vehicle Repair Special Tool(s) | | Remover, Vibration Damper, Crankshaft 303 - 338 (21153B) | | | Installer, Vibration Damper, Crankshaft 303 - 130 (21076) | | | Flange Holding Wrench, Universal 205 - 072 (15030A9 | Materials Name Specification Black silicone rubber (F4AZ - 19562 - B) WSE - M46323 - A6 Silicone gasket and sealant WSE - M4G323 - A6 Removal | | -
Disconnect the battery ground cable. | | | -
Loosen the RH front wheel nuts. | | | -
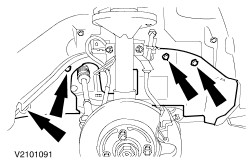
Remove the fender splash shields. | | | -
CAUTION:Prevent the crankshaft from rotating in a counterclockwise direction during the crankshaft pulley bolt removal. NOTE:The crankshaft pulley bolt is tightened to yield and must not be reused. Remove the crankshaft pulley bolt and washer. - Use a the special tool to hold the crankshaft pulley.
- Remove the crankshaft pulley bolt.
| | | -
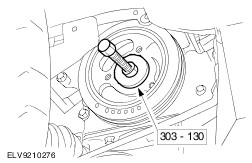
Using the special tool, remove the crankshaft pulley. | Installation | | -
NOTE:The crankshaft pulley bolt is torqued to yield and must not be reused. Remove all residues that may interfere with the sealers ability to adhere. | | | -
Apply Silicone gasket and sealant to the front of the crankshaft on the inside diameter surface of the crankshaft pulley at the keyway. | | | -
NOTE:Use the washer of the new crankshaft pulley bolt for installation. Using the special tool, install the crankshaft pulley. | | | -
NOTE:Crankshaft pulley bolt is torqued to yield and must not be reused. Install the crankshaft pulley bolt. - Install a the special tool to hold the crankshaft pulley.
| | | -
Install the fender splash shields. | | | -
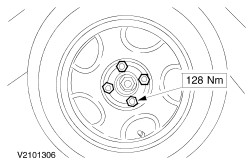
Install the RH front wheel. | | | -
NOTE:When the battery has been disconnected and reconnected, some abnormal drive symptoms may occur while the vehicle relearns its adaptive strategy. The vehicle may need to be driven 16 km (10 miles) or more to relearn the strategy. Connect battery ground cable. | | |