Remove the upper intake manifold. For additional information, refer to Upper Intake Manifold in this section.
Disconnect the left-hand and right-hand spark plug wires and the bracket.
Remove fuel charging wiring from the fuel injectors.
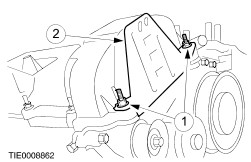
Remove the ignition coil.
Disconnect the ignition coil electrical connectors.
Remove the bolts.
Disconnect the grand strap and radio noise suppressor.
Remove the ignition coil.
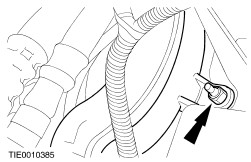
Remove the in-line connector bracket from the right-hand valve cover.
Remove the nuts.
Remove the bracket.
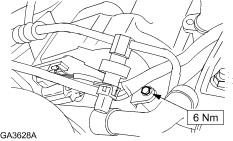
Remove two nuts and remove the wiring harness shield from the right-hand valve cover.
NOTE:Remove the bolts in the indicated sequence.
Remove the valve cover and discard the gasket.
Installation
NOTE:Install a new gasket in the valve cover and install the valve cover within six minutes of applying the sealer. Before installing the valve cover, apply a drop of sealer approximately 8 mm in diameter to the joint areas shown in the diagram.
Prior to installation, clean the valve cover sealing surfaces using a shop towel and metal surface cleaner.
Tighten the valve cover bolts in the indicated sequence.
Install the right-hand wiring harness shield and two nuts.
Install the in-line connector bracket to the right-hand valve cover.
NOTE:Verify the ground cable is in place when installing the ignition coil.
Install the ignition coil.
Position the ignition coil.
Install the bolts.
Connect the radio noise suppressor and ground strap.
Connect the electrical connectors.
Install the fuel charging wiring.
Begin at the front of the engine and work towards the rear of the engine.
Connect the spark plug wires to the spark plugs and install the bracket.
Install the upper intake manifold. For additional information, refer to Upper Intake Manifold in this section.
NOTE:When the battery has been disconnected and reconnected, some abnormal drive symptoms may occur while the vehicle relearns its adaptive strategy. The vehicle may need to be driven 16 km (10 miles) or more to relearn the strategy.