Ford Workshop Service and Repair Manuals
HOME
FEATURES
MENU
INDEX
ABOUT US
Forward-Coast-Direct Clutches >
< Forward-Coast-Direct Clutch Cylinder and Reverse Clutch Drum - Assembly
Cougar 1999 (08.1998-01.2001)
Mechanical Repairs
3 Powertrain
307 Automatic Transmission-Transaxle / 307-01 Automatic Transmission-Transaxle
Description and Operation
Diagnosis and Testing
General Procedures
In-vehicle Repair
Removal
Disassembly
Disassembly and Assembly of Subassemblies
Forward One-Way Clutch
Automatic Transmission/Transaxle - Forward One-Way Clutch
Cougar 1999 (08/1998-01/2001)
Disassembly and Assembly of Subassemblies
Disassembly
Forward one-way clutch
Item
Part Number
Description
1
–
Coast clutch hub retaining ring
2
–
Coast clutch hub
3
–
Forward one-way clutch outer ring
4
–
Forward one-way clutch end cap
5
-
Forward one-way clutch
6
-
Forward one-way clutch end cap
7
–
Forward one-way retainer
8
–
Low intermediate sun gear, race and bushing assembly
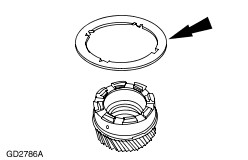
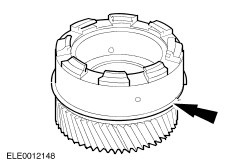
Remove the coast clutch hub retaining ring.
Remove the coast clutch hub.
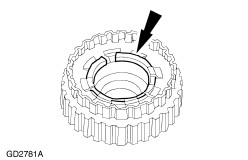
Remove the forward one-way clutch outer ring and forward one-way clutch with the end caps.
NOTE:
Orientation of the end caps forward one-way clutch. New design end caps are of the same thickness and interchangeable (but not reversible).
NOTE:
Not all transaxles contain the forward one-way clutch style shown.
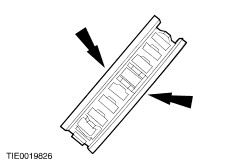
Remove the forward one-way clutch end caps from the forward one-way clutch.
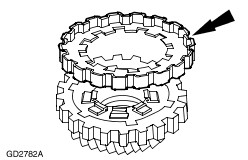
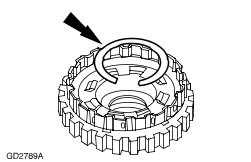
Remove the forward one-way clutch retainer.
Remove the retaining ring downward over the gear.
WARNING:
Wear protective goggles when using compressed air to clean components.
Thoroughly clean all components and blow them dry with moisture-free regulated compressed air.
Inspect the forward one-way clutch components for damage and wear.
Inspect the forward one-way clutch.
Inspect the forward one-way clutch and end caps.
Inspect the inner race and low-intermediate sun gear assembly.
Inspect the lube holes.
Inspect the coast clutch hub.
Assembly
Install the retaining ring.
NOTE:
The tabs on the forward one-way clutch retainer face downward.
Install the forward one-way clutch retainer.
NOTE:
Orientation of the forward one-way clutch end caps. New design end caps are of the same thickness and interchangeable (but not reversible).
Install the forward one-way clutch end caps onto the forward one-way clutch.
Install the forward one-way clutch and end caps in the forward one-way clutch outer ring.
NOTE:
Lube grooves face upward (away from the sun gear) forward one-way clutch.
Install the forward one-way clutch outer ring and one-way clutch on the forward one-way clutch inner race by rotating them.
Install the coast clutch hub.
NOTE:
The ends of the retaining ring should point toward the coast clutch hub.
NOTE:
Make sure the retaining ring is fully seated upon installation.
Install the coast clutch hub retaining ring.
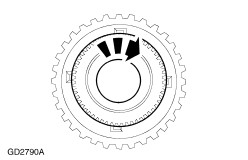
Check the operation of the forward one-way clutch with the low-intermediate sun gear facing upward.
Hold the outer race firmly.
Rotate the low-intermediate sun gear clockwise.
The low-intermediate sun gear should rotate with a slight drag without attempting to rotate the outer race.
Rotate the low-intermediate sun gear counterclockwise; the low-intermediate sun gear should rotate the outer race.
Mechanical Repairs
3 Powertrain
307 Automatic Transmission-Transaxle / 307-01 Automatic Transmission-Transaxle
Description and Operation
Diagnosis and Testing
General Procedures
In-vehicle Repair
Removal
Disassembly
Disassembly and Assembly of Subassemblies
Forward One-Way Clutch
Forward-Coast-Direct Clutches >
< Forward-Coast-Direct Clutch Cylinder and Reverse Clutch Drum - Assembly