
Crown Victoria V8-4.6L SOHC VIN 6 (1996)
5.
Measure the distance from the top of the pitman arm forging to the bottom of the centerlink using a digital caliper. See Figure 2.
6.
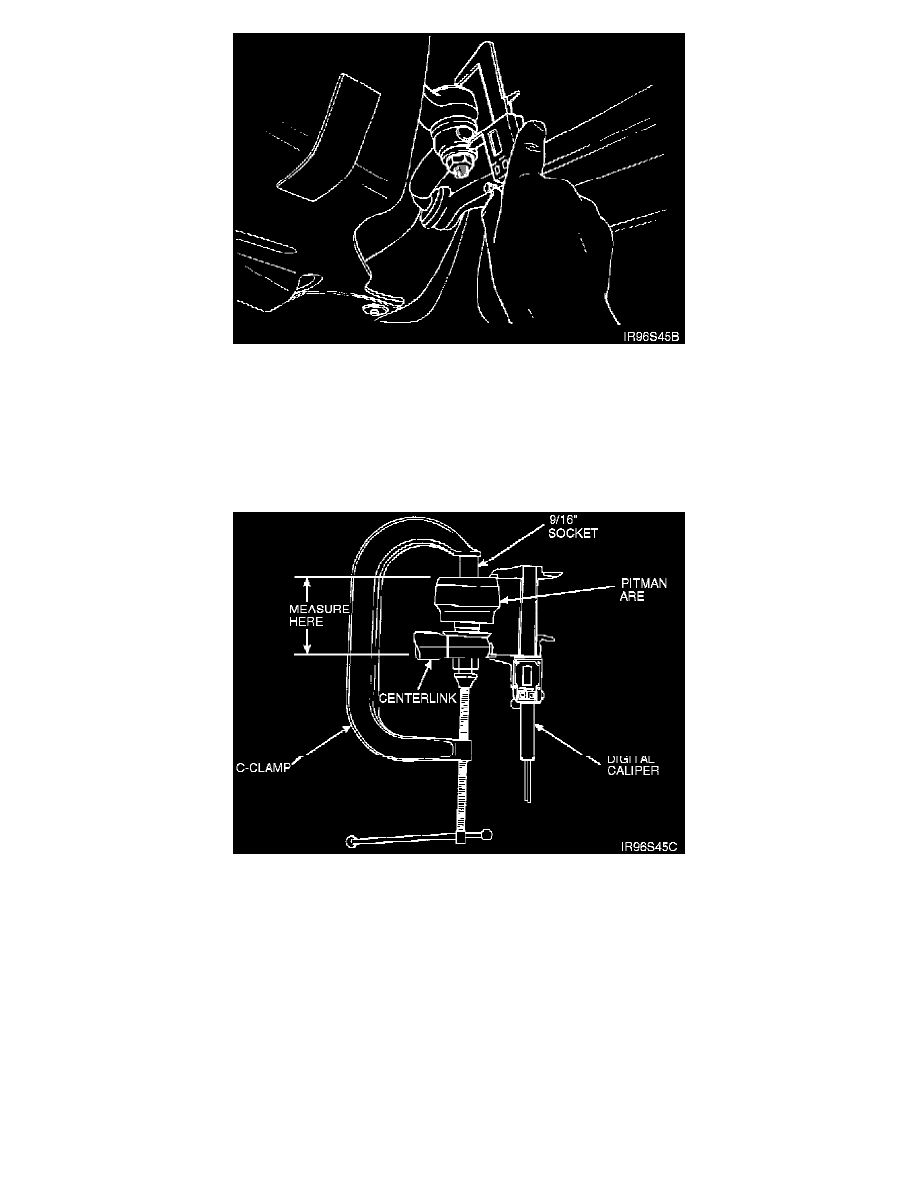
Place a 9/16 inch socket over the zerk fitting to protect it.
7.
Attach a 6 inch or 8 inch C-clamp between the top surface of the socket and the center of the pitman arm ball stud.
8.
Tighten C-clamp slowly to fully compress the joint until it bottoms out. Don't overtighten.
9.
Measure the distance from the top of the pitman arm forging to the bottom of the centerlink using a digital caliper. See Figure 3.
10.
Subtract the second measurement (compressed) from the first measurement (non-compressed) to get the total play (movement).
11.
The allowable pitman arm movement is 2.5 mm (0.100 inch). If movement is over this limit, replace the pitman arm. Refer to appropriate Service
Manual for pitman arm replacement.
12.
Once inspection is complete, lubricate the pitman arm ball joint until grease comes out past the seal on all sides, use recommended grease ESA
M1C75 B. If the part will not accept grease, replace the pitman arm per service manual instructions. The grease fitting is located on the top of the
pitman arm ball joint.
13.
Lower vehicle and turn air suspension system on if equipped.
Dealer Letter
August, 1996