
Escape 2WD L4-2.5L Hybrid (2010)
4. Remove the A/C return duct assembly.
5. NOTE: Due to clearance issues, the 40-pin connector must be disconnected last during the removal process and connected first during the
installation process.
Loosen the bolt of the 40-pin low voltage connector.
-
To install, tighten to 5 Nm (44 lb-in).
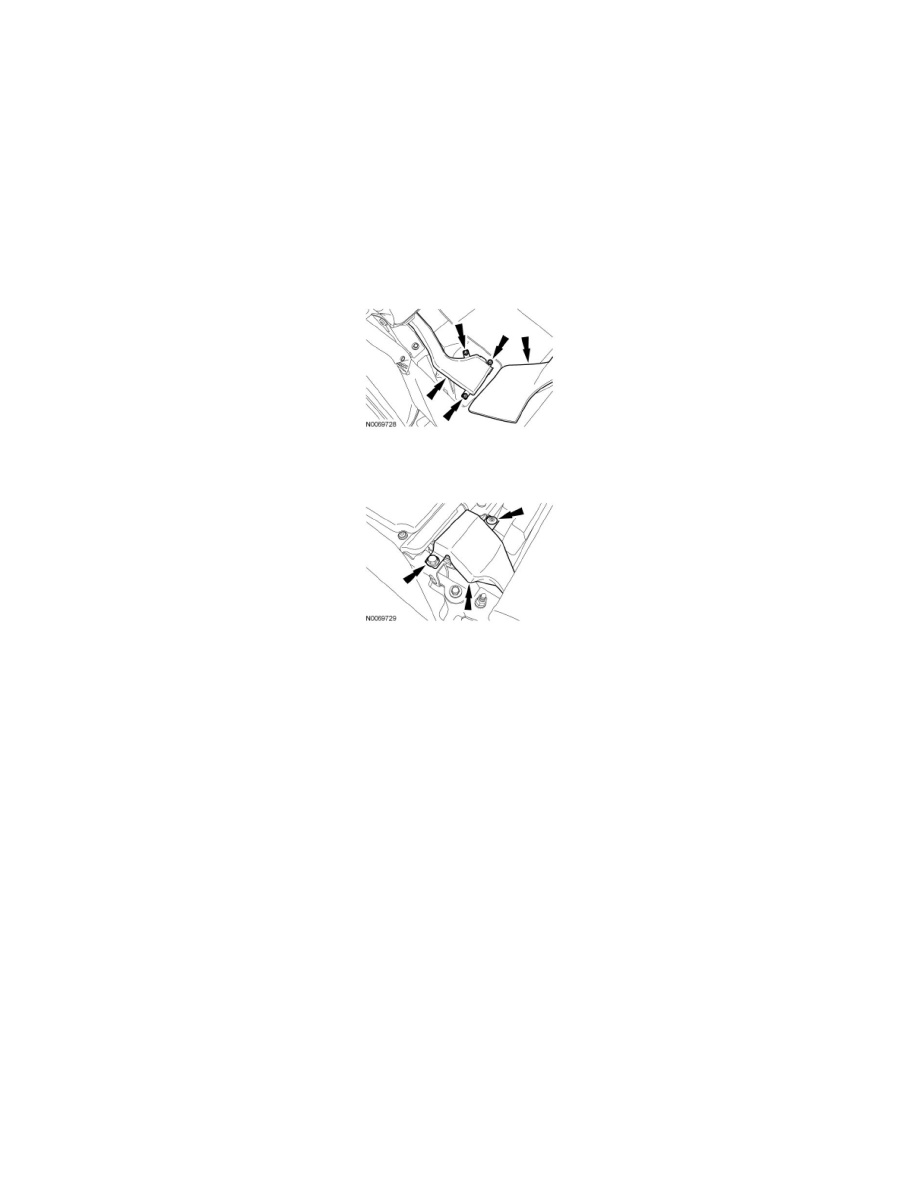
6. NOTE: Access the shield nuts through the slotted opening in the carpet.
From the right rear door opening, fold the right rear seat cushion forward and remove the 2 high-voltage cables shield nuts.
-
To install, tighten to 9 Nm (80 lb-in).
7. Fold the right rear seat backrest down and remove the high-voltage cables shield bolt, then remove the scrivet.
-
To install, tighten to 9 Nm (80 lb-in).
8. Remove the high-voltage cables shield.
9. Press the locking tab down and rotate the locking lever upward until the aligning dowels are disengaged from the locking lever to remove the
high-voltage cables electrical connector.
10. NOTE: The attaching bolts have a conductive coating on them and are serrated under the head flange. These features ground the HVTB to the
vehicle, which is required for electro-magnetic compatibility. If a bolt(s) is lost or damaged, a new bolt(s) must be installed with the identical type
of bolt.
Remove the 9 HVTB bolts.
-
NOTE: Hand-start all of the bolts before tightening them to specification.
To install, tighten to 55 Nm (41 lb-ft).
11. NOTE: Make certain to reinstall this plug during the HVTB installation procedure to avoid NVH issues.
Remove the cap plug to expose the center (rear) lifting attachment point.
12. Attach 3 M10 x 1.5 x 35 eyebolts to the 3 HVTB lift points. Install nuts onto the eye bolts to gain the proper eyebolt height. Obtain the eyebolts
locally.
13. NOTICE: Use chain lengths as specified. Changing the chain length may result in damage to the High Voltage Traction Battery (HVTB)
or HVTB lifting points.
Attach the lengths of chain to the eyebolts and the lifting device.