| Removal and Installation Removal Vehicles with 2.0L Zetec-E (Zeta) engine | | -
Disconnect the battery ground cable.
For additional information, refer to: Battery Disconnect (414-01 Battery, Mounting and Cables, General Procedures).
| | | -
Remove the air cleaner.
For additional information, refer to: Air Cleaner (303-12 Intake Air Distribution and Filtering, Removal and Installation).
| All vehicles | | -
Raise and support the vehicle.
For additional information, refer to: Lifting (100-02 Jacking and Lifting, Description and Operation).
| | | -
CAUTION:Excessive bending of the flexible exhaust pipe may cause damage resulting in failure. Support the flexible exhaust pipe with a support wrap or suitable splint. Support the flexible exhaust pipe, using a suitable wrap. | | | -
Disconnect the front exhaust pipe and detach the support insulators. | | | -
Disconnect the center exhaust hanger and support the exhaust with wire. | | | -
Remove the exhaust heat shield. - Unclip the selector lever cable.
| | | -
Disconnect the selector lever cable from the selector lever assembly. - Open the adjuster assembly by turning the selector lever cable outer sleeve.
- Disconnect the selector lever cable from the transmission range (TR) sensor bracket.
- Detach the selector lever cable from the bracket.
| | | -
Remove the floor console.
For additional information, refer to: Floor Console - Vehicles With: Automatic Transaxle (501-12 Instrument Panel and Console, Removal and Installation).
| | | -
Remove the selector lever cable from the selector lever. - Shift the selector lever to "P".
- Unclip the selector lever cable.
- Unclip the selector lever cable outer sleeve.
| | | -
Remove the center armrest brace. | | | -
Remove the center console lower trim panels (left-hand side shown). | | | -
Remove the footwell heater channel. | | | -
Remove the heater housing cover (right-hand side shown). | | | -
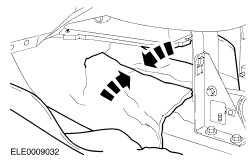
Detach the floor covering and the insulator material and position it to one side (heat exchanger shown removed). | | | -
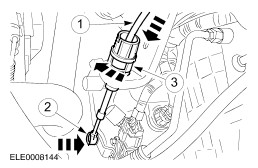
Attach a suitable length of draw cord to the transaxle end of the selector lever cable and secure it to the transaxle. | | | -
Remove the selector lever cable grommet. | | | -
Remove the selector lever cable. - Pull the cable and draw cord through the floor panel.
| Installation All vehicles | | -
Attach the. draw cordto the transaxle end of the selector lever cable. | | | -
Pull the selector lever cable through the floor panel. | | | -
Install the selector lever cable grommet. | | | -
Secure the insulator material and the floor covering with adhesive tape (head exchanger shown removed). | | | -
Install the heater housing cover (right-hand side shown). | | | -
Install the footwell heater channel. | | | -
Install the center console lower trim panels (left-hand side shown). | | | -
Install the armrest brace. | | | -
Install the selector cable to the selector lever. - Shift the selector lever to "P".
- Clip in the selector lever cable outer sleeve.
- Clip in the selector lever cable.
| | | -
Install the floor console.
For additional information, refer to: Floor Console - Vehicles With: Automatic Transaxle (501-12 Instrument Panel and Console, Removal and Installation).
| | | -
Raise and support the vehicle.
For additional information, refer to: Lifting (100-02 Jacking and Lifting, Description and Operation).
| | | -
Attach the selector lever cable to the selector lever assembly. - Attach the selector lever cable to the bracket.
- Connect the selector lever cable to the transmission range (TR) sensor bracket.
- Secure the adjuster assembly by turning the selector lever cable outer sleeve.
| | | -
Install the exhaust heat shield. - Clip the selector cable to the floor pan.
| | | -
Connect the center exhaust hanger and remove the support wire. | | | -
NOTE:Install a new exhaust flange gasket. Attach the exhaust pipe support insulators and connect the front exhaust pipe. | | | -
Adjust the selector lever cable.
For additional information, refer to: Selector Lever Cable Adjustment (307-05 Automatic Transmission/Transaxle External Controls - Vehicles With: 4F27E, General Procedures).
| Vehicles with 2.0L Zetec-E (Zeta) engine | | -
Connect the battery ground cable.
For additional information, refer to: Battery Disconnect (414-01 Battery, Mounting and Cables, General Procedures).
| | | -
Install the air cleaner.
For additional information, refer to: Air Cleaner (303-12 Intake Air Distribution and Filtering, Removal and Installation).
| |