
Expansion tank viscous coupling
- Make
- Land Rover
- Model
- Defender V8i Workshop Manual Supplement
- Section
- Repair › Expansion tank viscous coupling
Cooling systemExpansion tank viscous coupling · page 1 of 2
EXPANSION TANK VISCOUS COUPLING
Service repair no - 26.15.01 Service repair no - 26.25.19
Remove Remove
- WARNING: Do not remove expansion tank
- filler cap when engine is hot. The cooling
- system is pressurised and personal
- scalding could result.
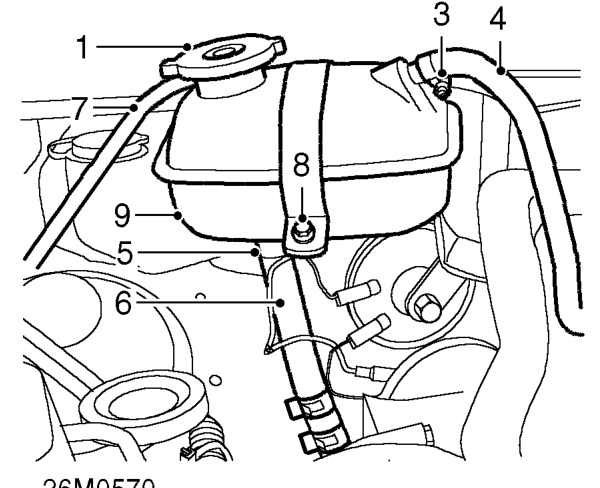
- Remove expansion tank filler cap by slowly turning it anti-clockwise. Pause to allow pressure to escape then continue to turn in same direction and remove.
- Position container to collect any coolant spillage.
- Loosen clip securing radiator hose to expansion tank.
- Release radiator hose from expansion tank.
- Loosen clip securing coolant hose to underside of expansion tank.
- Release coolant hose from expansion tank.
- Remove overflow pipe from expansion tank.
- Remove clamping bolt from expansion tank mounting bracket and collect nut and washer.
- Lift mounting bracket clamp and remove expansion tank.
Refit
- Fit expansion tank to mounting bracket.
- Fit and tighten nut and bolt securing expansion tank to mounting bracket.
- Fit overflow pipe to expansion tank.
- Connect coolant hose to underside of expansion tank and secure with clip.
- Connect radiator hose to expansion tank and secure with clip.
- Remove container.
- Top-up engine coolant.
- Disconnect battery negative lead and release clips securing coolant hoses to fan upper cowl.
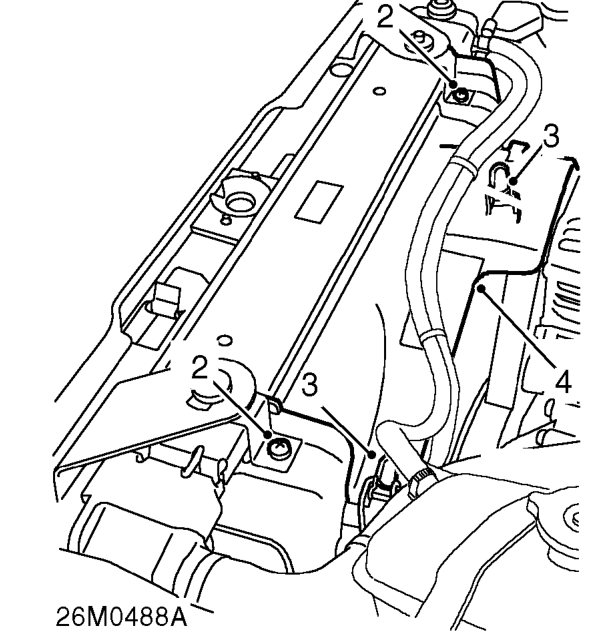
- Remove 2 screws securing radiator top mountings to fan upper cowl.
- Release 2 clips securing fan upper cowl to lower cowl.
- Remove fan upper cowl.
Parts & tools for this job For Land Rover Defender
- FLUIDCoolantSearch: Land Rover coolant antifreeze
- PARTThermostatSearch: Land Rover Defender thermostat
- TOOLCooling system pressure testerSearch: cooling system pressure tester
Links open Amazon search results in a new tab. As an Amazon Associate I earn from qualifying purchases.