
FRONT SHOCK ABSORBER
- Make
- Land Rover
- Model
- Defender 300Tdi Defender
- Section
- FRONT SHOCK ABSORBER
60
FRONT SUSPENSION
2
REPAIR
REV: 09/97
6. Remove fixings, radius arm to axle.
7. Lower radius arm front end to clear axle and
remove from vehicle.
8. Using suitable length of steel tubing, press out
flexible bushes.
Refit
9. Press in replacement bushes.
CAUTION: When pressing in new bushes
press on outer edge of bush and not
rubber inner.
10. Fit radius arm to axle mounting.
11. Fit track rod at ball joint.
12. Fit radius arm to chassis. Tighten bolts to
176
Nm (130 lbf/ft).
13. Fully tighten radius arm to axle fixings to
197 Nm
(145 lbf/ft).
14. Fit road wheel, remove chassis stands and jack.
Tighten wheel nuts to correct torque:
Alloy wheels -
130 Nm (96 lbf/ft)
Steel wheels -
100 Nm (80 lbf/ft)
Heavy duty wheels -
170 Nm (125 lbf/ft)
FRONT SHOCK ABSORBER
Service repair no - 60.30.02.
Remove
1. Loosen road wheel retaining nuts.
2. Support chassis on stands and remove road
wheel.
3. Support axle weight with jack.
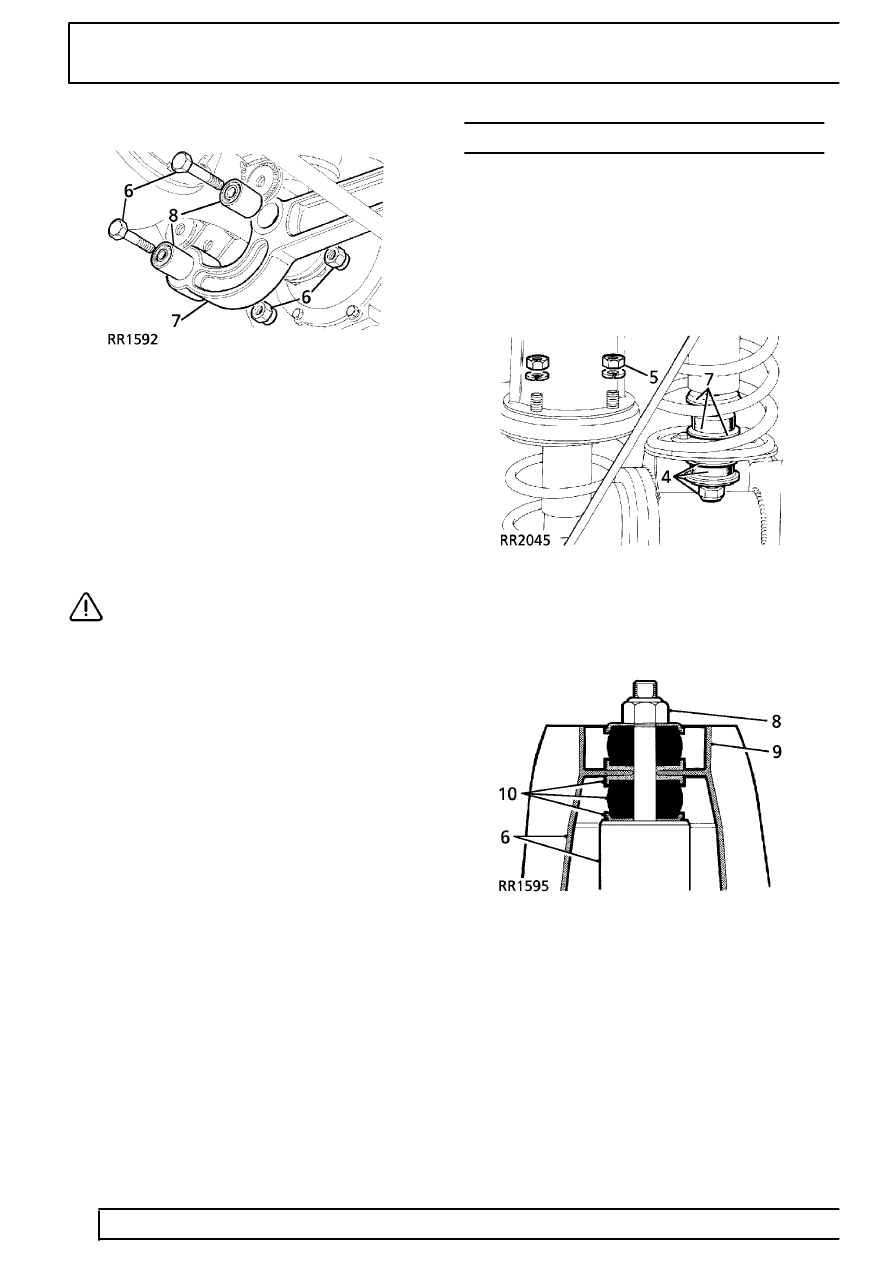
4. Remove shock absorber lower fixing and
withdraw cupwasher, rubber bush and seating
washer.
5. Remove four shock absorber bracket fixings.
6. Withdraw shock absorber and bracket assembly.
7. Withdraw lower seating washer, rubber bush and
cupwasher.
8. Remove fixings, shock absorber to mounting
bracket.
9. Withdraw mounting bracket.
10. Lift off top seating washer, rubber bush and
cupwasher.
Parts & tools for this job For Land Rover Defender
- TOOLCoil spring compressorSearch: coil spring compressor
- TOOLBall joint separatorSearch: ball joint separator
- PARTFront shock absorbersSearch: Land Rover Defender front shock absorbers
Links open Amazon search results in a new tab. As an Amazon Associate I earn from qualifying purchases.