TD5 Defender

86
ELECTRICAL
12
REPAIR
Refit
7. Fit solenoid to mounting bracket and secure with
screws.
8. Connect operating rod to solenoid assembly.
9. Fit solenoid to door, fit screw and tighten bolt to
6 Nm (4 lbf.ft).
10. Position harness to solenoid mounting bracket
and secure with clip.
11. Connect multiplug to solenoid.
12. Fit tail door trim casing. See CHASSIS AND
BODY, Repair.
SOLENOID/MOTOR - FRONT DOOR - FROM 02MY
Service repair no - 86.26.08
Remove
1. Remove door trim casing. See CHASSIS AND
BODY, Repair.
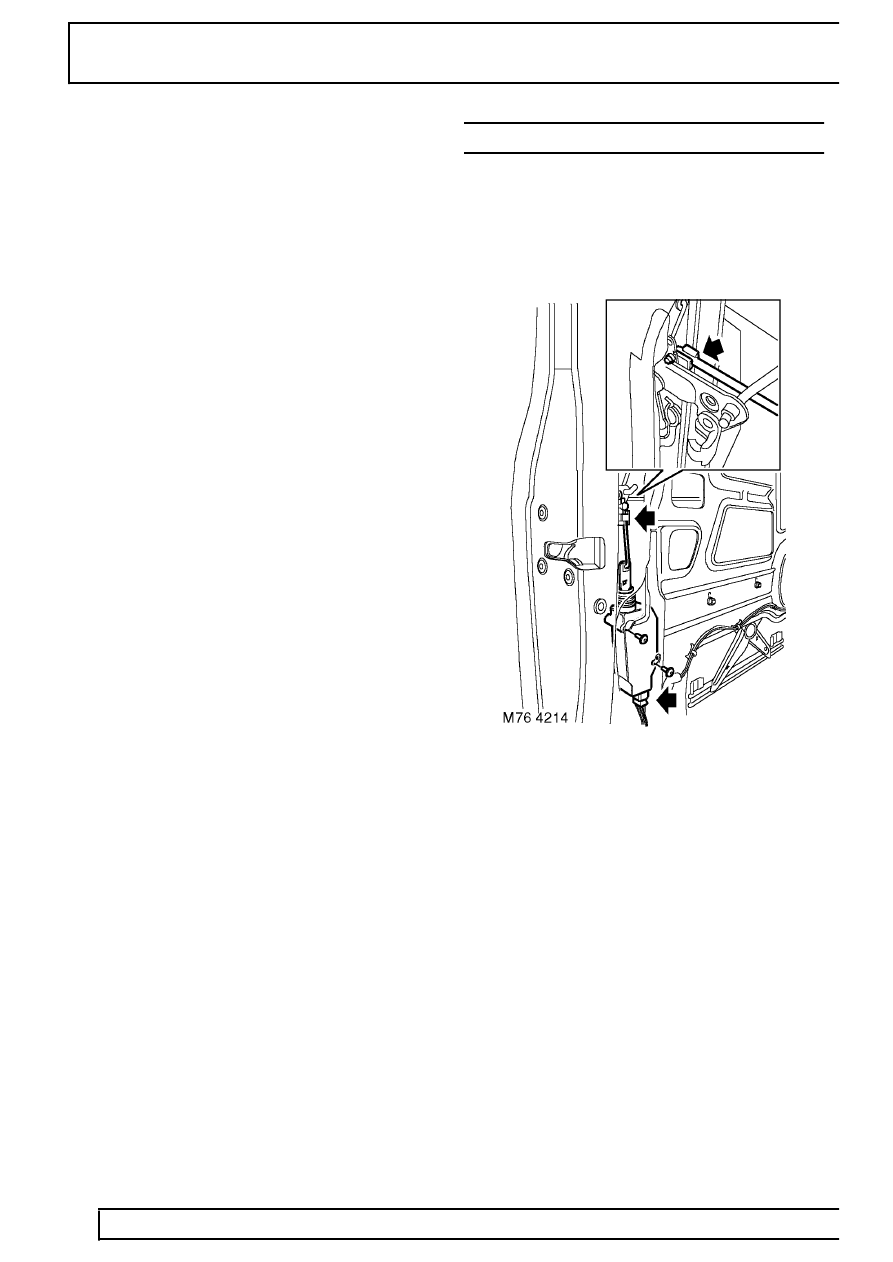
2. Carefully peel back plastic sheet to expose
mechanism.
3. Release clip, detach and remove lock solenoid
link.
4. Loosen 2 screws securing solenoid, release
solenoid from mounting panel, disconnect
multiplug and remove solenoid.
Refit
5. Connect multiplug to solenoid, locate solenoid to
mounting panel and tighten screws.
6. Fit and secure link.
7. Secure plastic sheet.
8. Fit door trim casing. See CHASSIS AND
BODY, Repair.
9. Adjust door lock solenoid. See Adjustment.
