
Freelander Service Procedures
AUTOMATIC GEARBOX - JATCO
REPAIRS
44-29
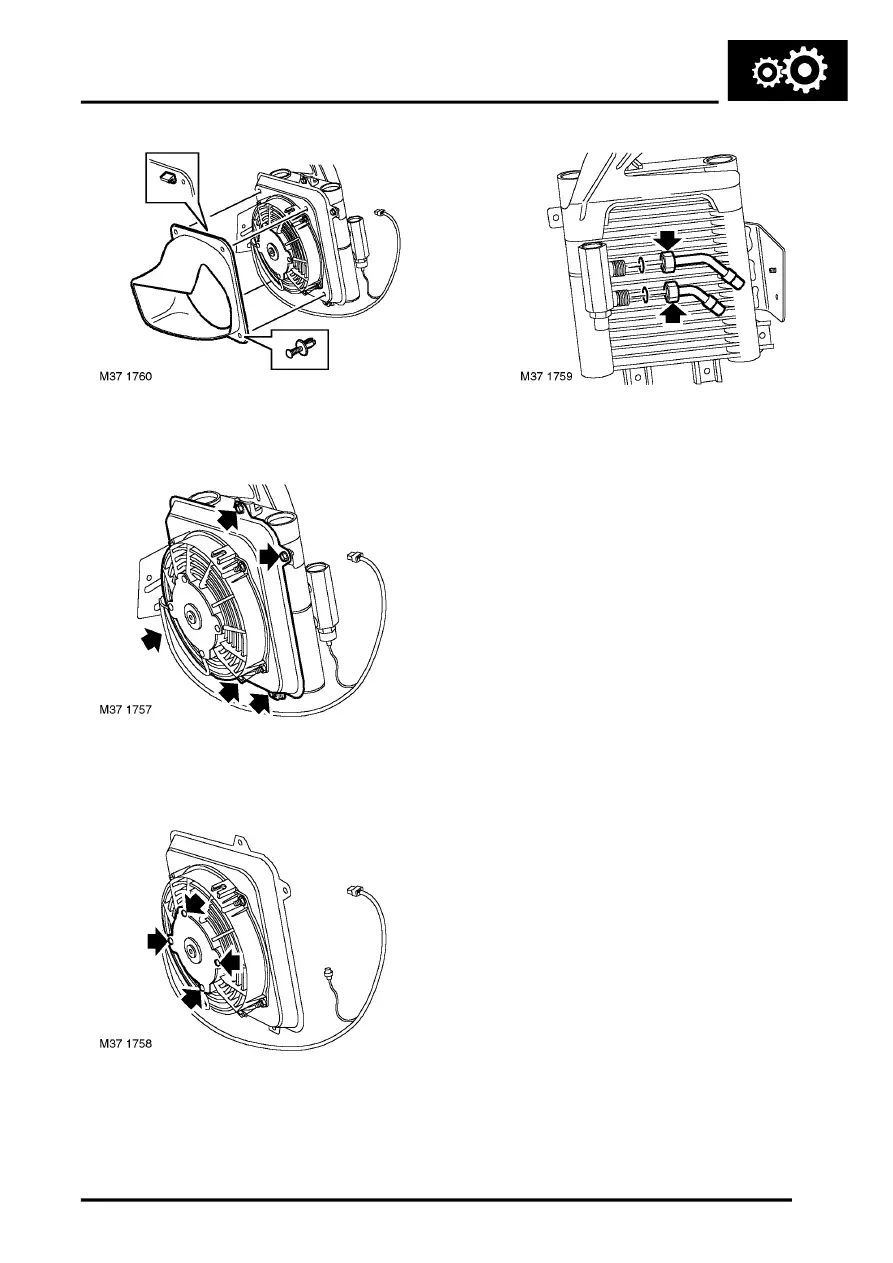
9. Remove 2 scrivets, release cooler ducting from
hooks and move aside.
10. Remove 5 bolts securing fan cowl to cooler
matrix and move aside.
11. Remove 4 nuts securing fan motor to cowl and
move aside.
NOTE: Do not carry out further dismantling if
component is removed for access only.
12. Remove cooler pipe union nuts and move pipes
aside.
CAUTION: To prevent damage to
components, use two spanners when
loosening or tightening unions.
13. Remove and discard 'O' rings.
Refit
1. Fit new 'O' rings to oil cooler pipes.
2. Fit pipes to cooler matrix, align and tighten
union nuts to 25 Nm (18 lbf.ft).
3. Position fan cowl to cooler matrix, fit bolts and
tighten to 5 Nm (3.5 lbf.ft).
4. Position fan motor to cowl, fit nuts and tighten
to 5 Nm (3.5 lbf.ft).
5. Fit cooler duct and secure with scrivets.
6. Fit air blast cooler assembly, fit bolts and
tighten upper bolt to 5 Nm (3.5 lbf.ft). Lower
bolts should be tightened to 10 Nm (7.5 lbf.ft).
7. Ensure connections are clean, then fit and
secure flexible hoses.
8. Fit multiplug mounting bracket and tighten nut
to 10 Nm (7.5 lbf.ft).
9. Connect harness multiplug, fit multiplug to
mounting bracket.
10. Fit front bumper.
Bumper - assembly - front - up to 04MY.
11. Connect battery earth lead.