
Freelander Service Procedures
DRIVESHAFTS
REPAIRS
47-7
10. With assistance pull hub assembly outwards
and release drive shaft outer joint from hub
assembly.
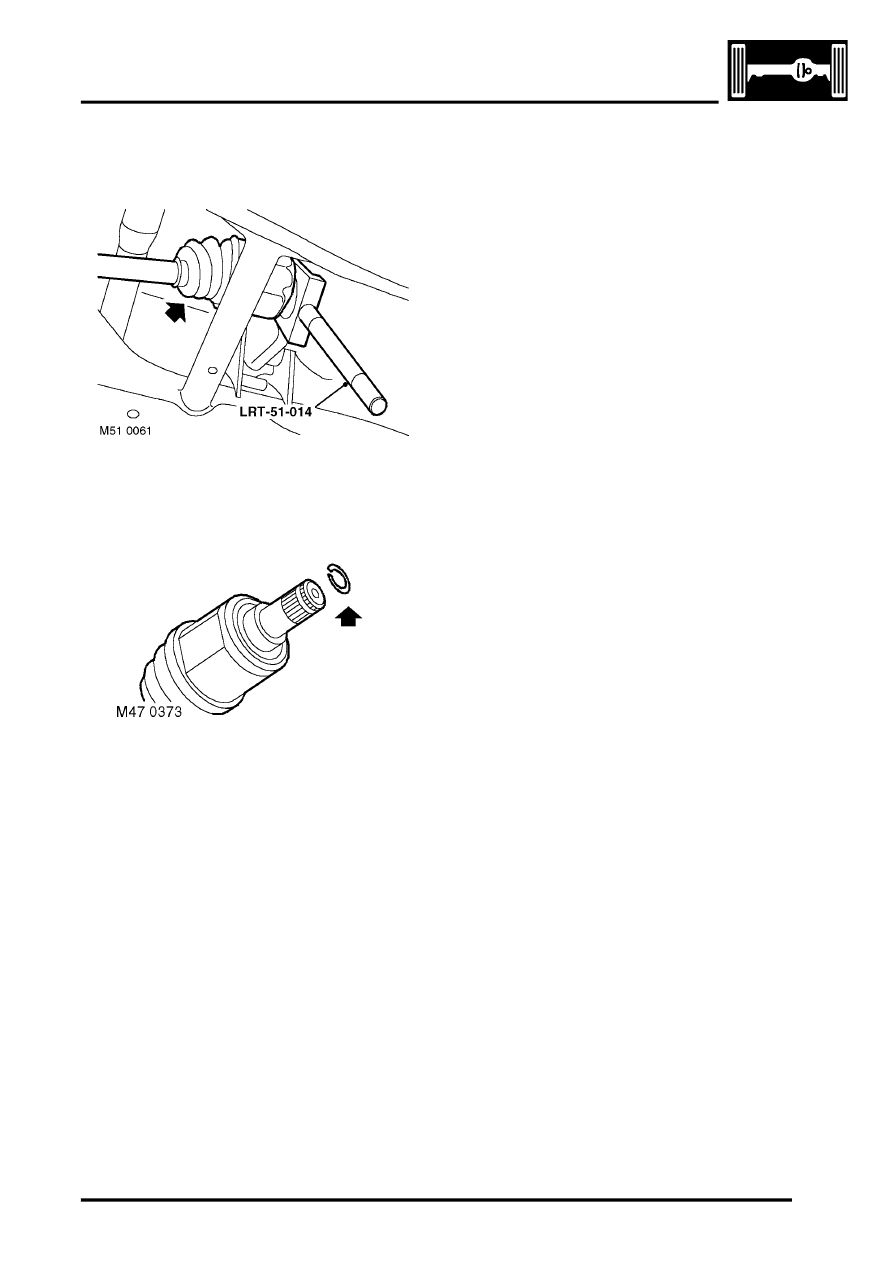
11. Taking care not to damage 'Flinger', release
drive shaft inner joint from differential using
LRT-51-014 and remove drive shaft.
12. Remove and discard drive shaft circlip.
Refit
1. Inspect differential seal, renew if worn or
damaged.
2. Clean ends of drive shaft and locations in hub
and differential.
3. Lubricate oil seal running surface with
transmission oil.
4. Fit new circlip to drive shaft.
5. Fit drive shaft to differential and push fully
home.
CAUTION: Pull the drive shaft to ensure the
circlip is fully engaged and retains the shaft.
6. With assistance fit drive shaft to hub.
7. Fit new drive shaft nut but do not tighten at this
stage.
8. Fit nut, bolt and dynamic damper to adjustable
transverse link and tighten to 120 Nm (89 lbf.ft).
CAUTION: Nuts and bolts must be tightened
with the weight of the vehicle on the
suspension.
9. Fit nut and bolt to fixed transverse link and
tighten to 120 Nm (89 lbf.ft).
10. Fit spacer, nut and bolt to trailing link and
tighten to 120 Nm (89 lbf.ft).
11. Fit new drive shaft nut and tighten to 400 Nm
(295 lbf.ft). Stake nut to shaft.
12. Check and top up oil level.
13. Fit road wheel(s) and tighten nuts to 115 Nm 85
lbf.ft).
14. Remove stands and lower vehicle.
15. Connect battery earth lead.