Freelander Service Procedures

EXTERIOR FITTINGS
REPAIRS 76-2-15
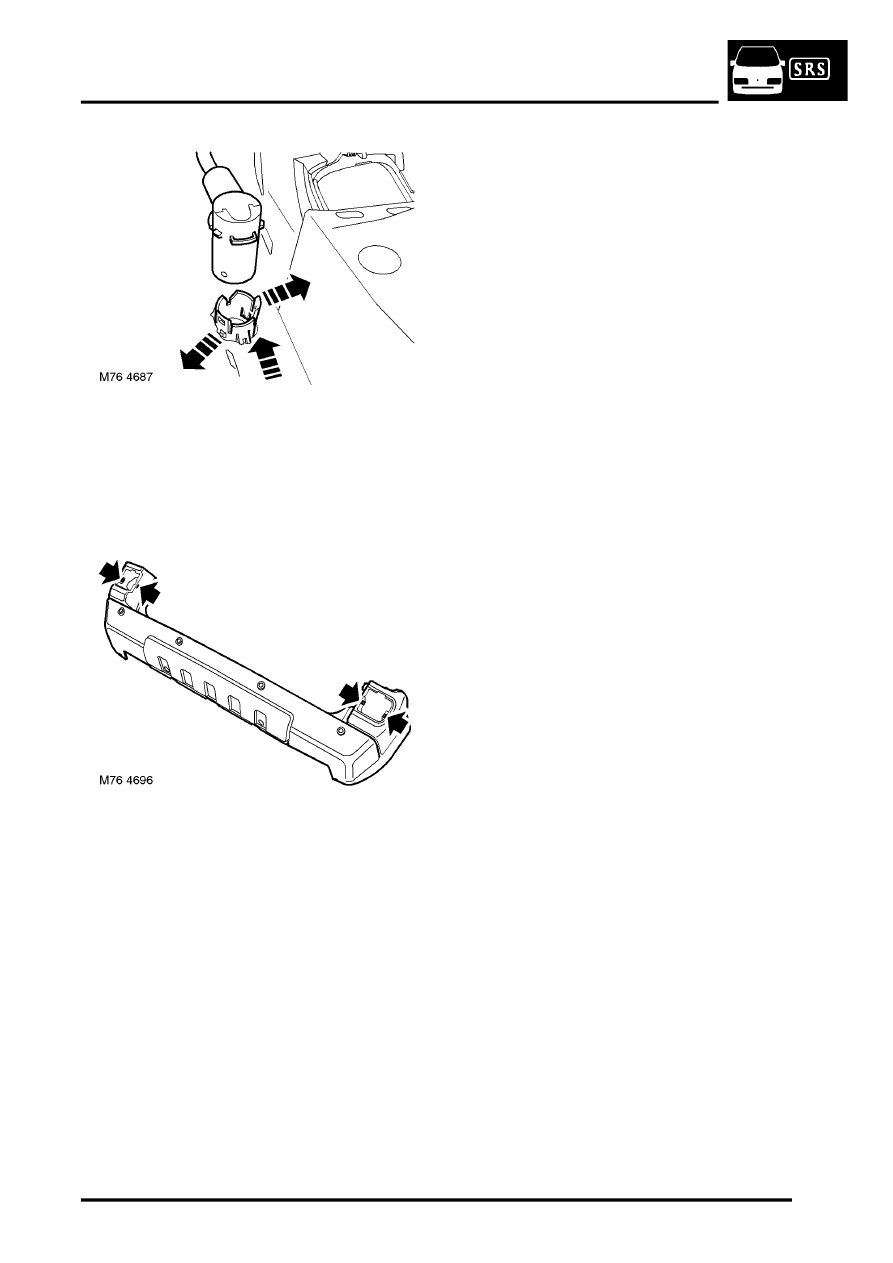
17. Release 2 retaining clips and remove parking
aid sensor from finisher.
18. Remove parking aid sensor finisher from
bumper valance.
19. Repeat above procedure for remaining 3
parking aid sensors.
20. Remove tail lamp speed nuts from bumper
valance.
Refit
1. Fit tail lamp speed nuts to bumper valance.
2. Fit and secure parking aid finishers and
sensors to bumper valance.
3. Fit and secure parking aid harness to sensors
and bumpers valance.
4. Fit both rear tail lamps.
5. With assistance, position bumper valance to
body.
6. Connect parking aid harness multiplug, fit
retaining clip and secure to body.
7. Align bumper valance to body and secure with
retaining screws and scrivets.
8. Fit Torx screws securing bumper valance to
bumper armature and tighten to 5 Nm (3.7
lbf.ft).
9. Fit tailgate aperture seal to body.
10. Fit luggage compartment carpet retainer and
secure with Torx screws.
11. Fit both mud flap retaining brackets and secure
with screws.
12. Fit rear wheel arch extensions.
Wheelarch extension - rear wing part.
13. Fit both rear fog lamps.
14. Fit rear mud flaps.
