
Freelander Service Procedures
SCREENS
REPAIRS
76-4-1
SCREENS
REPAIRS
Windscreen
$% 76.81.01
The following equipment is required: Cutting wire
and handles, Windscreen repair kit, Sealer applicator
gun and Suction cups
Wear protective gloves when handling glass,
solvents and primers.
Wear suitable eye protection when removing and
refitting glass.
Remove
1. Remove air intake panel.
2. Remove sun visors and sun visor retaining
clips.
3. Remove 'A' post upper trim casings.
REPAIRS, Trim finisher - 'A' post - upper -
renew.
4. Remove retaining stud from front of headlining.
5. Remove interior mirror.
6. Fit protection to bonnet and areas around
screen.
7. Cover heater ducts with masking tape.
8. Cover interior of vehicle with protective sheet.
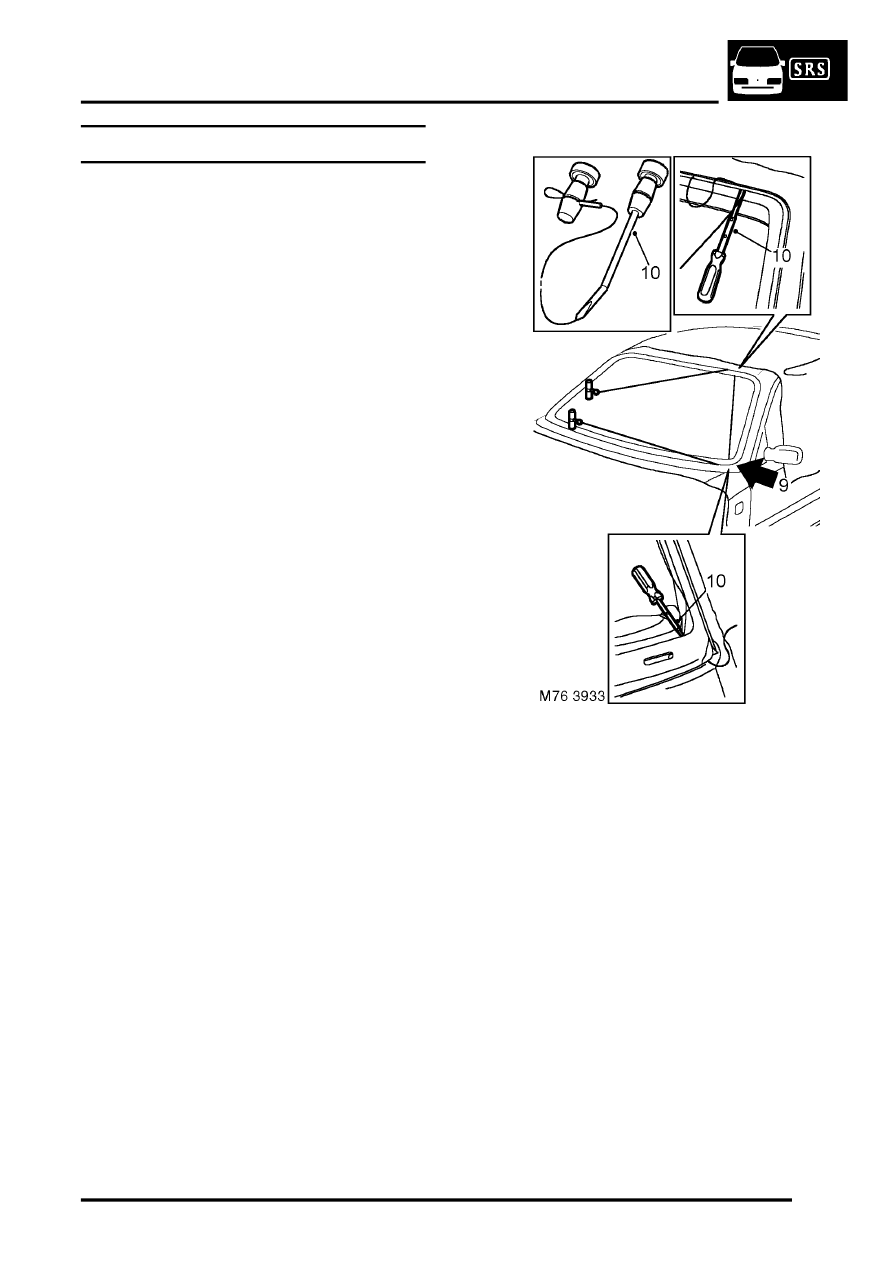
9. Make knife cut in sealant at bottom of 'A' post.
10. Insert cutting wire through previously made
knife cut and fit handles as shown, with
approximately 200 mm of wire between
handles.
11. Using suitable cutting wire, with assistance if
required, carefully cut sealer. Ensure that glass
is retained as last sealant is cut.
If multi-strand cutting wire is used, a sawing
action can be used to cut through heavy
sealant deposits around corners.
Use of a sawing action may overheat and
break single strand wire.
12. Attach suction cups and use assistance to
remove glass from body.
Lay glass on felt covered supports. Do not
stand on edge. Any chipping of glass edge
may develop into cracks.
13. Collect screen support blocks.