
Freelander Service Procedures: Sunroof Repairs - Front Motor (5 Door)
SUNROOF
76-6-6
REPAIRS
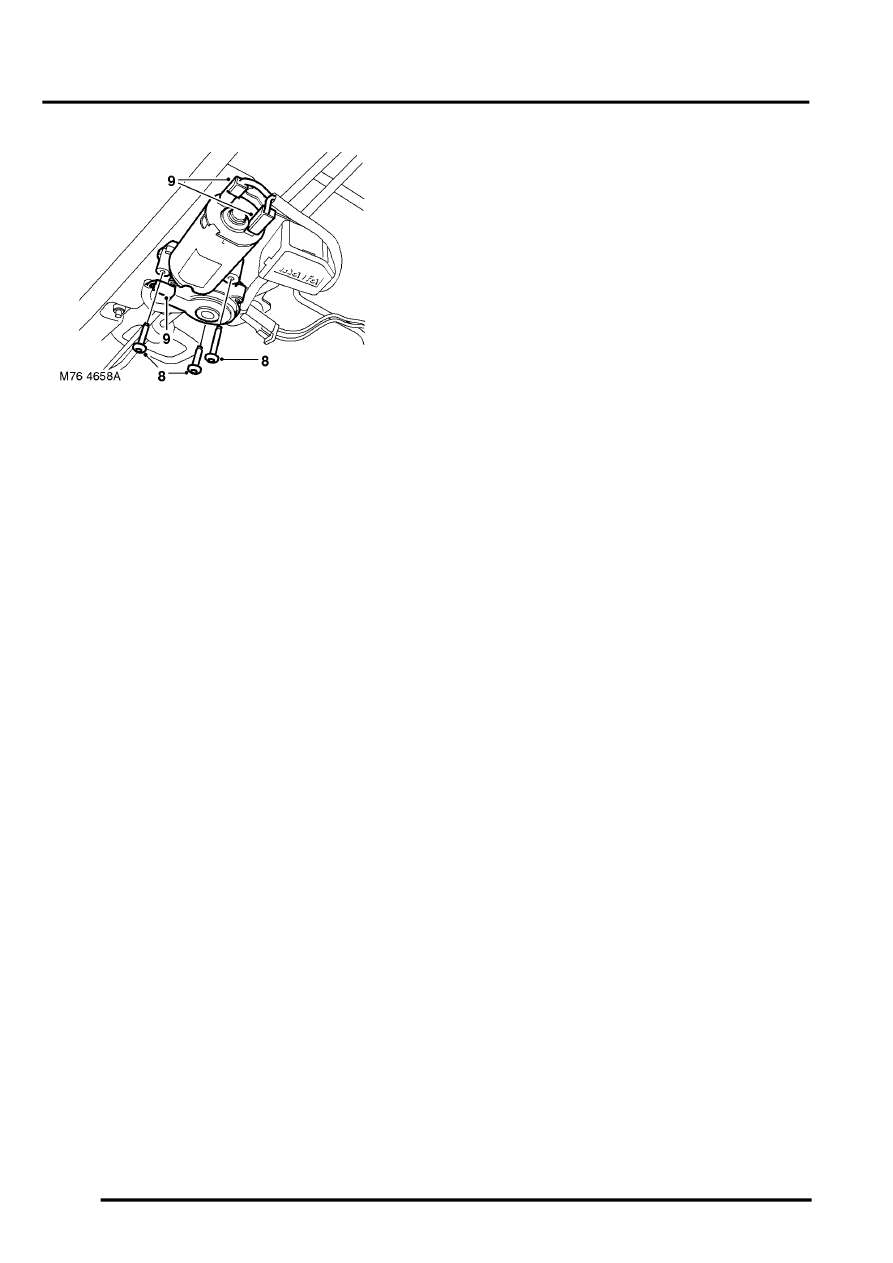
8. Remove 3 Torx screws securing motor.
9. Disconnect 2 Lucars and 1 multiplug from
motor.
10. Release motor from sunroof assemby, lower
through headlining and remove motor.
Refit
1. Position motor to sunroof assembly and fit 1
Torx screw.
2. Connect 2 Lucars to motor assembly.
3. Inch glass panel to maximum tilt by depressing
sunroof switch.
CAUTION: Care must be taken not to exceed
maximum tilt.
4. Connect multiplug to motor.
5. Remove Torx screw and release motor from
sunroof assembly.
6. Depress sunroof switch in open position, keep
button depressed until motor stops (motor and
lifting assemblies are then timed together).
7. Position motor to sunroof assembly, fit and
tighten Torx screws to 6 Nm (4.4 lbf.ft).
8. Carefully reposition headlining.
9. Fit sunroof finisher.
10. Up to 04MY: Position front interior lamp and
connect multiplug.
11. Up to 04MY: Fit Torx bolts securing interior
lamp and tighten to 6 Nm (4.4 lbf.ft).
12. Up to 04MY: Fit lens to front interior lamp.
13. From 04MY: Fit and secure front interior lamp
to headlining.